
Complete 20-level walkthrough
Color Tiles All 20 Levels Guide
Example routes for every level, plus a practical method for reading blockers, managing empty cells, and building the next color group.
Color Tiles layouts change daily. The screenshots and routes on this page come from one complete run, so use them as worked examples rather than permanent answers.
Rules first
How Color Tiles Works
- Every arrow press moves all movable colored tiles one cell in that direction. Stone blockers never move.
- A group clears when four or more tiles of the same color connect vertically or horizontally. Diagonal contact does not count.
- Clearing one color group restores one move. Plan around the move you will earn back, not only the number currently displayed.
- A full run starts with 3 moves, and moves carry between levels. A direction that moves nothing does not cost a move.
- Undo restores the previous board state once per level. Save it for a move that breaks a useful connection.
Direction notation: ↑ up, ↓ down, ← left, and → right.
What stays fixed
The 20-Level Structure
| Levels | Board | Colors | Blockers | Main change |
|---|---|---|---|---|
| 1 | 3×3 | 2 | 0 | Introductory board with one empty cell |
| 2–3 | 4×4 | 3 | 0 | Multiple colors without blockers |
| 4–8 | 5×5 | 4 | 2 | Fixed stone blockers are introduced |
| 9–14 | 6×6 | 5 | 3 | More lanes and longer routes |
| 15–20 | 7×7 | 6 | 4 | Largest boards with strong blocker divisions |
One complete example
Level-by-Level Walkthrough
Level 1: Start by Reading the Empty Cell
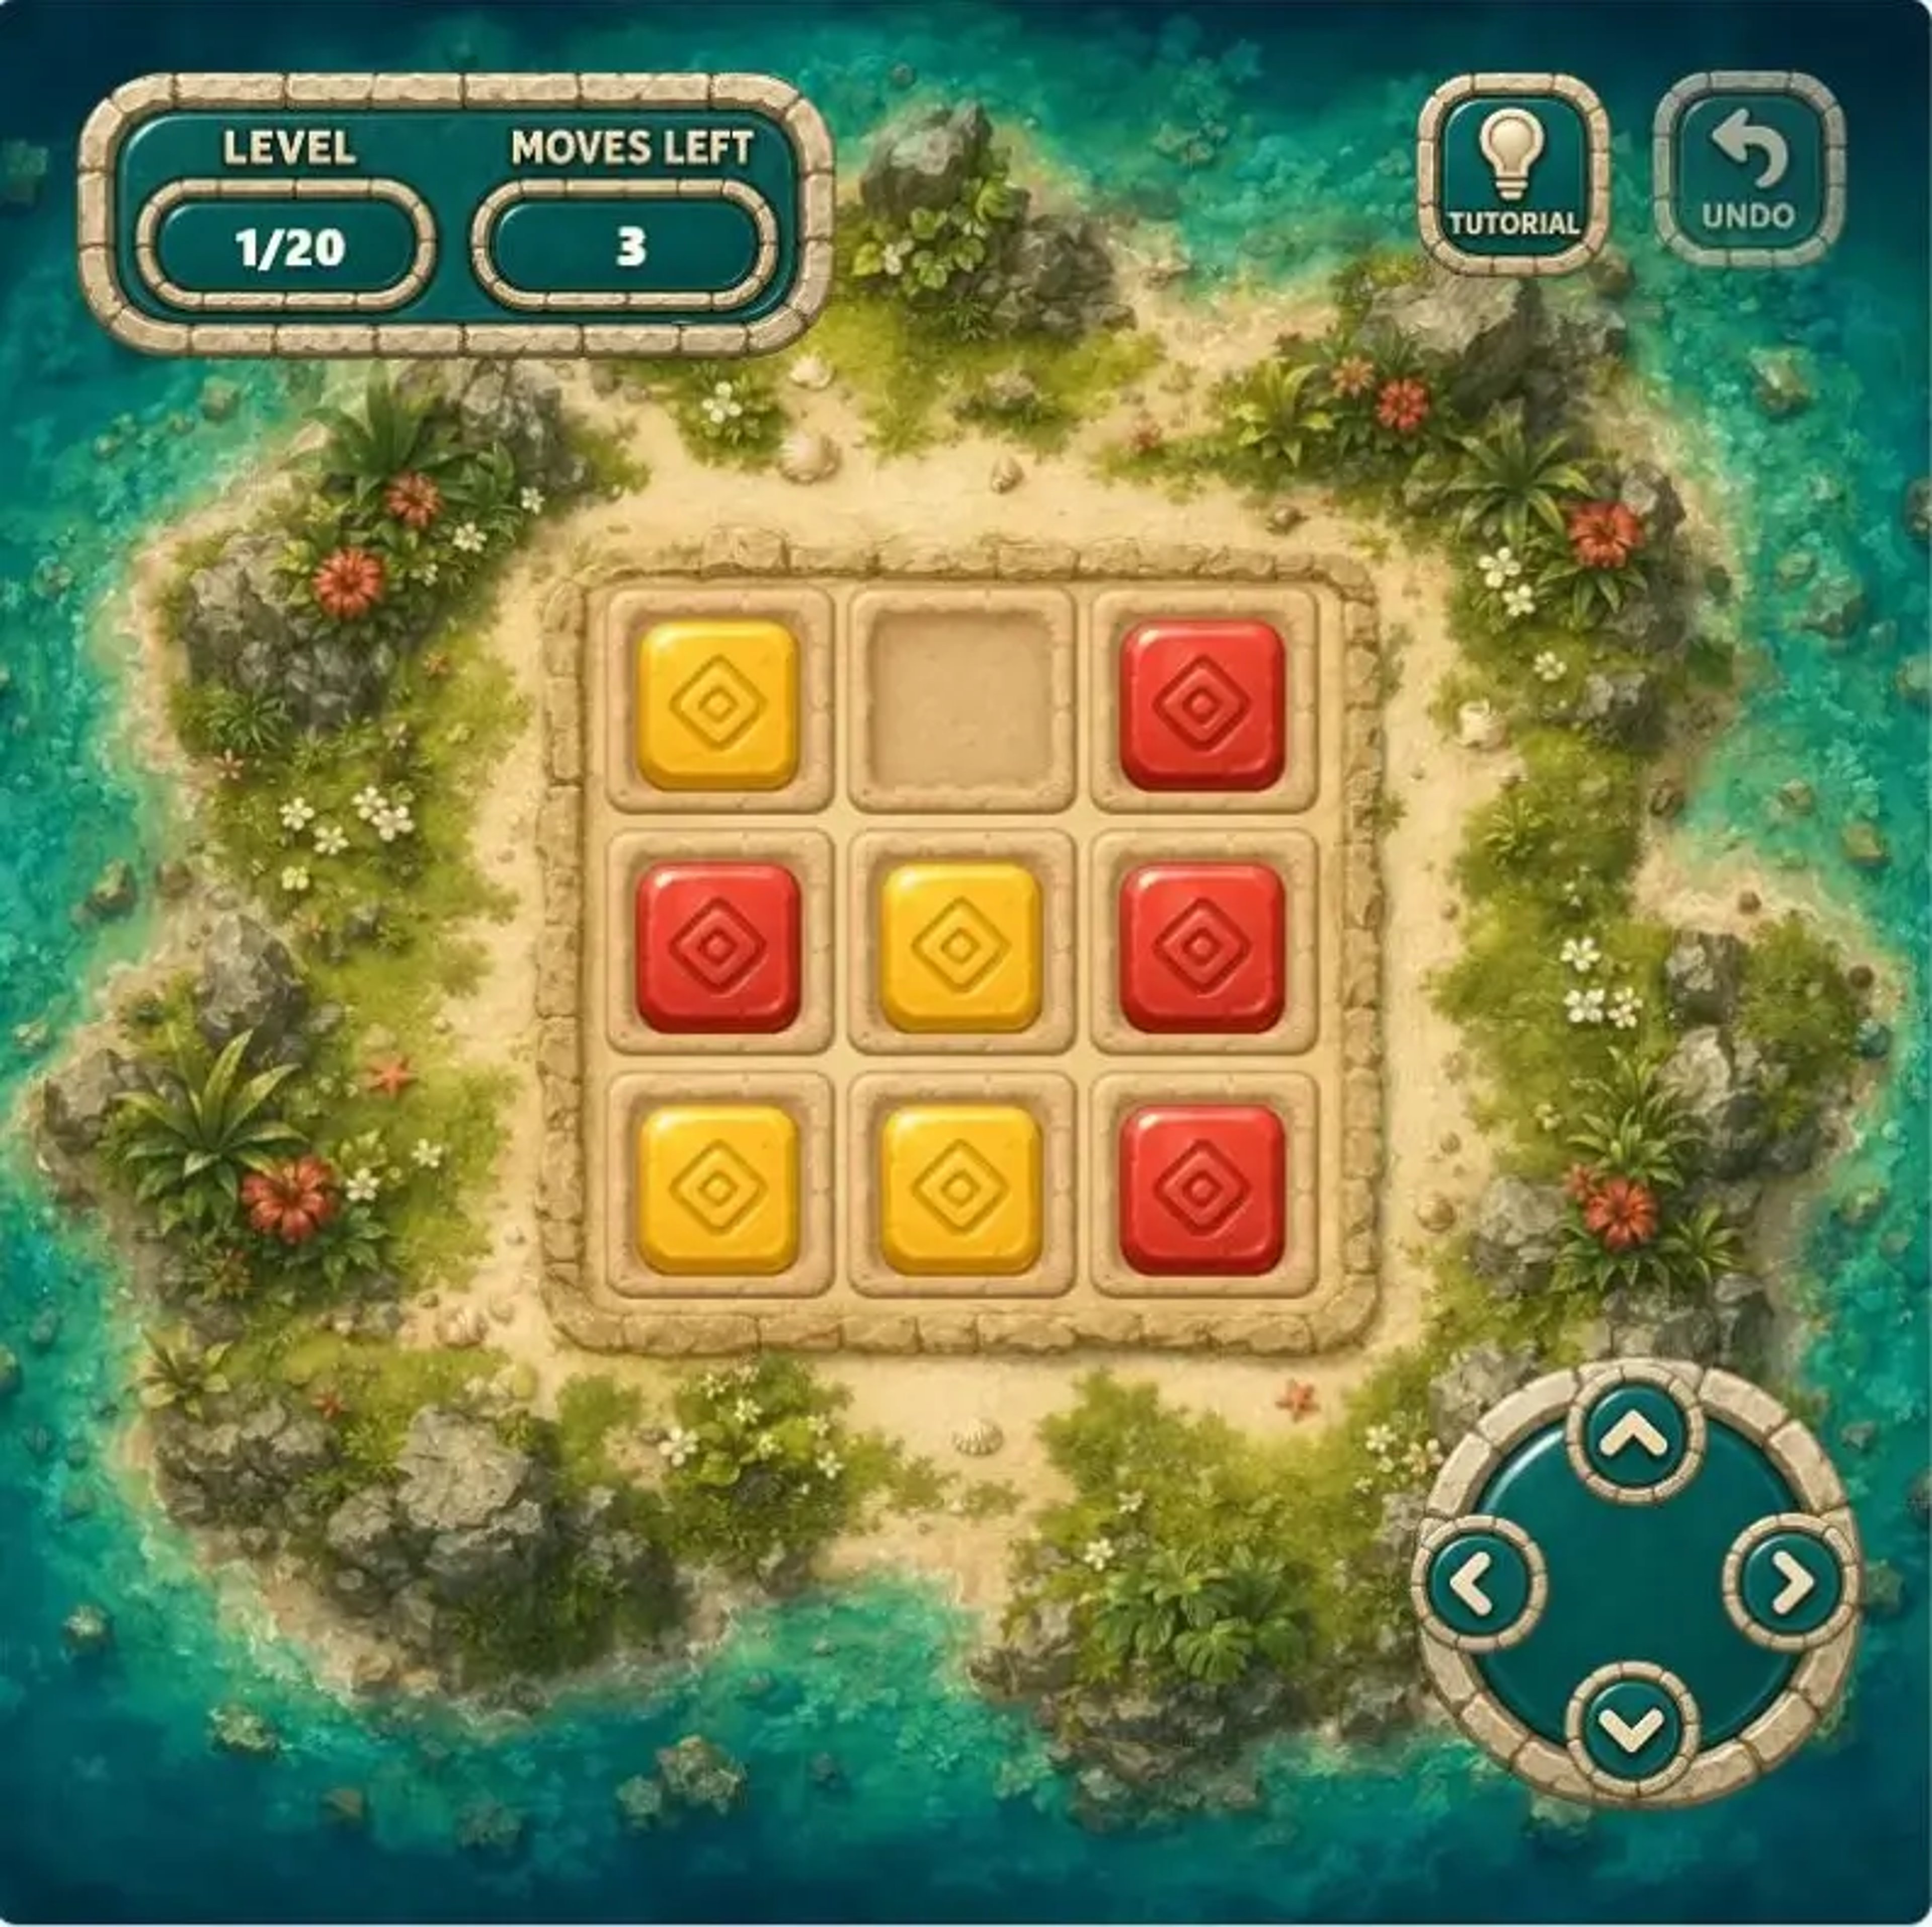
Example route→ →
The 3×3 board has one empty cell and two colors. Find the row or column containing the empty cell, then determine which edge will bring one color group together. Consecutive pushes toward the same edge are usually the first idea to test. This level teaches the essential rule that the entire board moves at once.
Level 2: Clear the Group Closest to an Edge
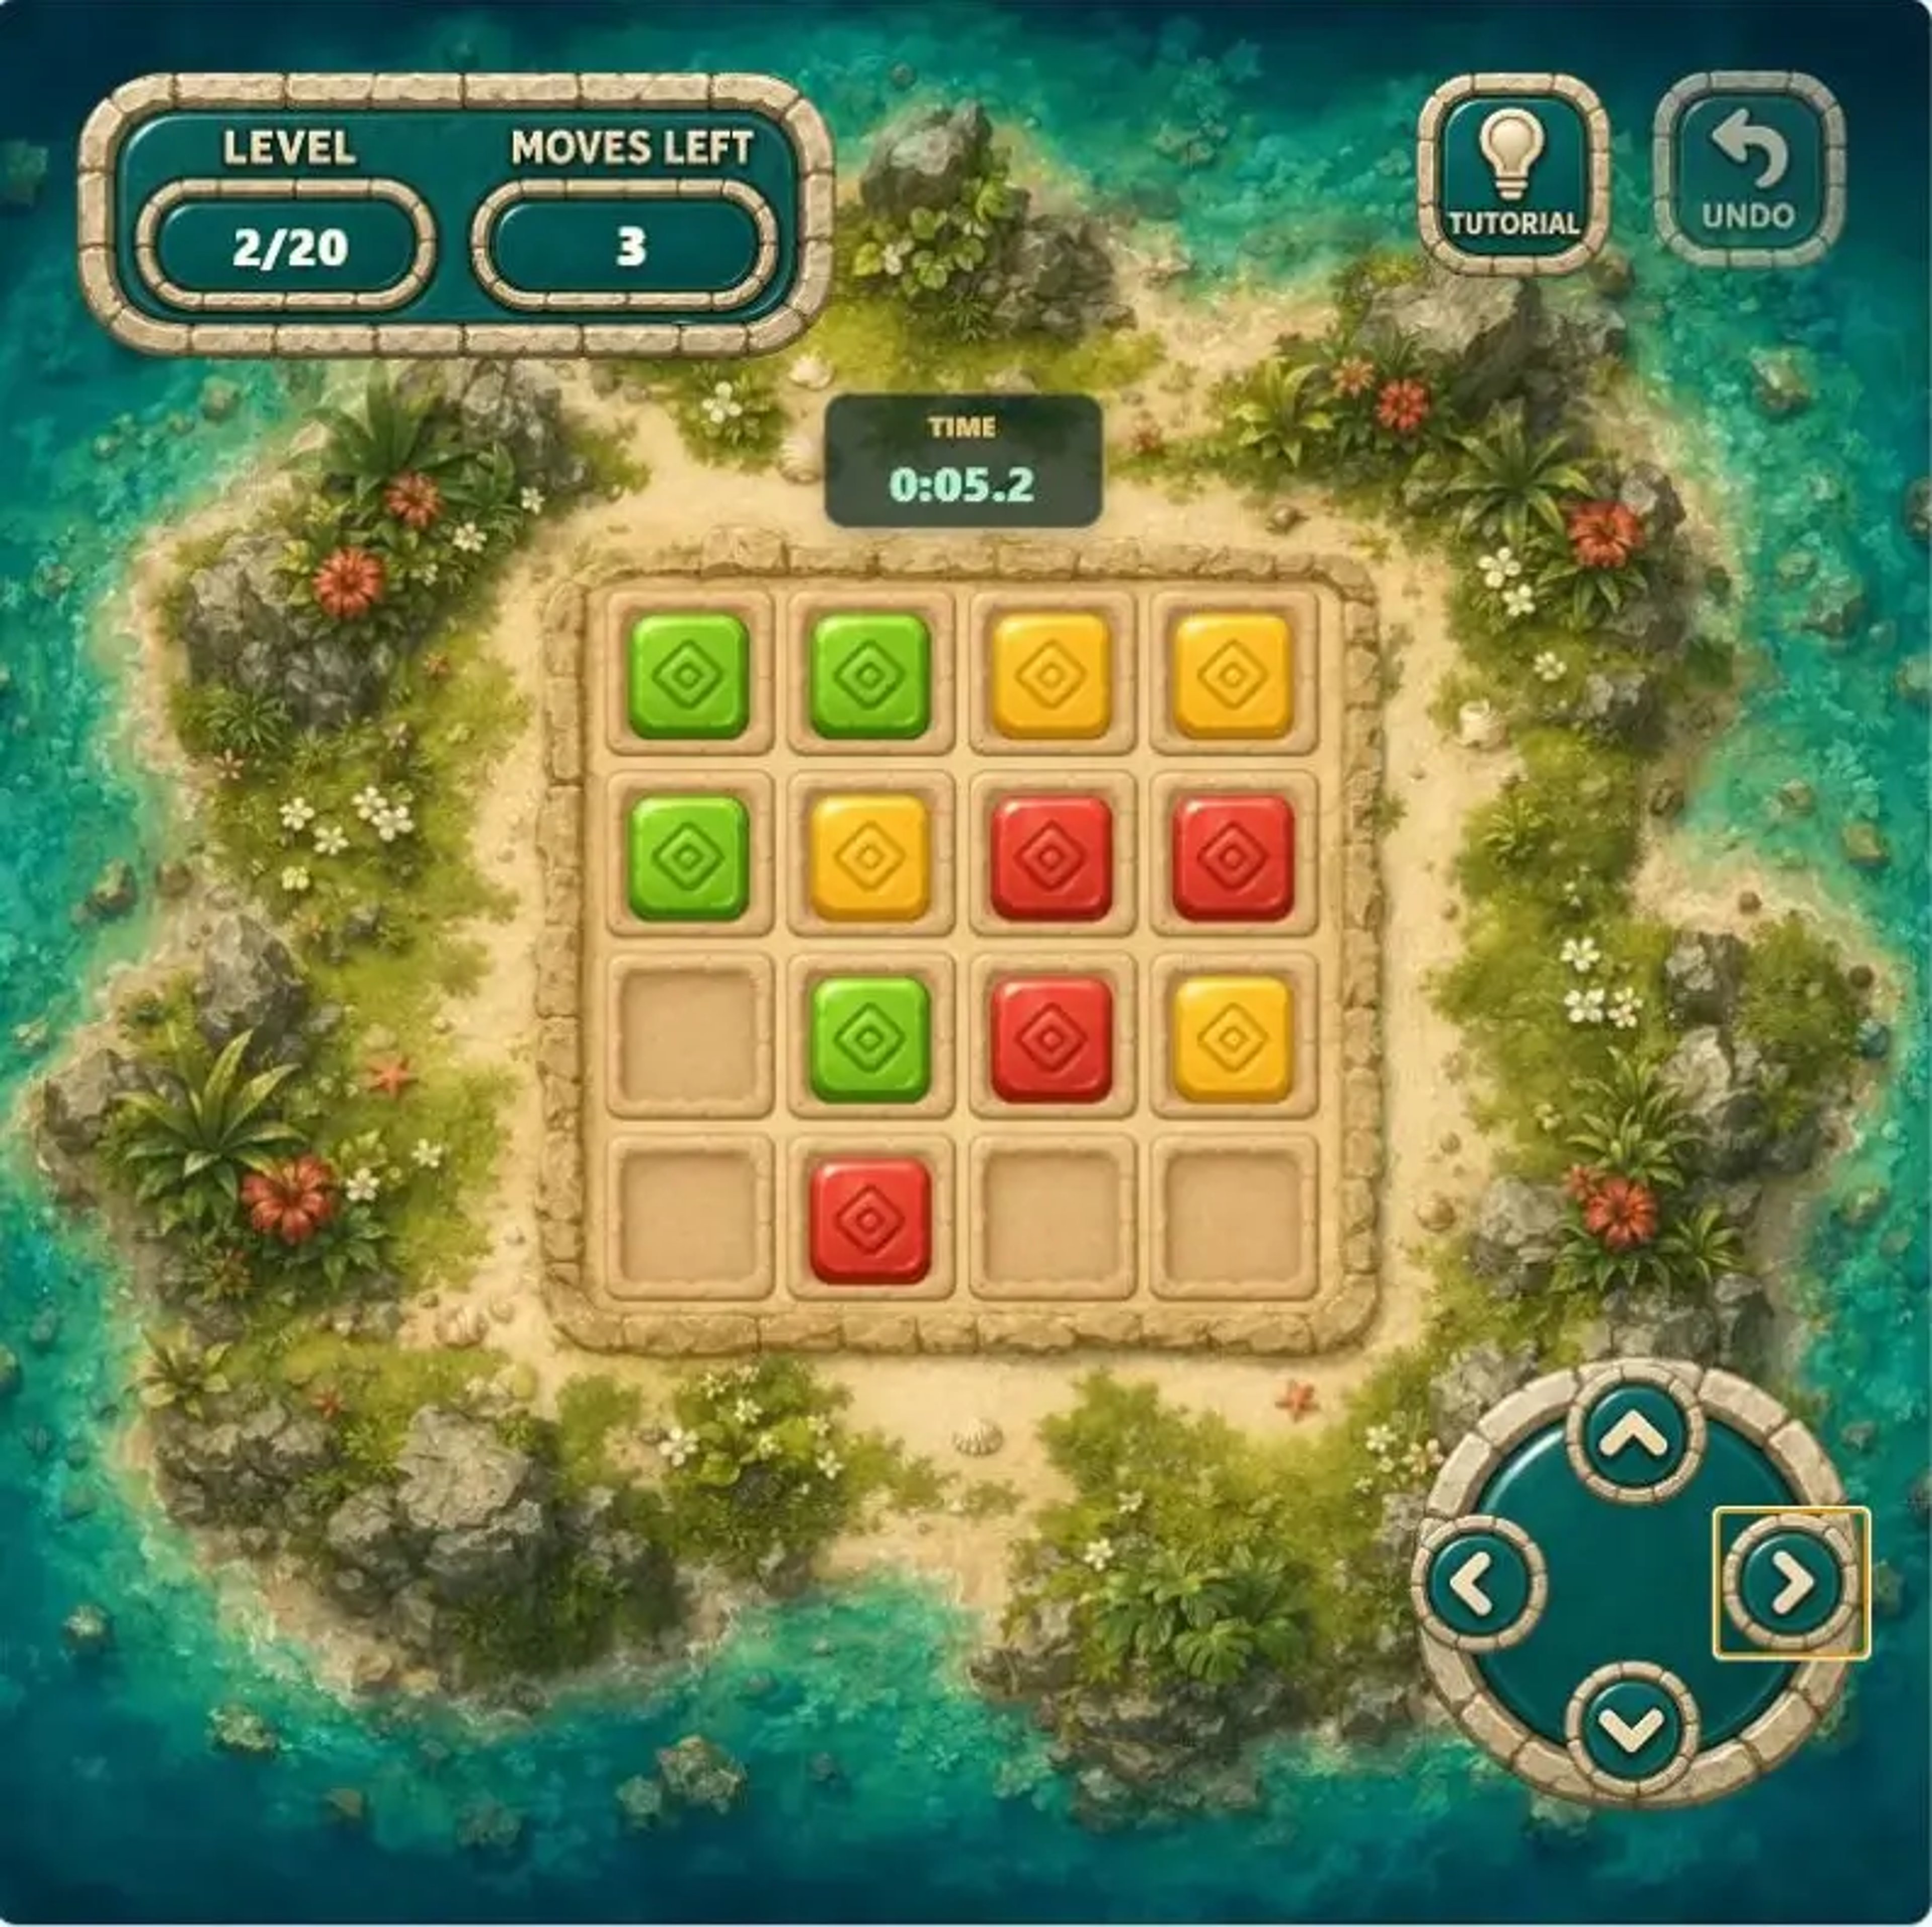
Example route→ ← ↑
The board expands to 4×4 with three colors. First identify a color that already has two or three adjacent tiles near an edge. It is usually the cheapest group to complete. Read the board again after every move; a useful first push to the right does not mean the next move should also go right.
Level 3: Compress the Board With Repeated Pushes
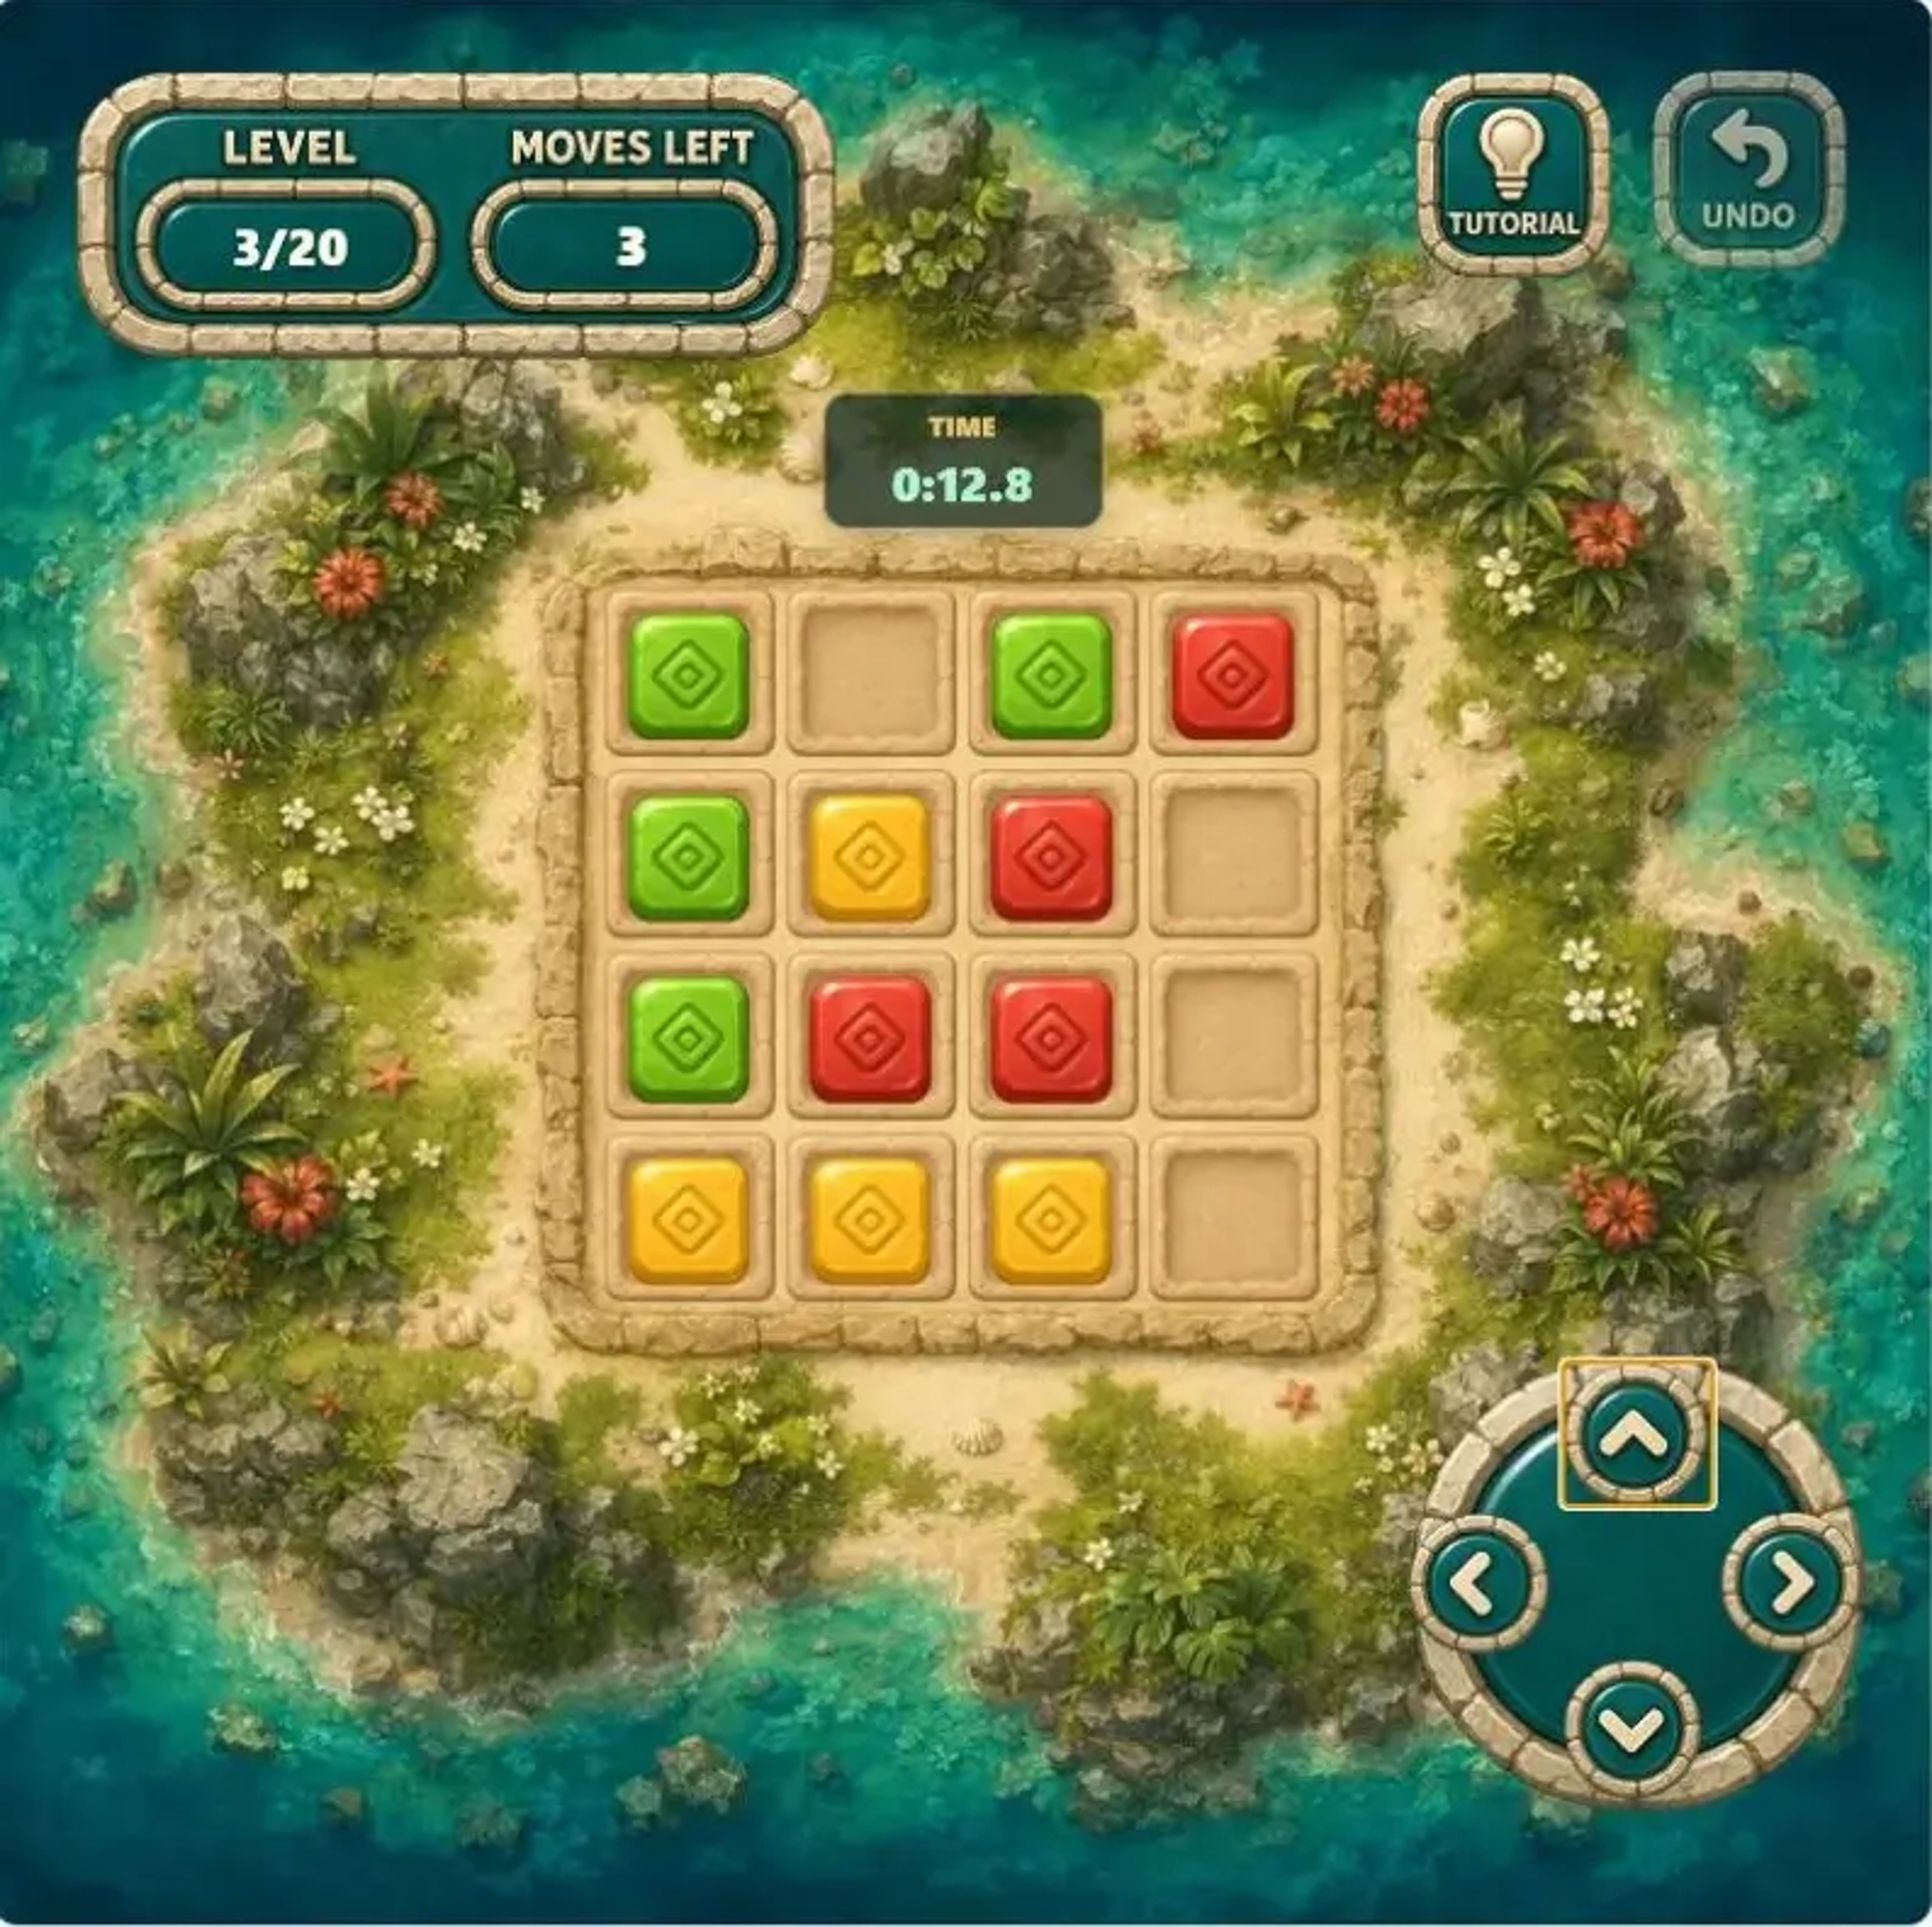
Example route↓ ↓ ←
This is another 4×4 board without blockers, but the colors are more scattered. If the first push does not clear a group yet clearly reduces the distance between matching tiles, repeat it. Continue in the same direction only while the target color is still becoming more compact.
Level 4: Treat Blockers as Fixed Walls
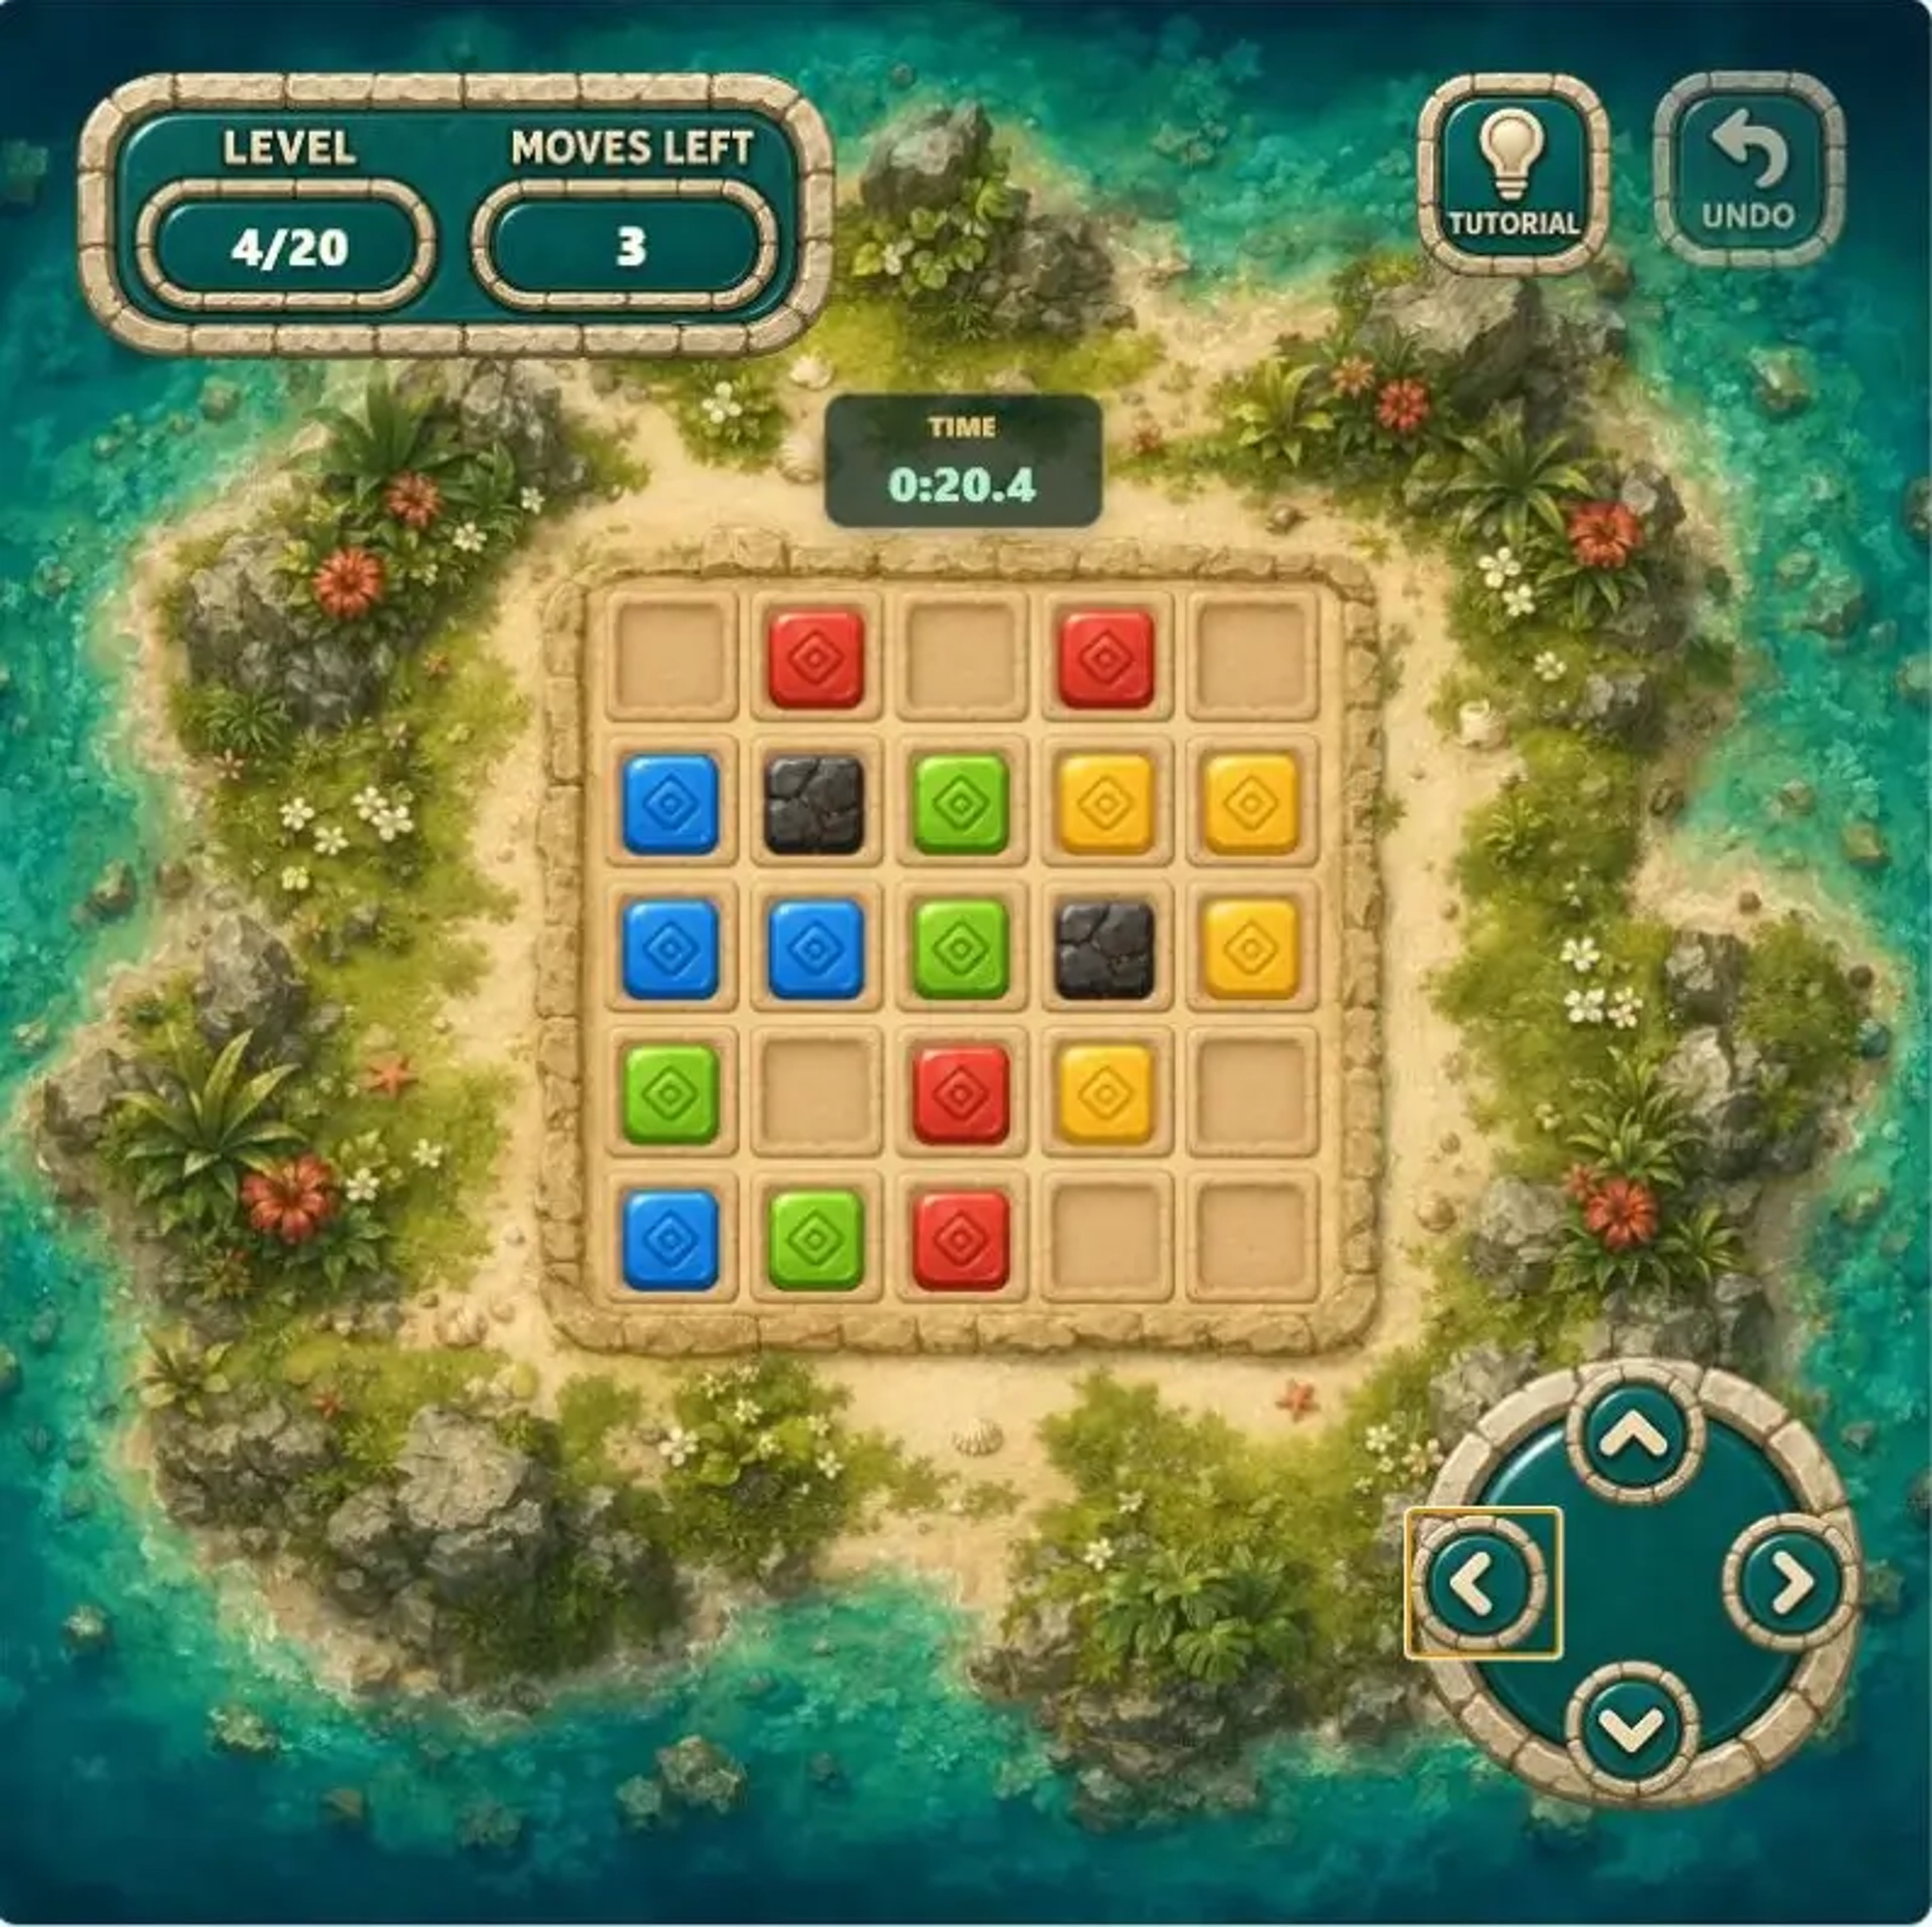
Example route→ ↓ ↓ ↓
Level 4 introduces two stone blockers. They divide rows and columns into shorter lanes because colored tiles cannot pass through them. Look for colors that can use a blocker as an anchor. When one tile stops against a stone while another keeps moving, previously offset tiles can line up.
Level 5: Alternate Between Horizontal and Vertical Moves
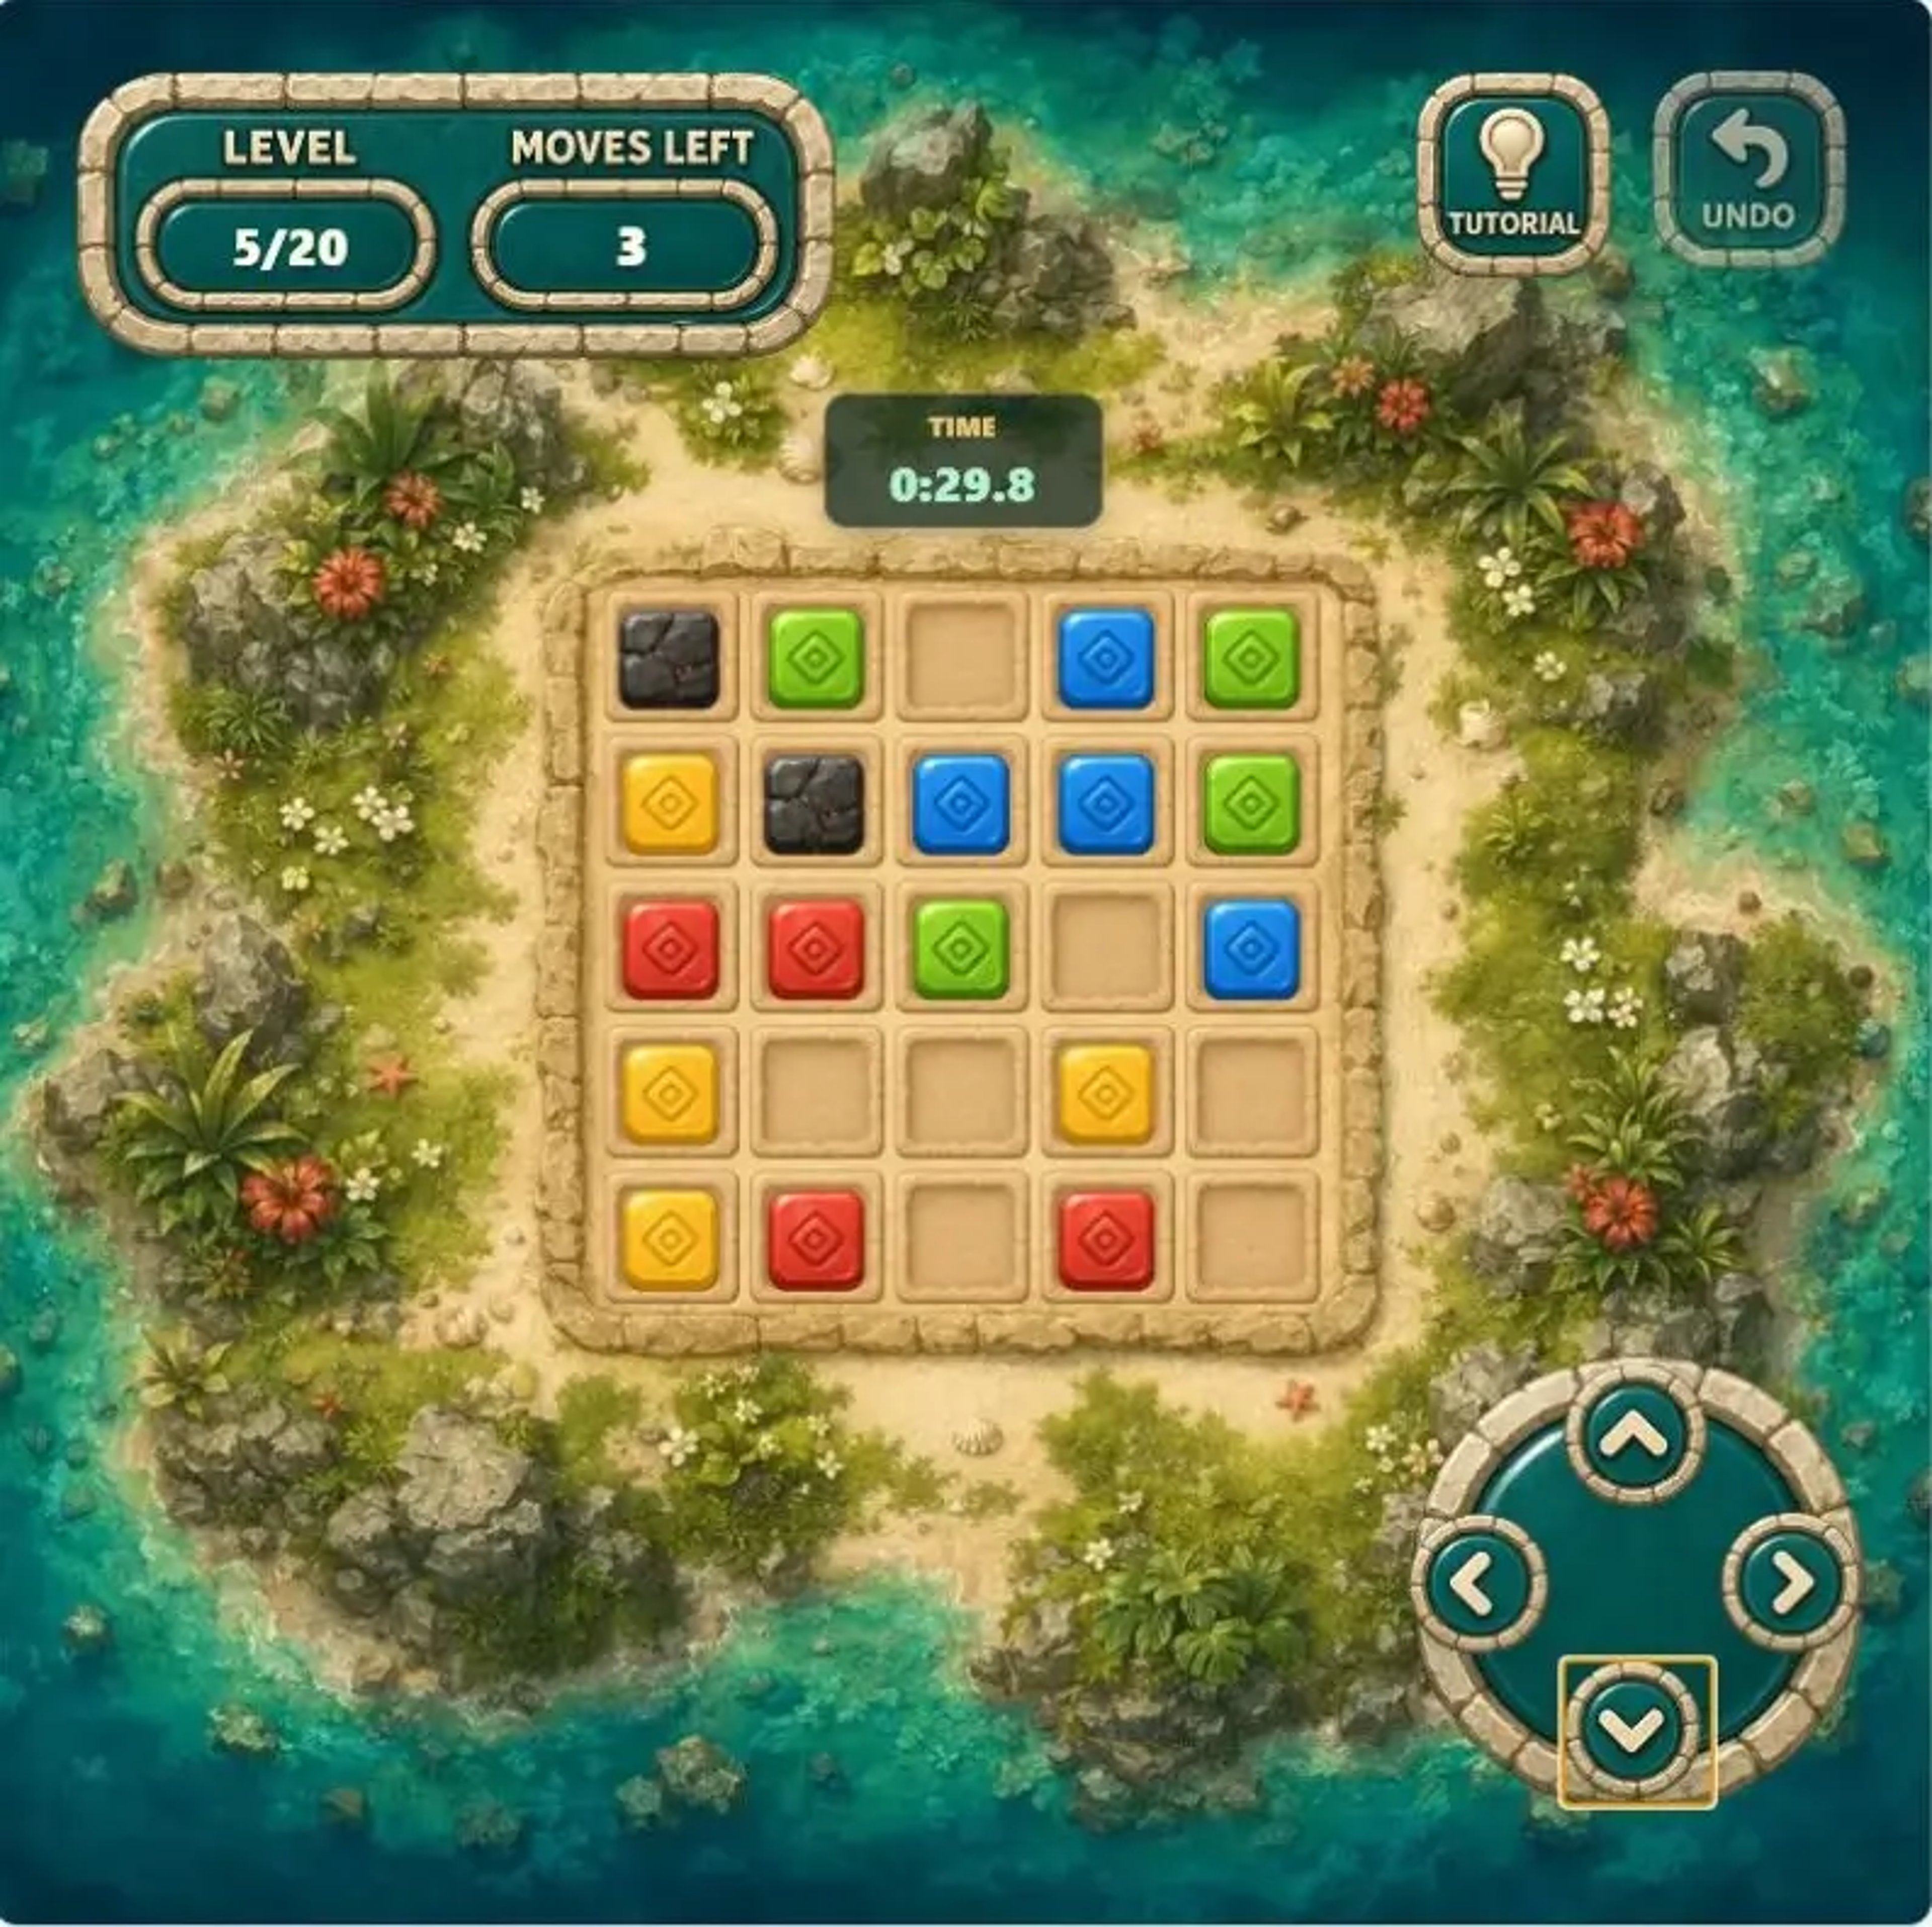
Example route← ↑ ← ↑
Do not expect one direction to solve the entire level. Use a horizontal push to complete or prepare one group, then use a vertical push to change the row relationships of the remaining colors. A clear creates new empty cells, so treat the resulting board as a new puzzle instead of following an inflexible opening plan.
Level 6: Push Toward a Boundary, Then Close Sideways
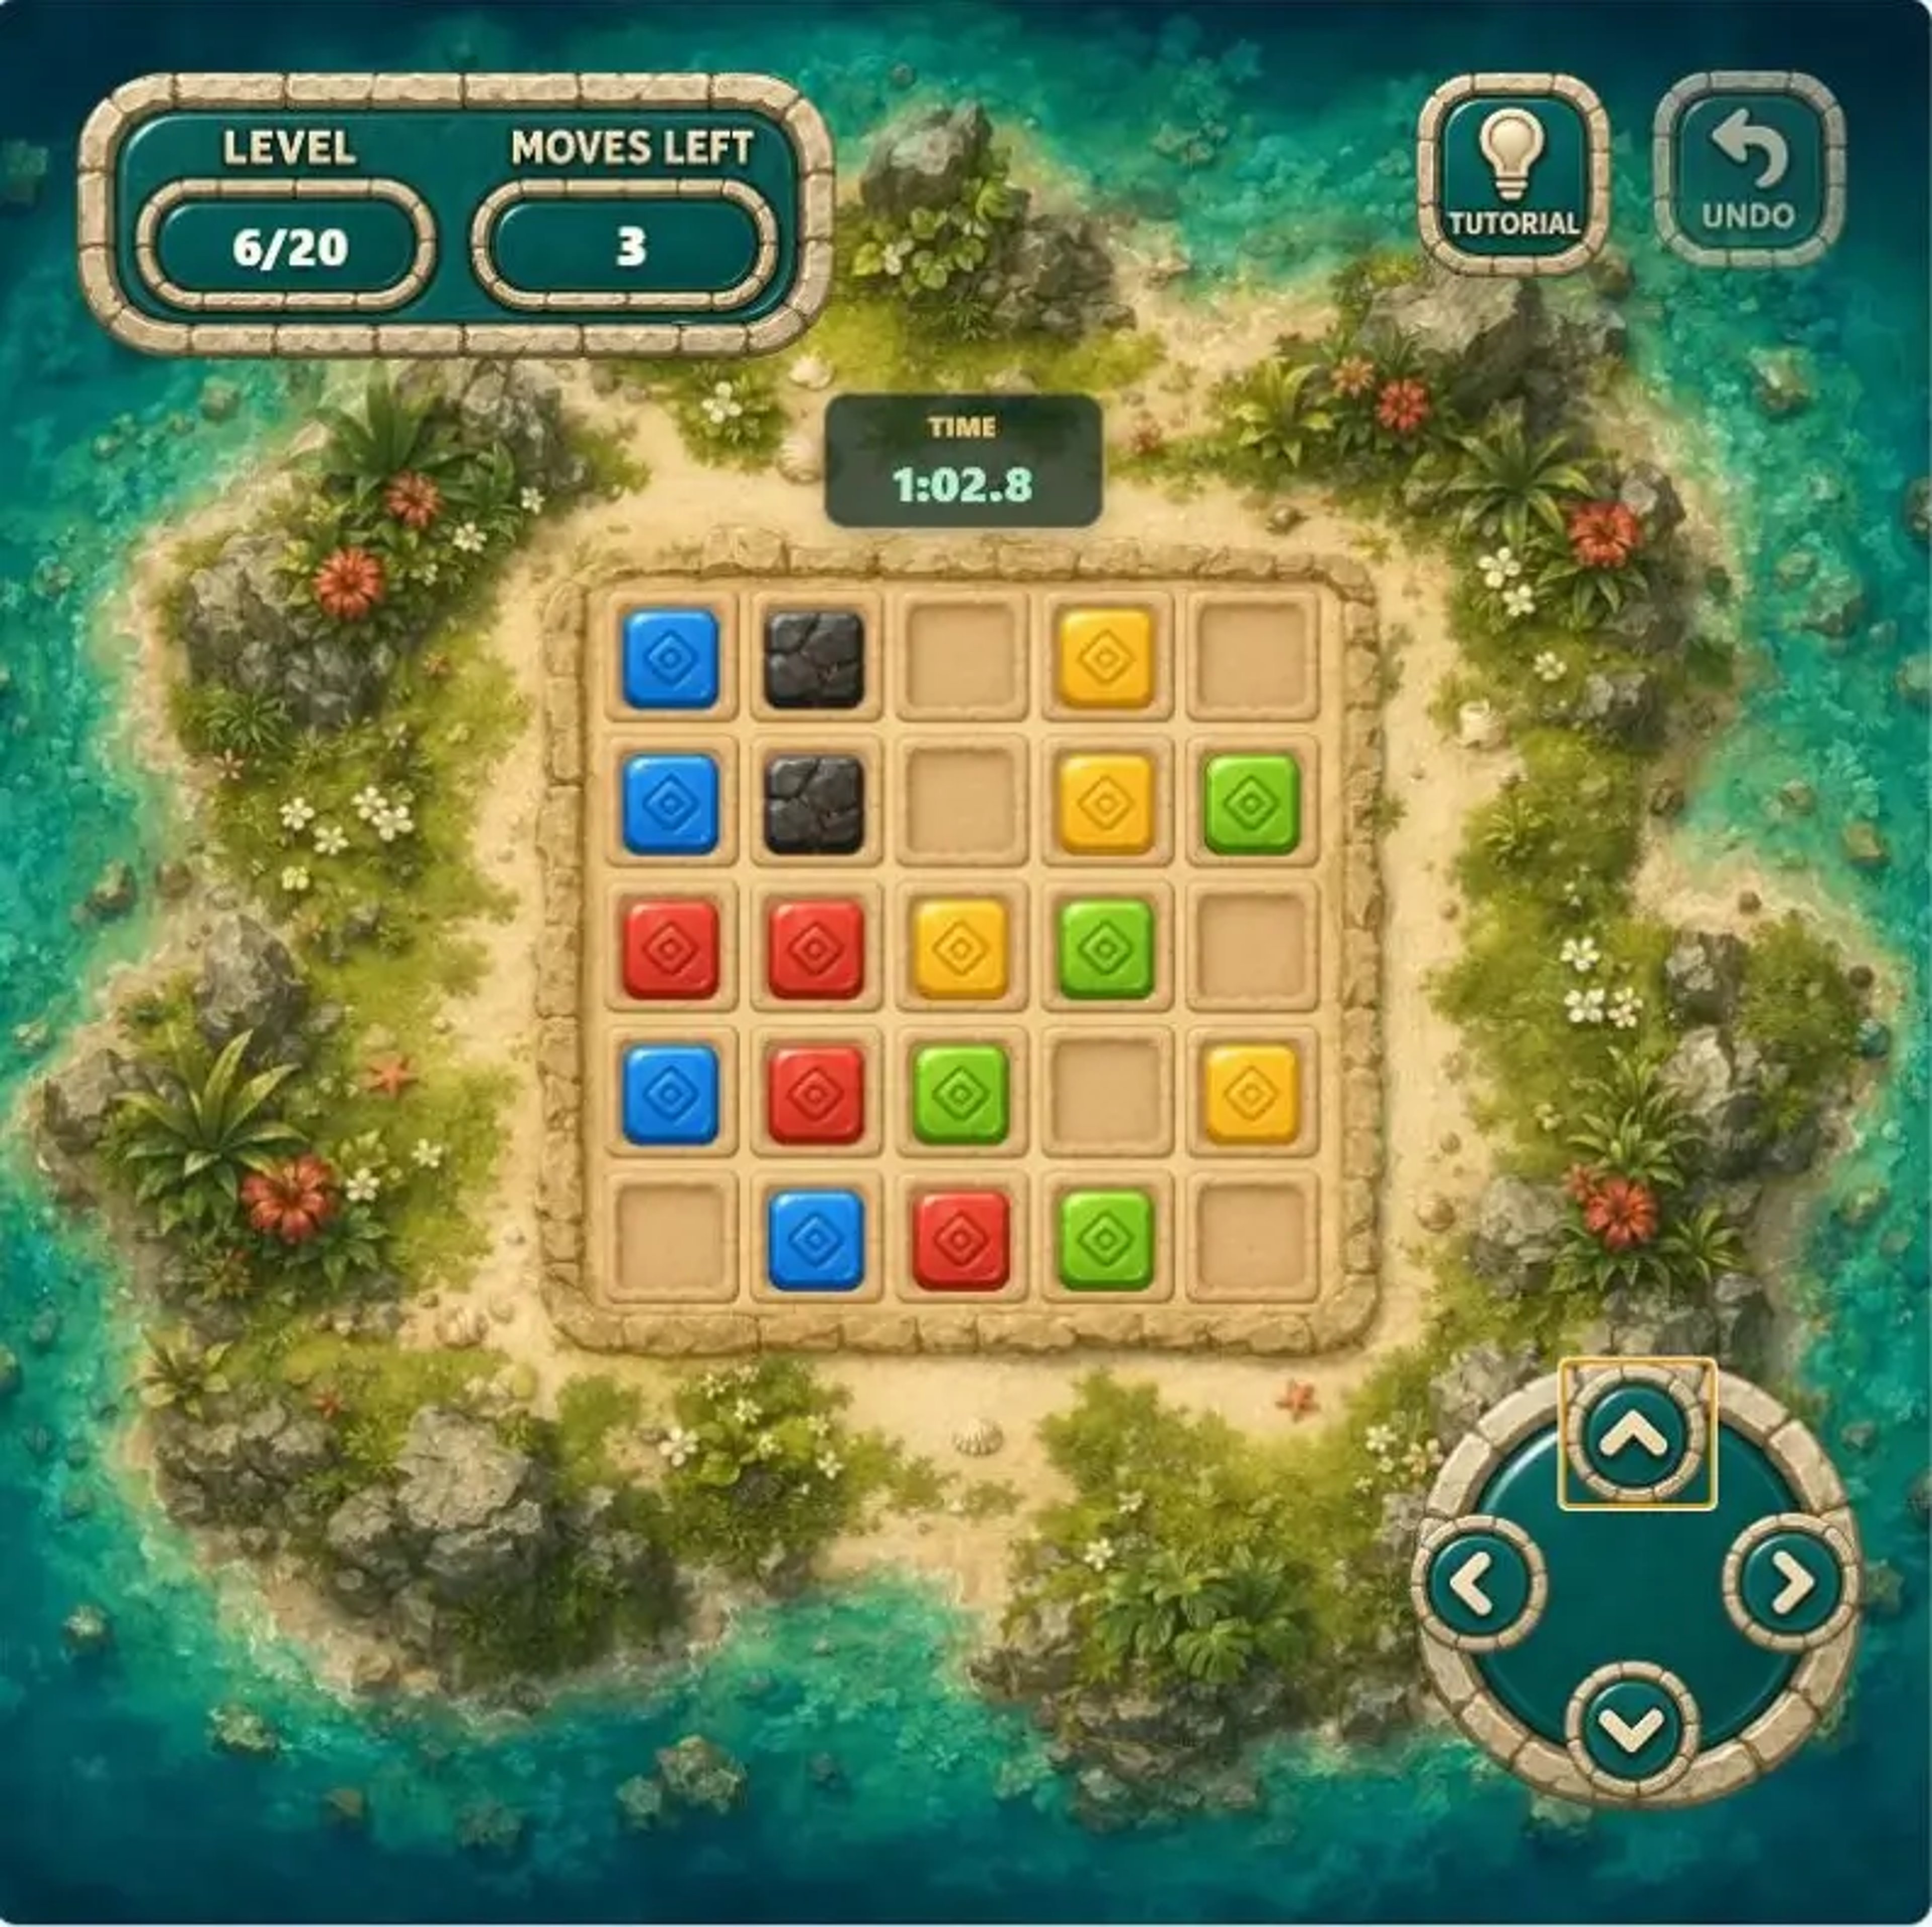
Example route↑ ↑ ↑ ←
When several colors are spread vertically, repeated upward pushes can gather them against the top edge or a blocker. Check after every push to see whether a group has cleared. Once another upward move no longer improves a connection, use a horizontal move to close the remaining gap.
Level 7: Identify the Main Push Direction
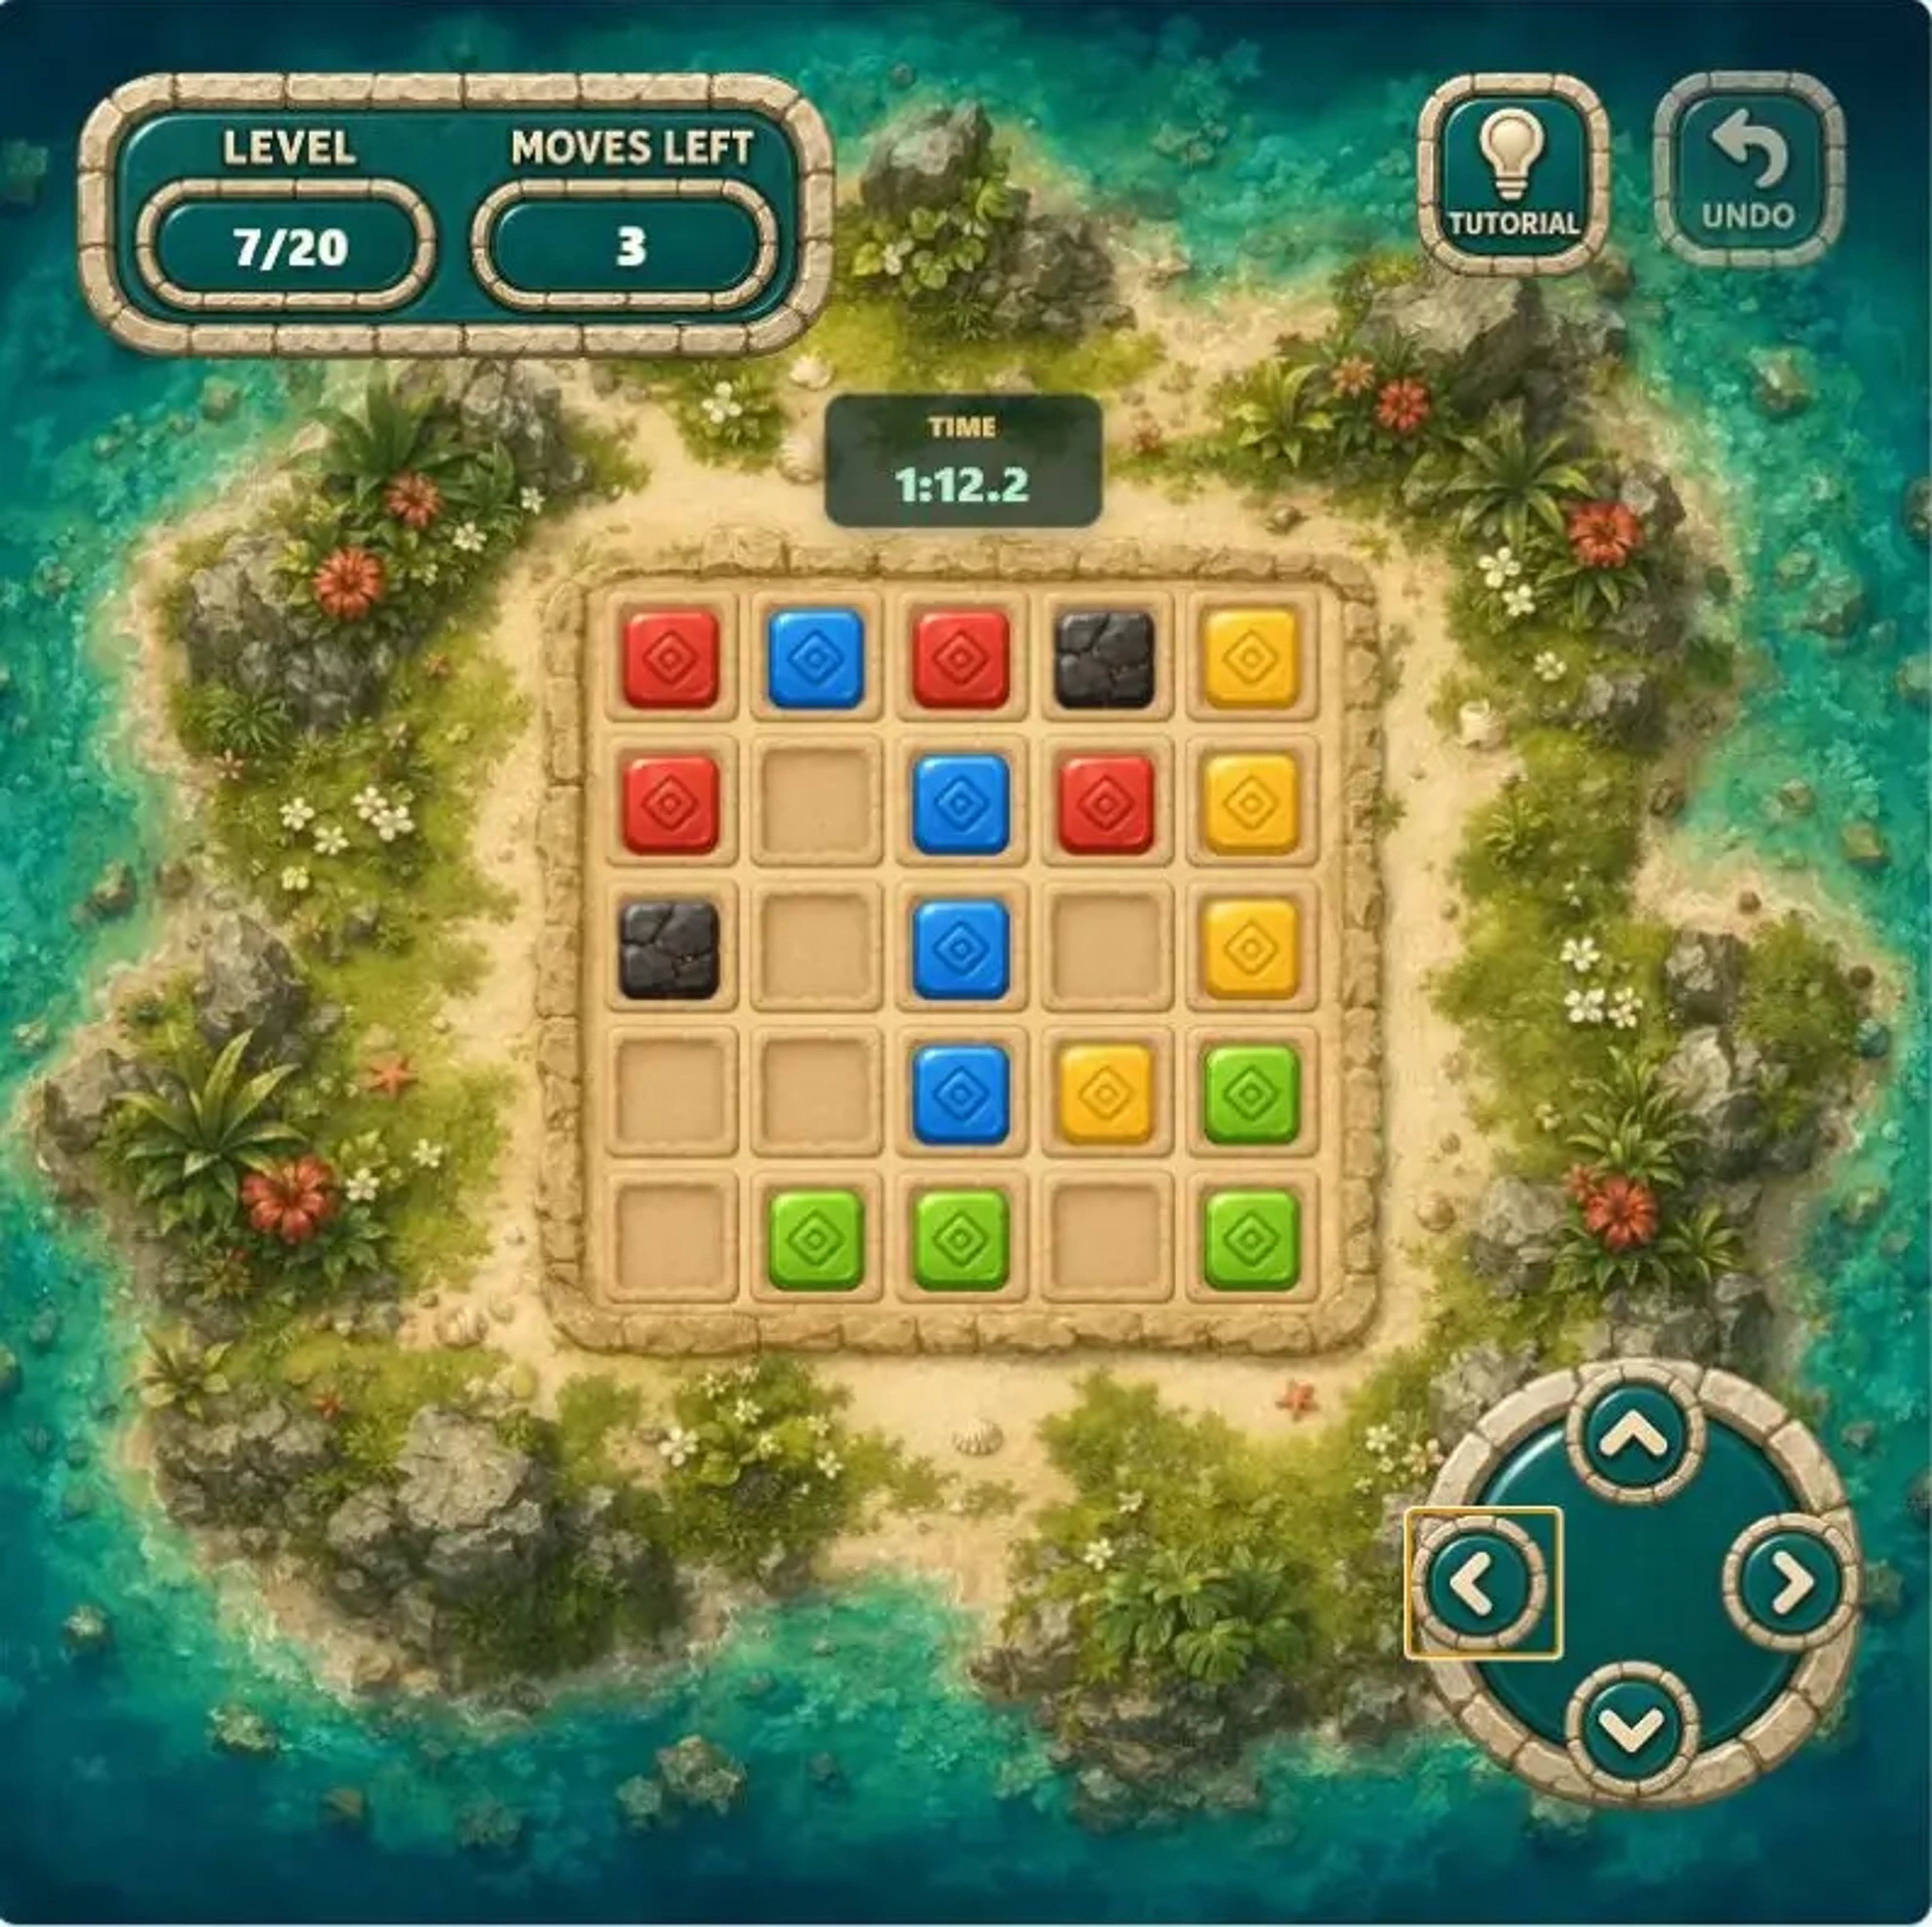
Example route↑ ← ← ←
Some layouts allow several colors to benefit from the same direction. Use one perpendicular move to fix their alignment, then continue along the main direction. After each clear, confirm that the remaining tiles can still travel that way. Change axes as soon as blockers close the route.
Level 8: Use One Turn to Open a New Lane
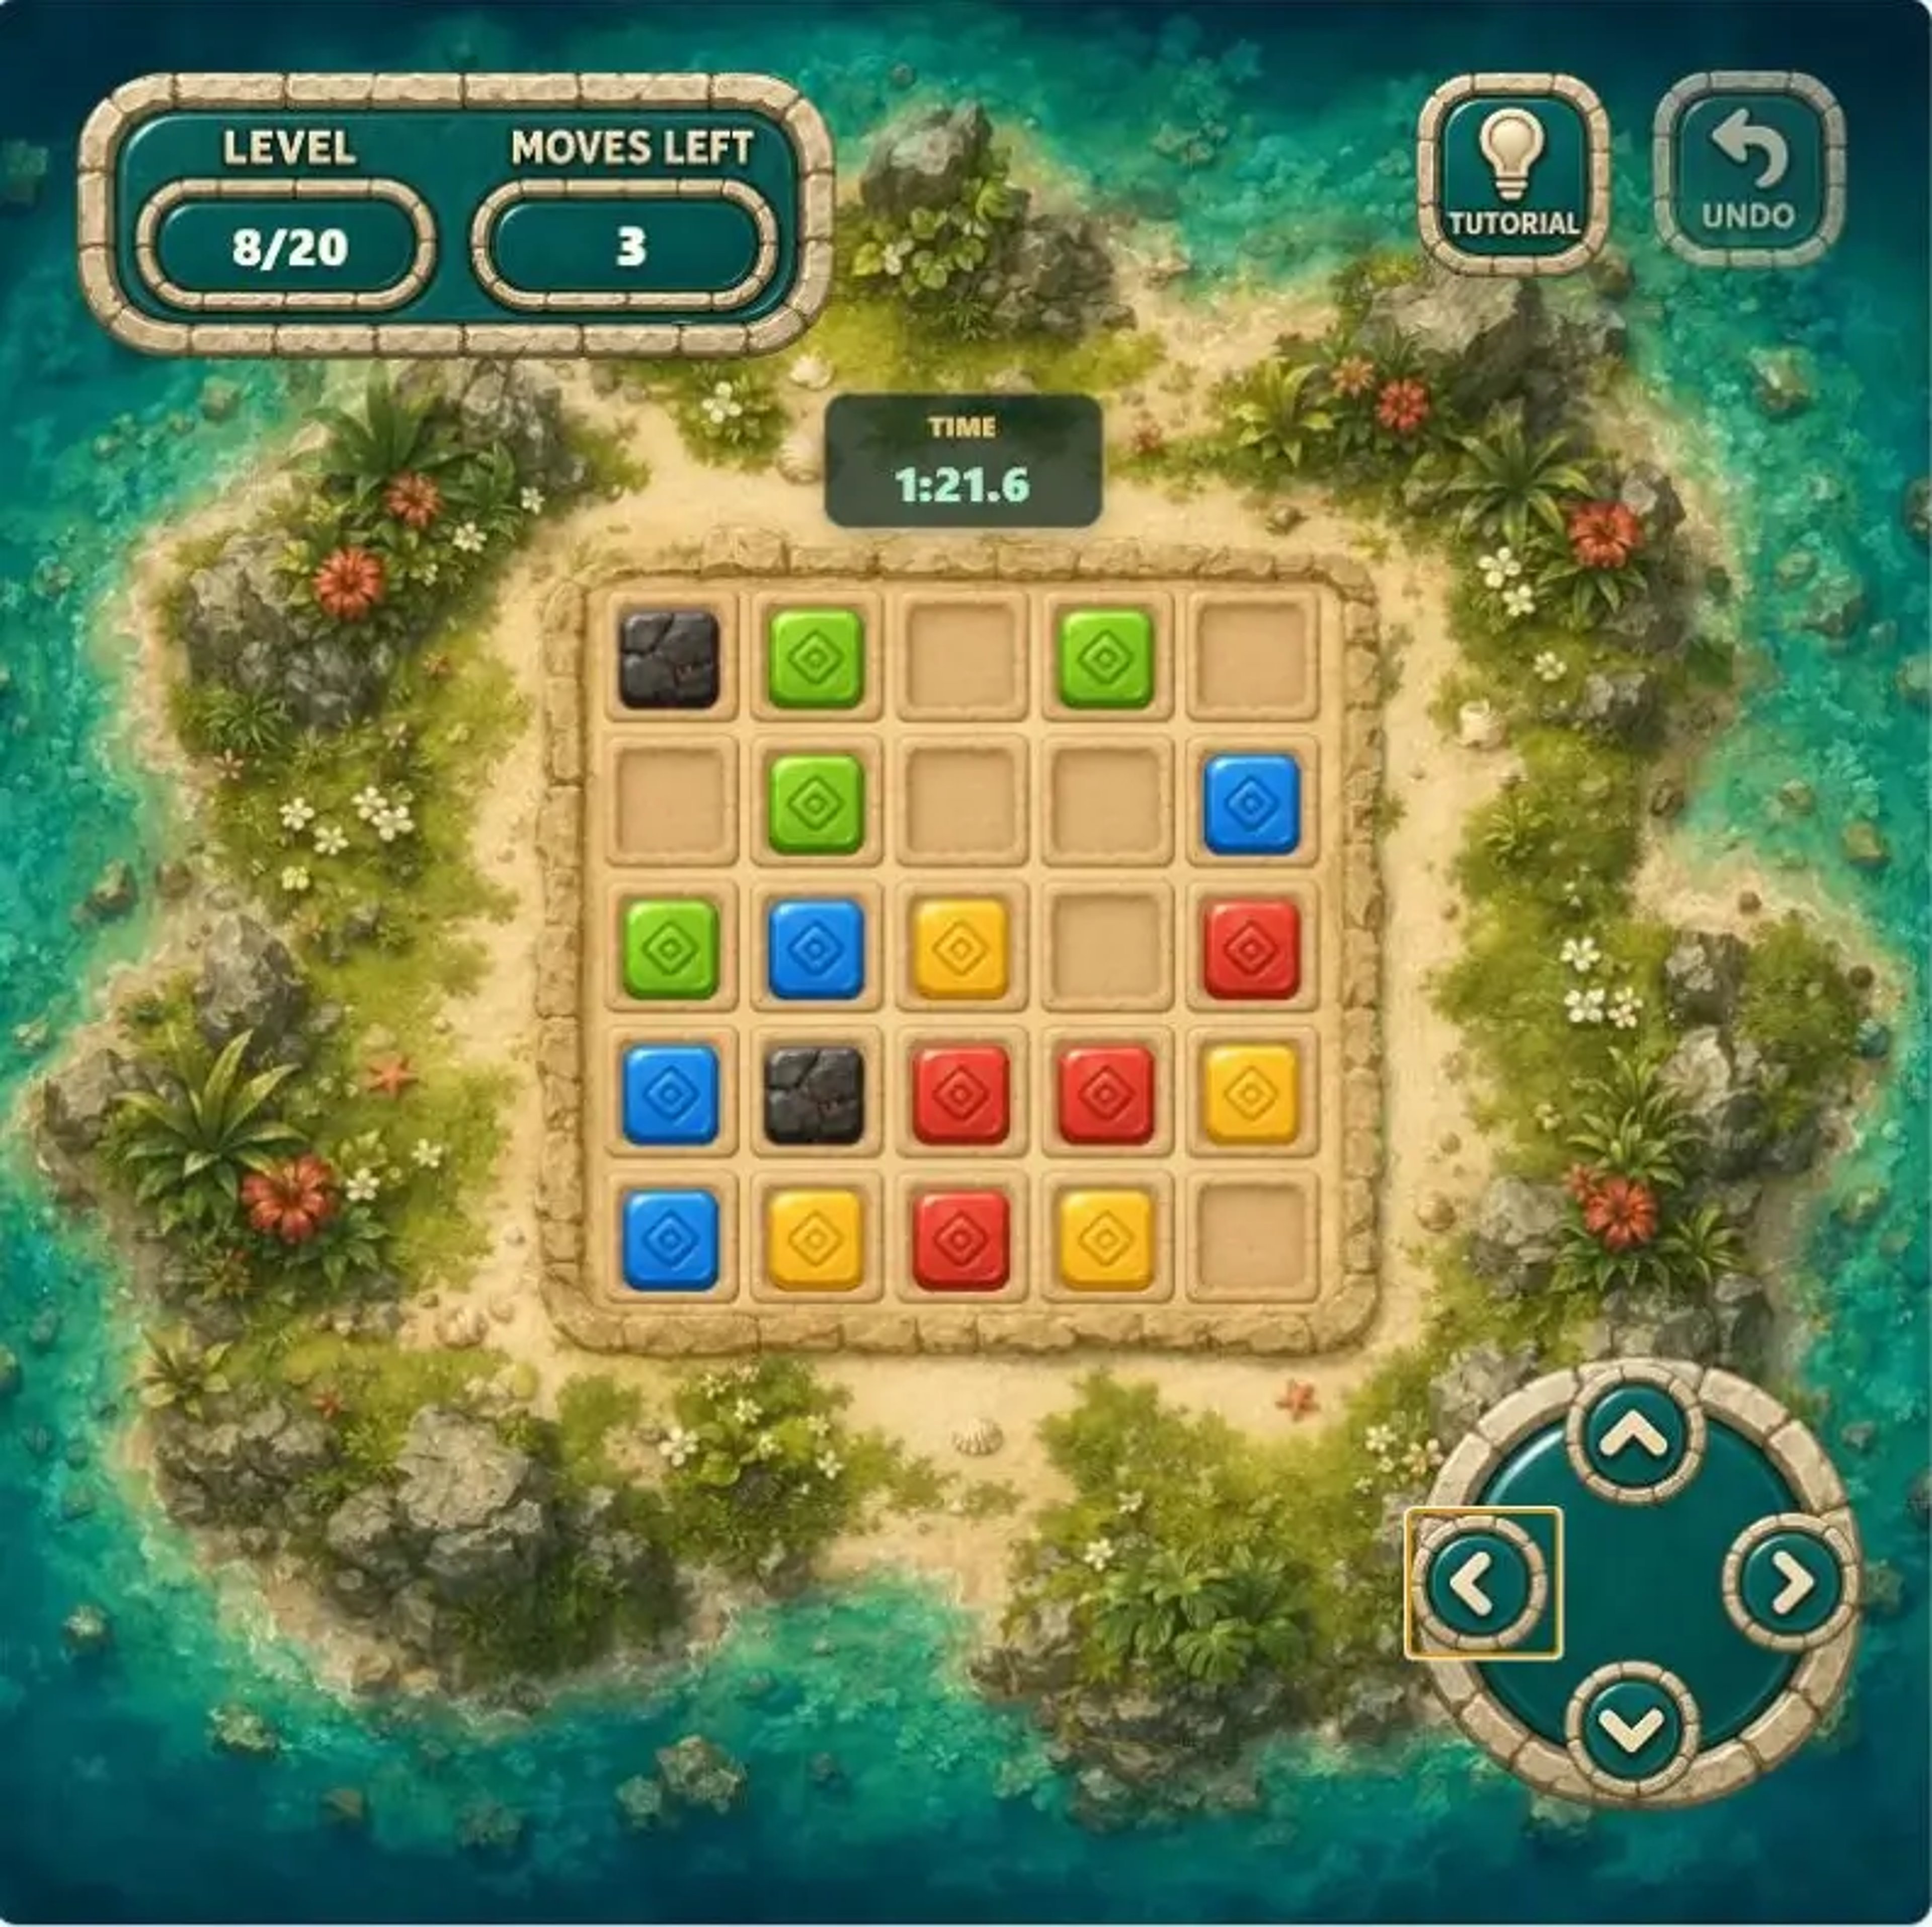
Example route← ↓ ← ←
If a horizontal push clears one group but leaves the others offset, use one vertical move to redistribute the empty cells, then return to the horizontal route. That middle move switches lanes: it does not need to clear immediately, but it must create a visible connection opportunity for the next push.
Level 9: Read the 6×6 Blocker Zones First
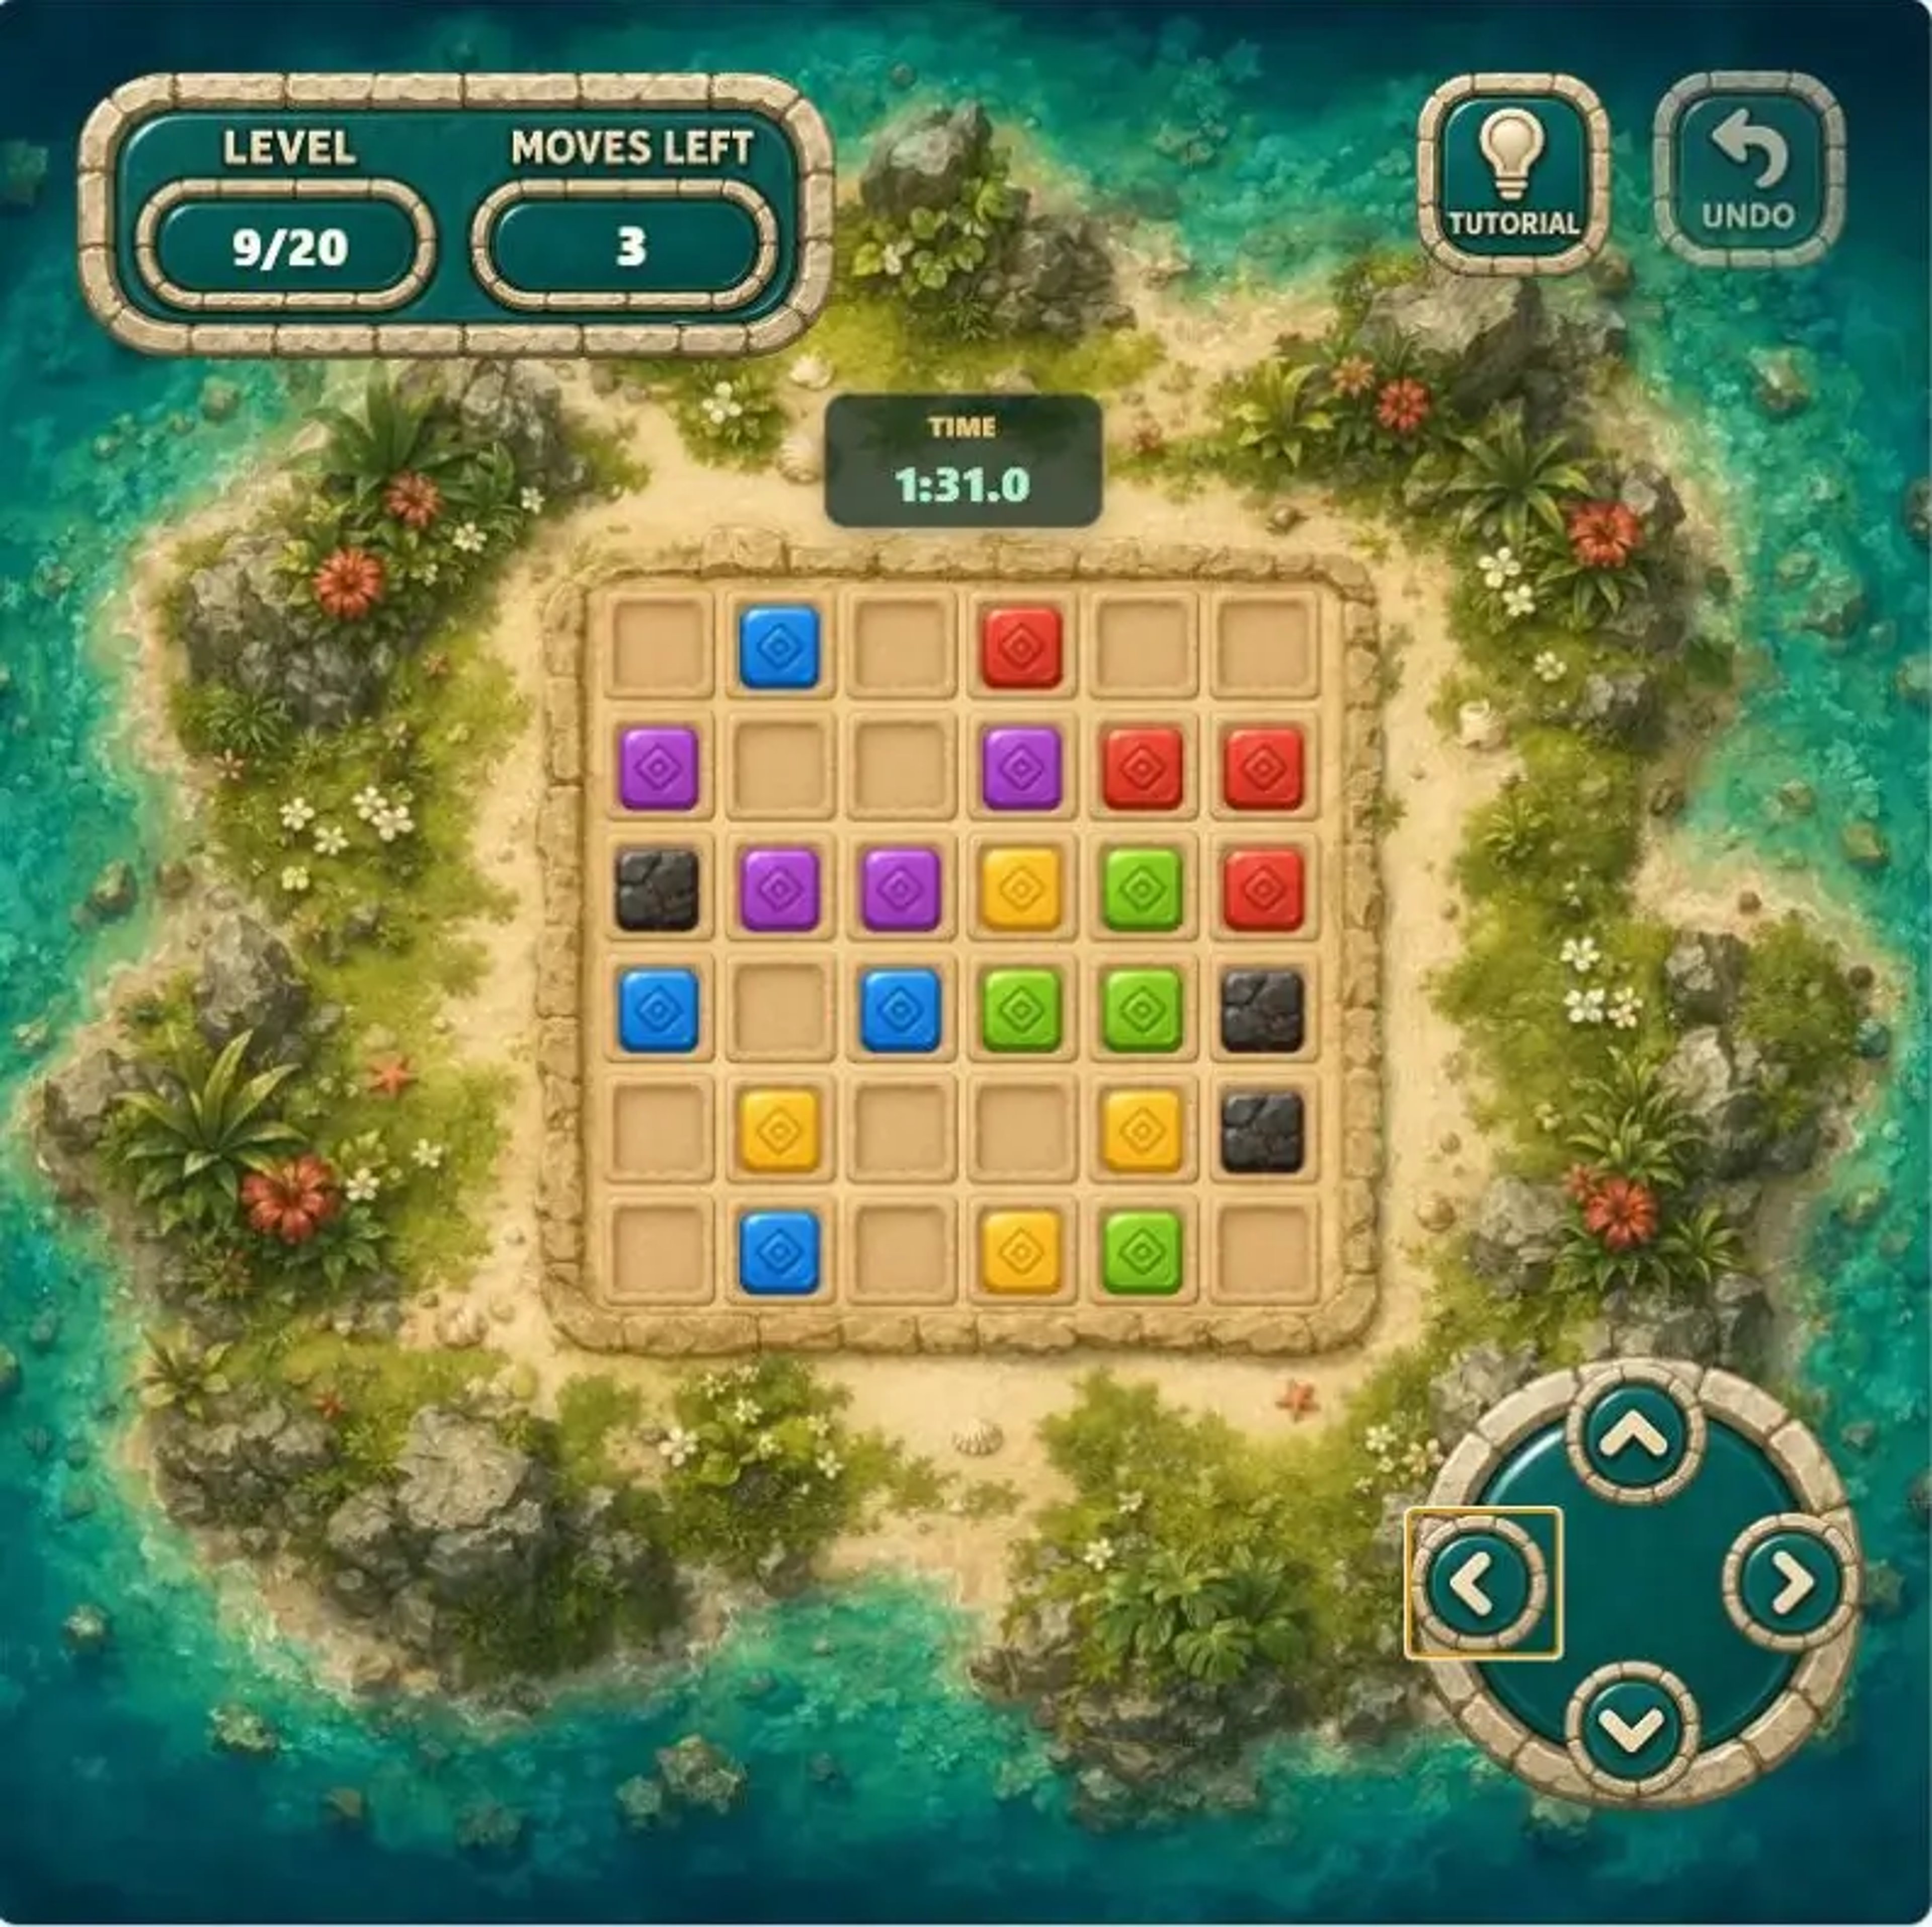
Example route→ ↓ ↓ ↓ ↓
The game now uses a 6×6 board, five colors, and three blockers. Do not try to track every tile individually. First identify which rows and columns the blockers divide, then find the area with the most usable empty cells. A strong main direction can often clear different colors in sequence.
Level 10: Build a Two-Stage Vertical and Horizontal Route
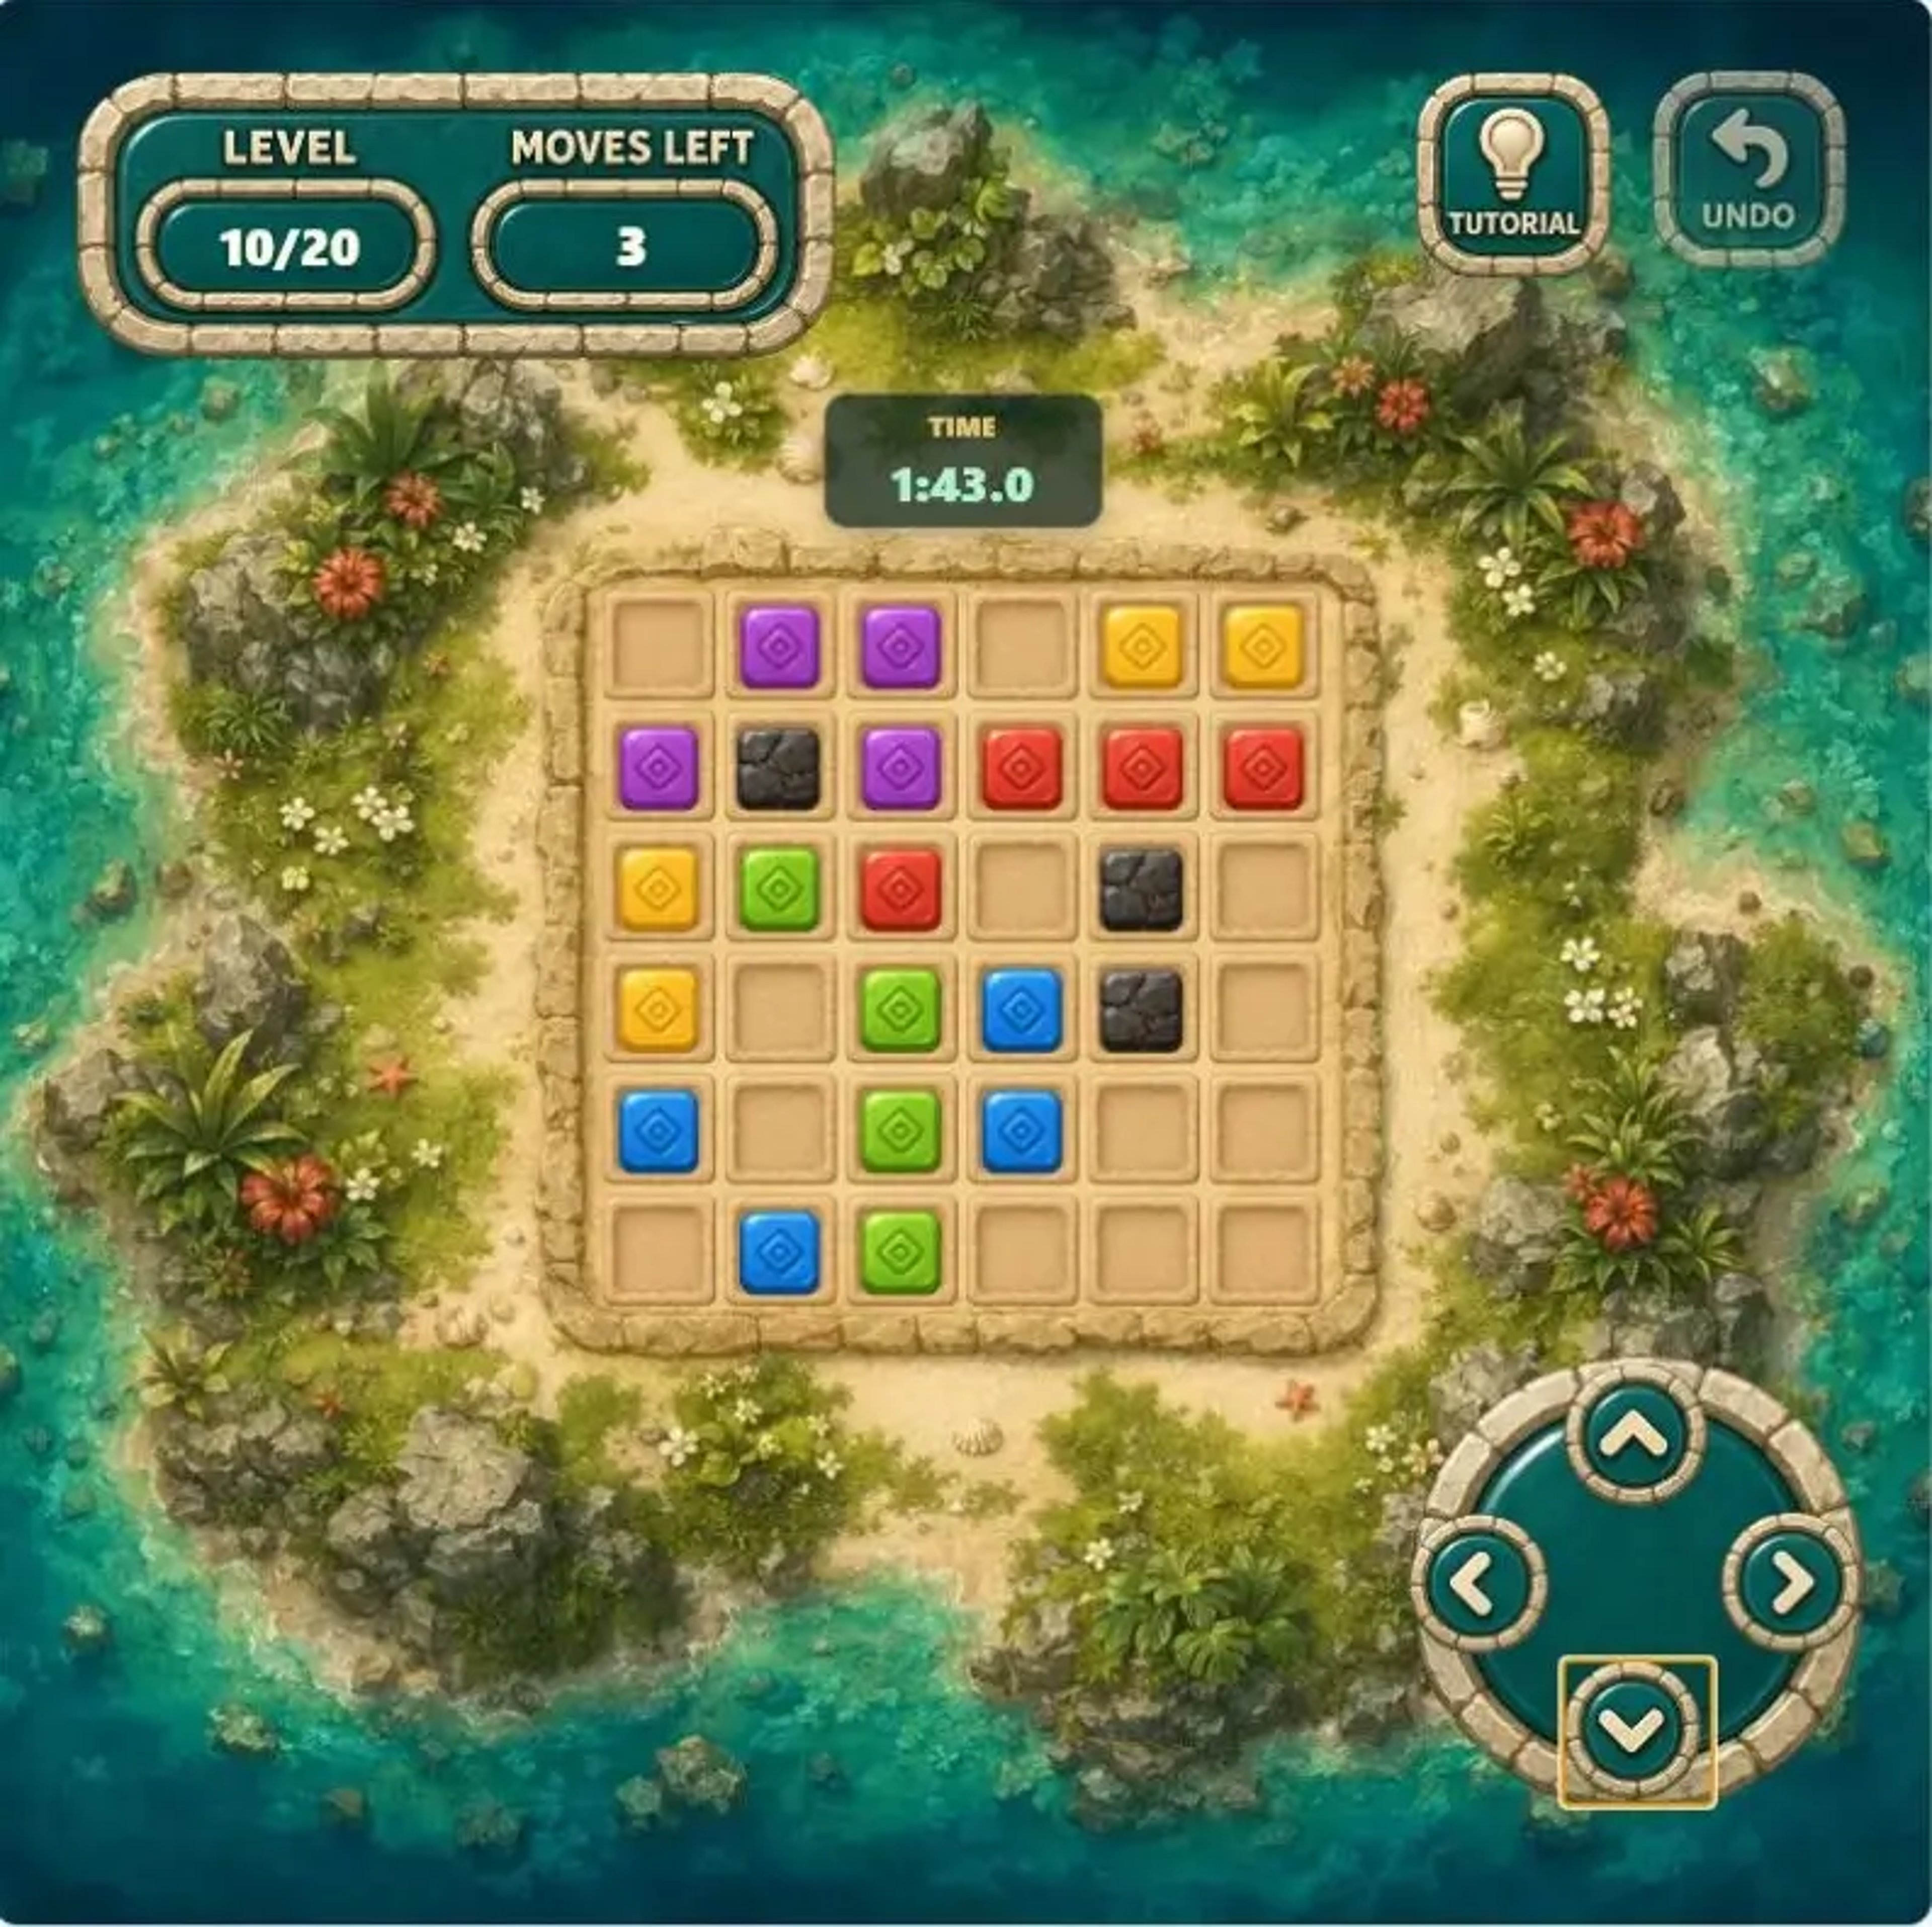
Example route↑ ← ↑ ← ←
Large boards often place matching tiles in a zigzag pattern, with differences in both rows and columns. Use a vertical move to reduce the height difference, then a horizontal move to correct the column difference. Each move only needs to improve one target color; it does not have to help all five colors at once.
Level 11: Compress Along a Long Lane, Then Seal the Group
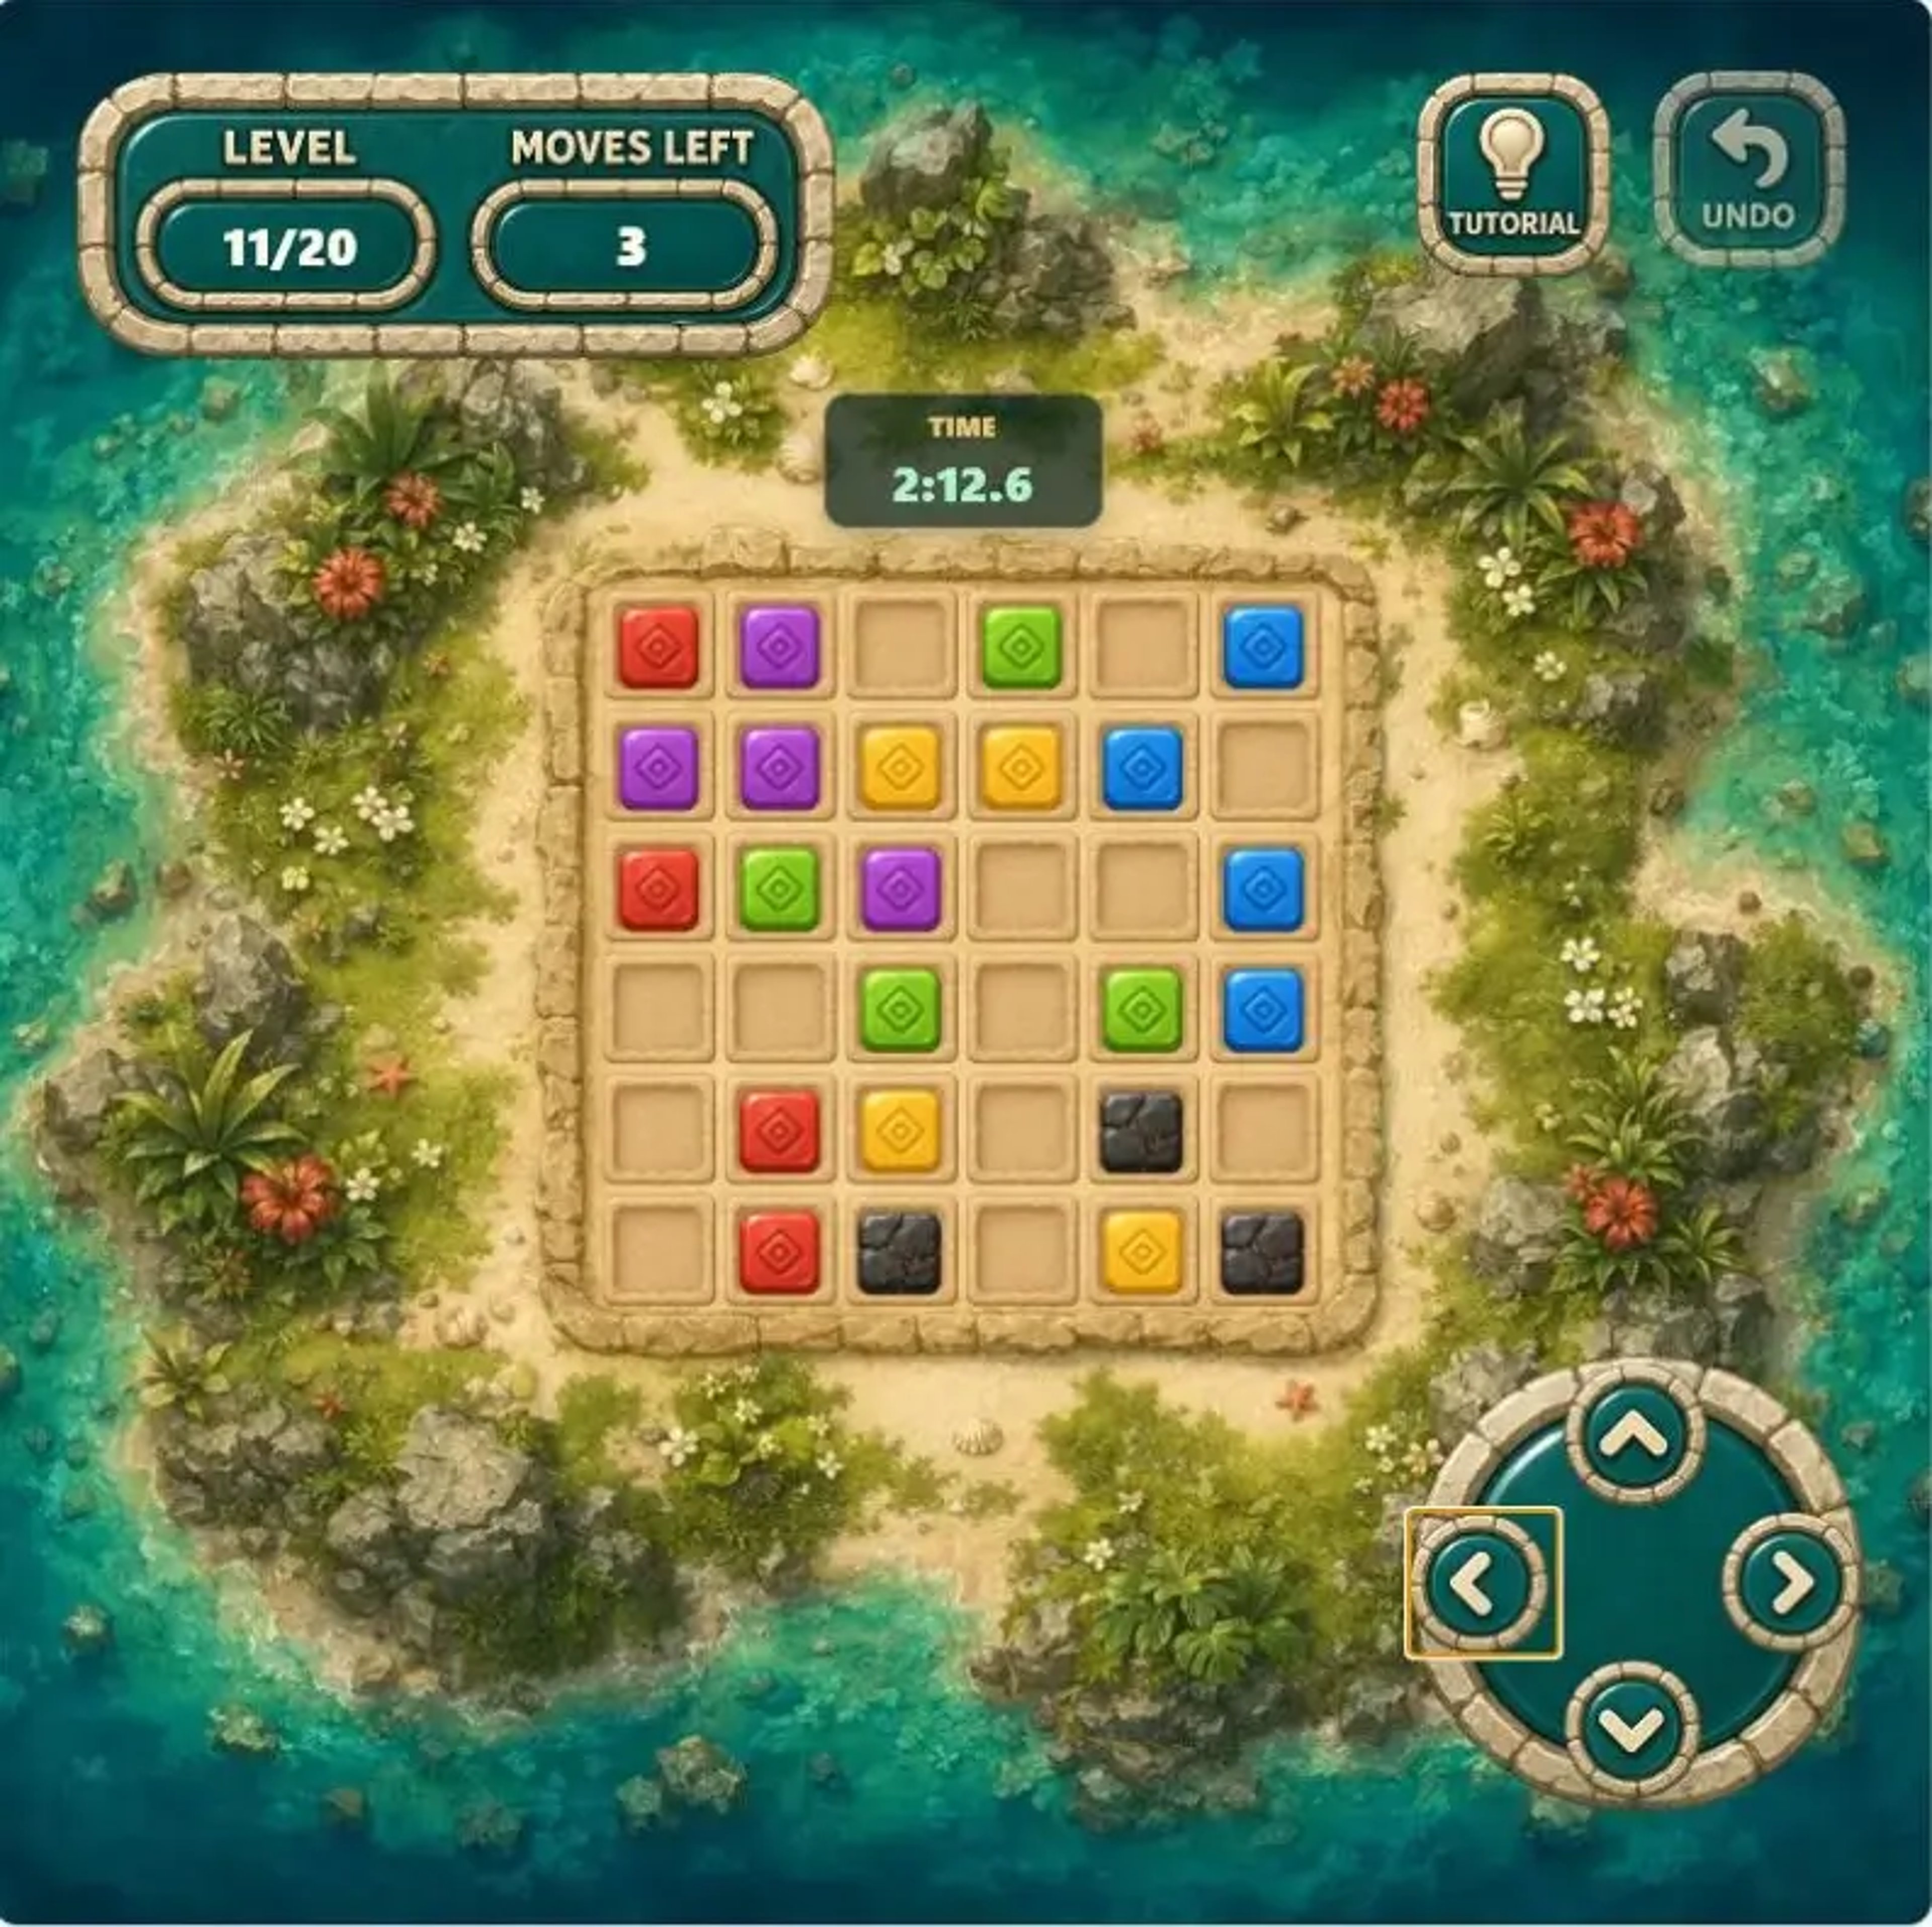
Example route↓ ↓ ↓ ↓ →
When a blocker leaves a long lane above or below it, repeated pushes can compress several colors toward the same edge. Verify that matching tiles are still getting closer after each move. The final perpendicular push often joins two prepared rows or columns into complete groups.
Level 12: Treat Every Clear as a New Opening
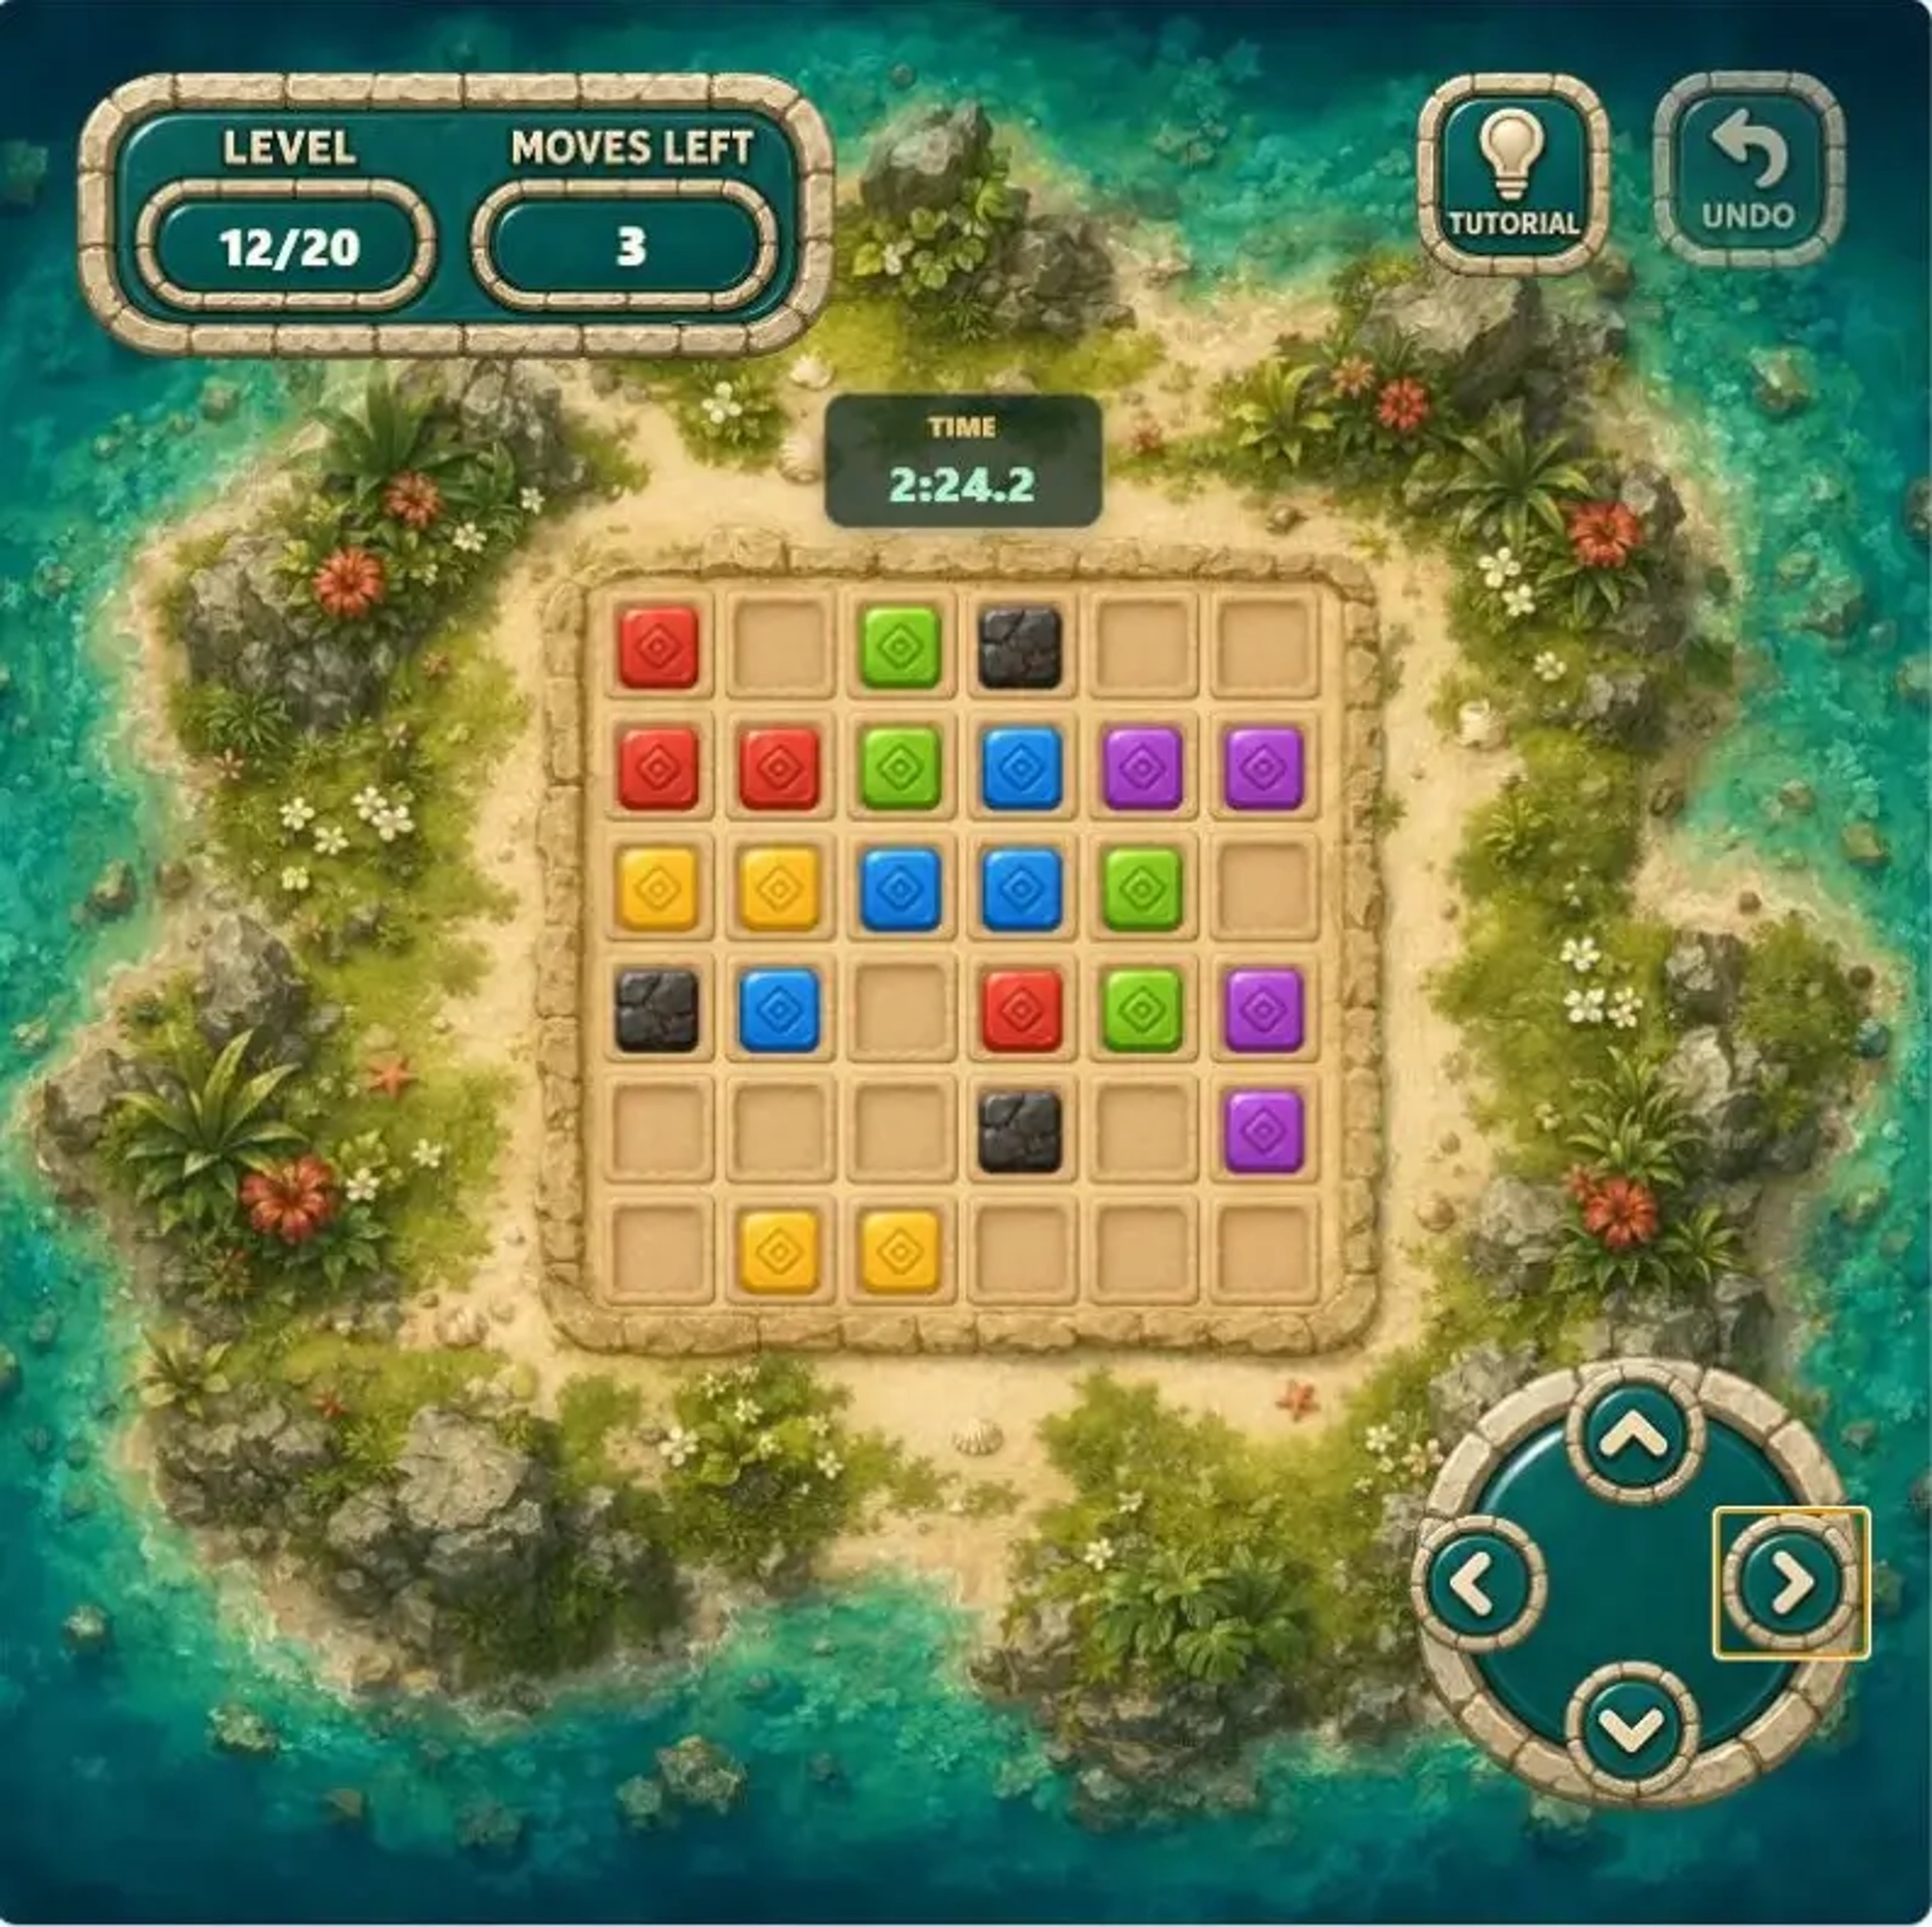
Example route↑ ↑ ← ↑ ←
With five colors, the full route is rarely obvious from the starting board. Complete the clearest group first, wait for the clear animation, and inspect where the new empty cells appear. Empty-cell placement matters more than the original tile positions because it determines which tiles can move next.
Level 13: Similar Moves Do Not Mean Identical Boards
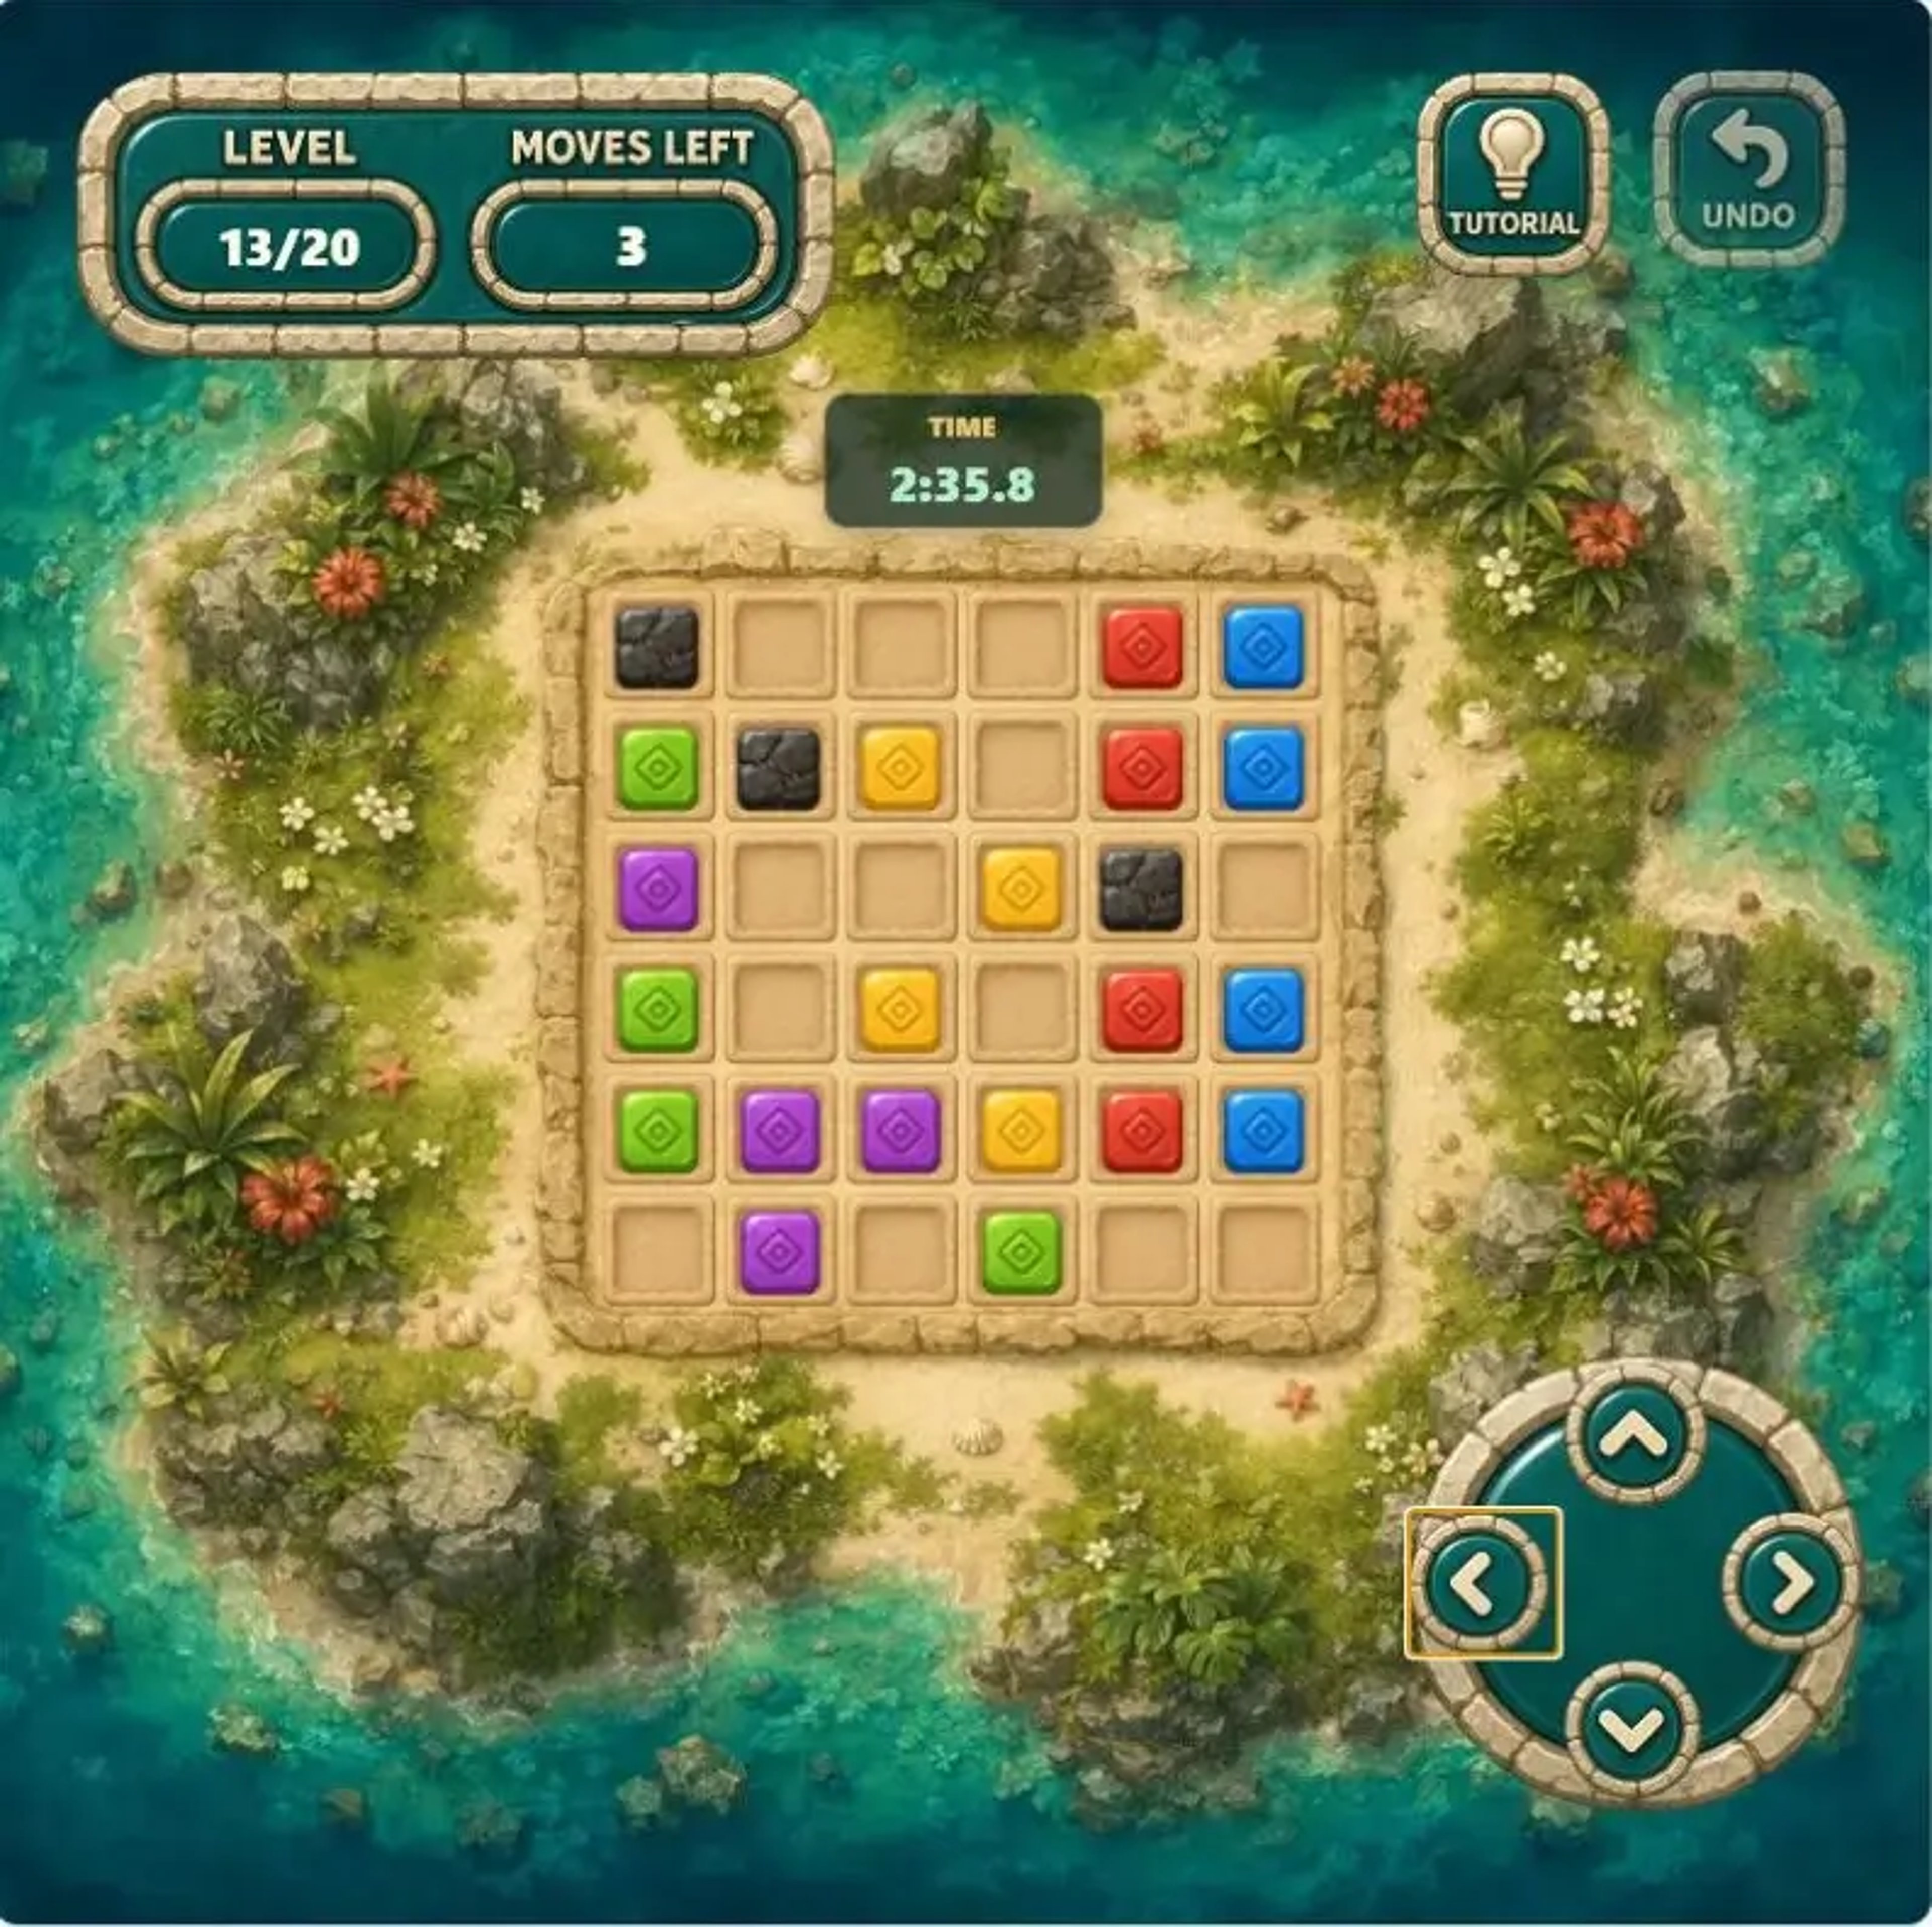
Example route↑ ↑ ← ↑ ←
Levels 12 and 13 happened to use the same direction sequence in this example, but that is only a coincidence of the generated layouts. Always recheck blocker positions, empty cells, and the color closest to a four-tile connection. Reuse the decision process, not the previous answer.
Level 14: Hold the Direction After Changing Axes
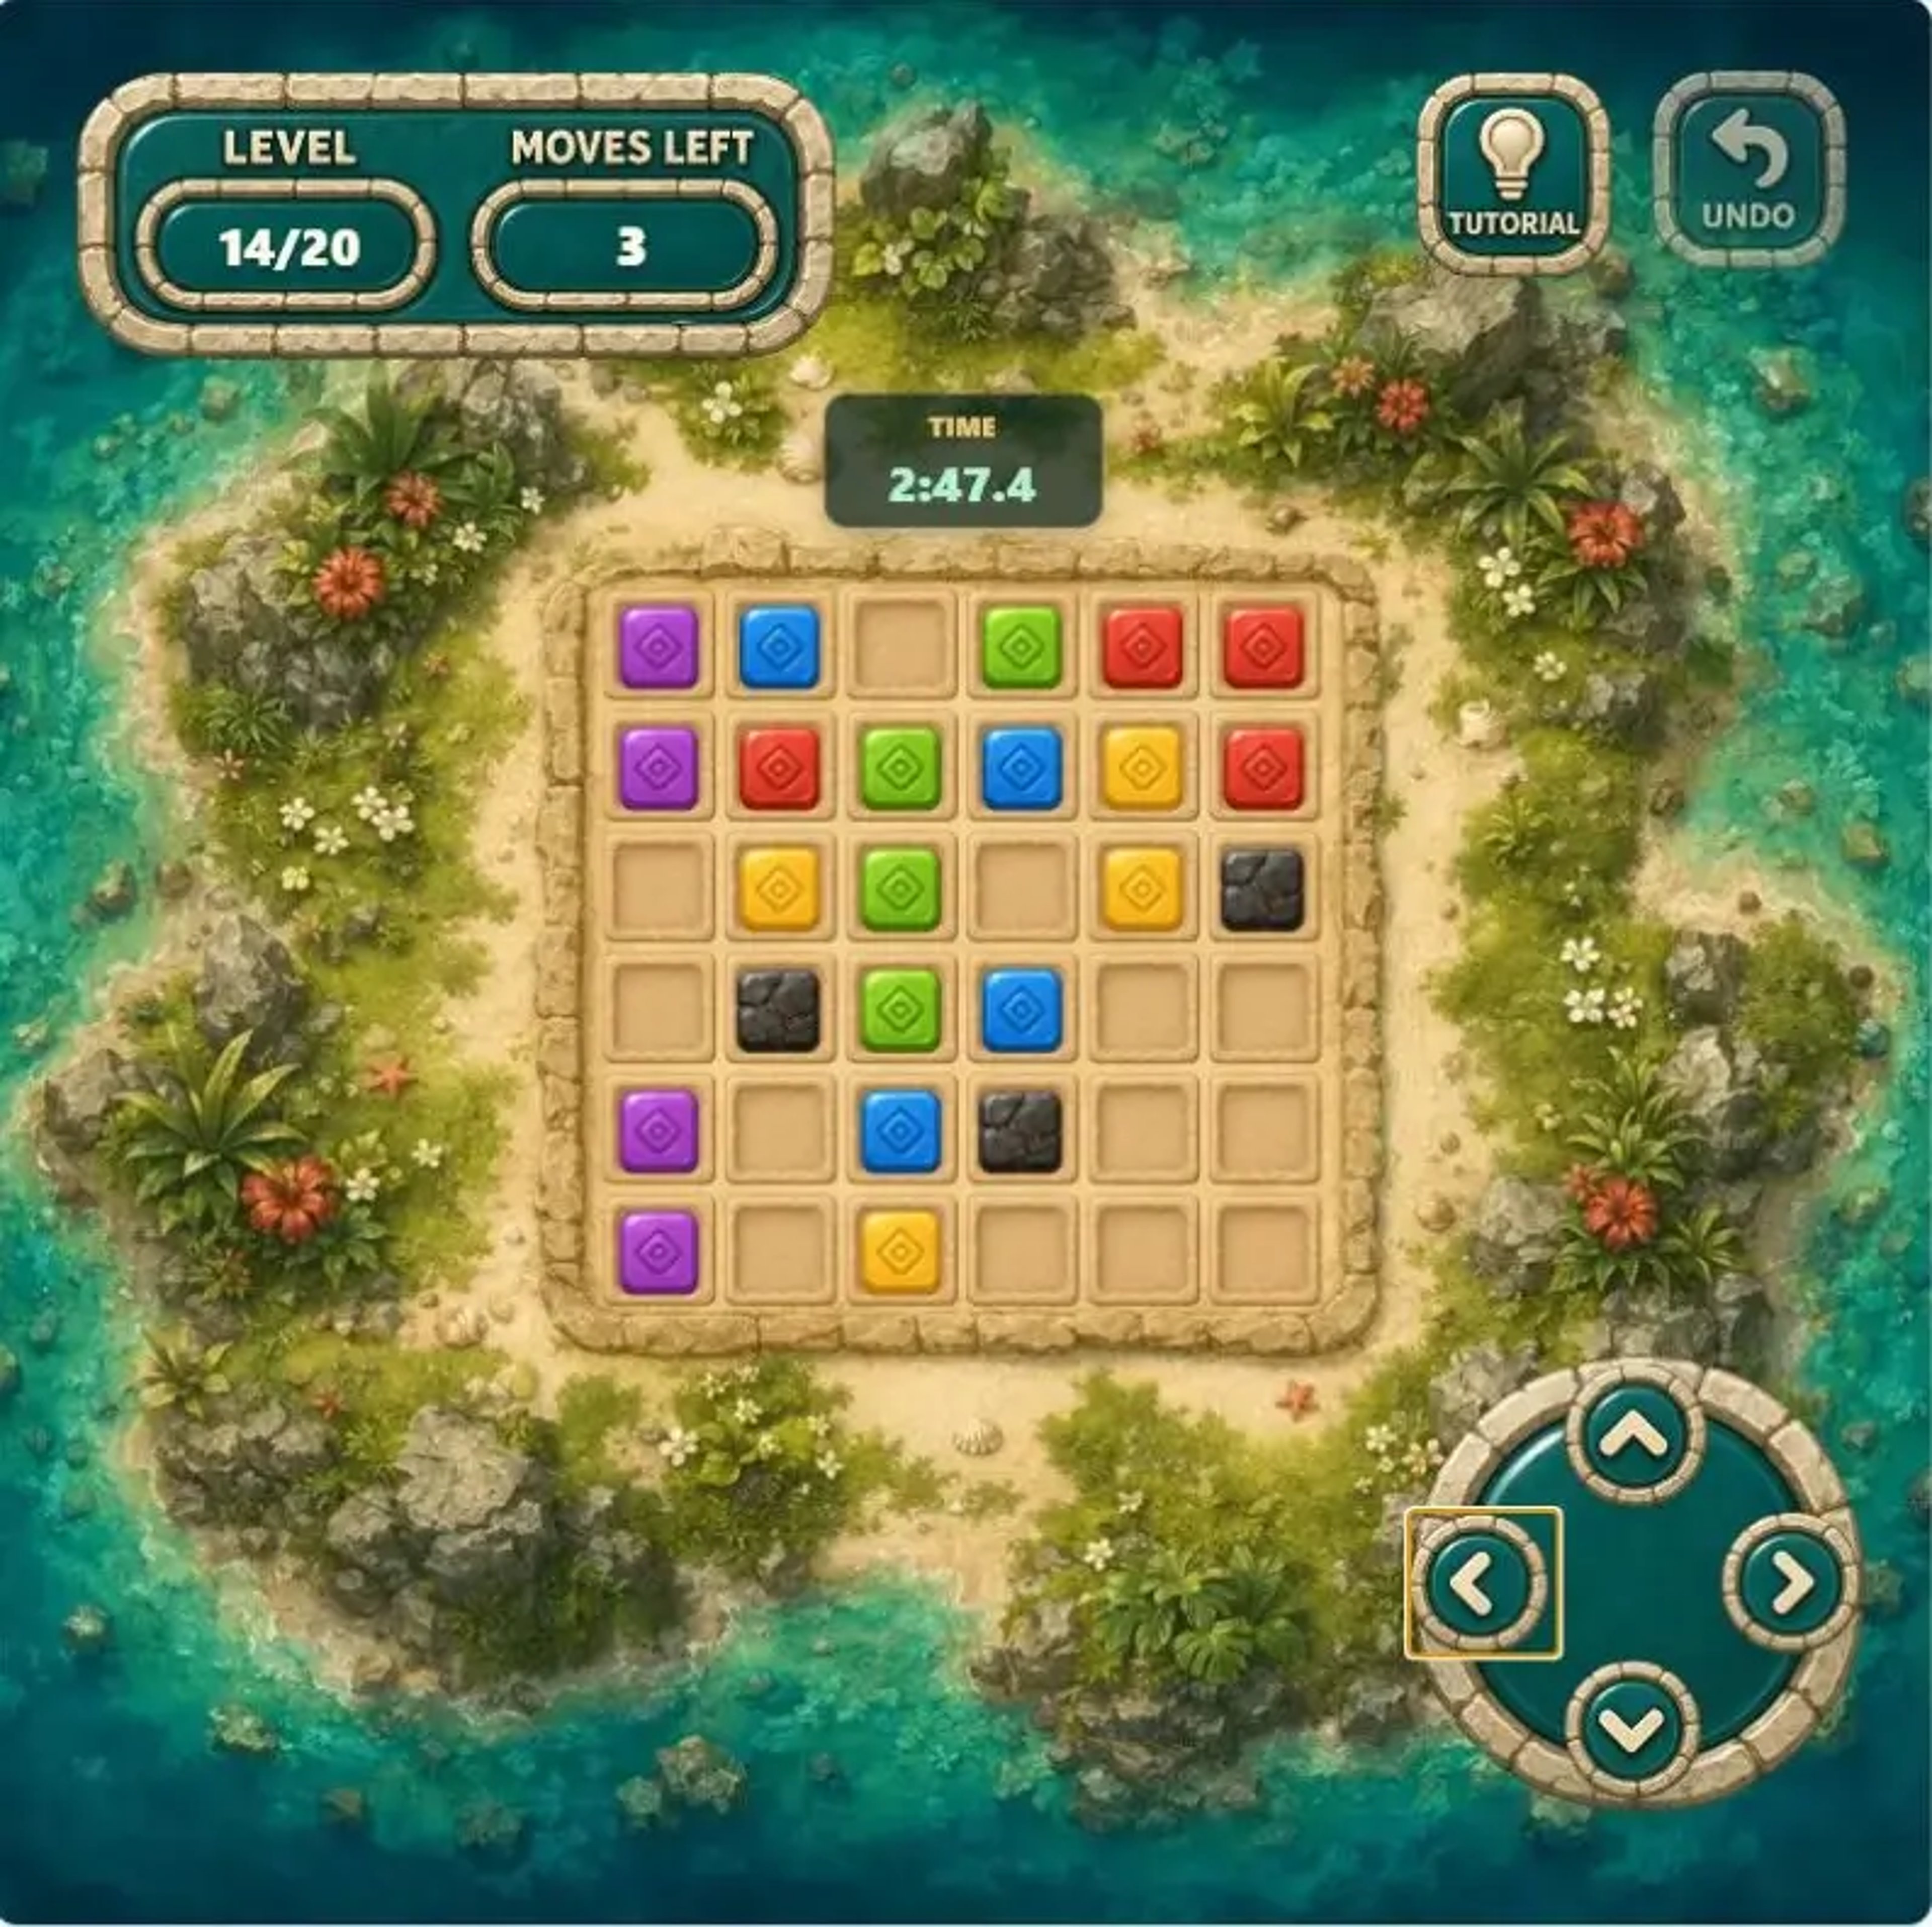
Example route↑ ↑ → → →
Use vertical moves to place the colors on useful rows, then commit to the horizontal direction. If each push continues to prepare or complete a group, avoid unnecessary changes. Moving back and forth can undo the compression you just created.
Level 15: Start the Largest Board at Its Densest Edge
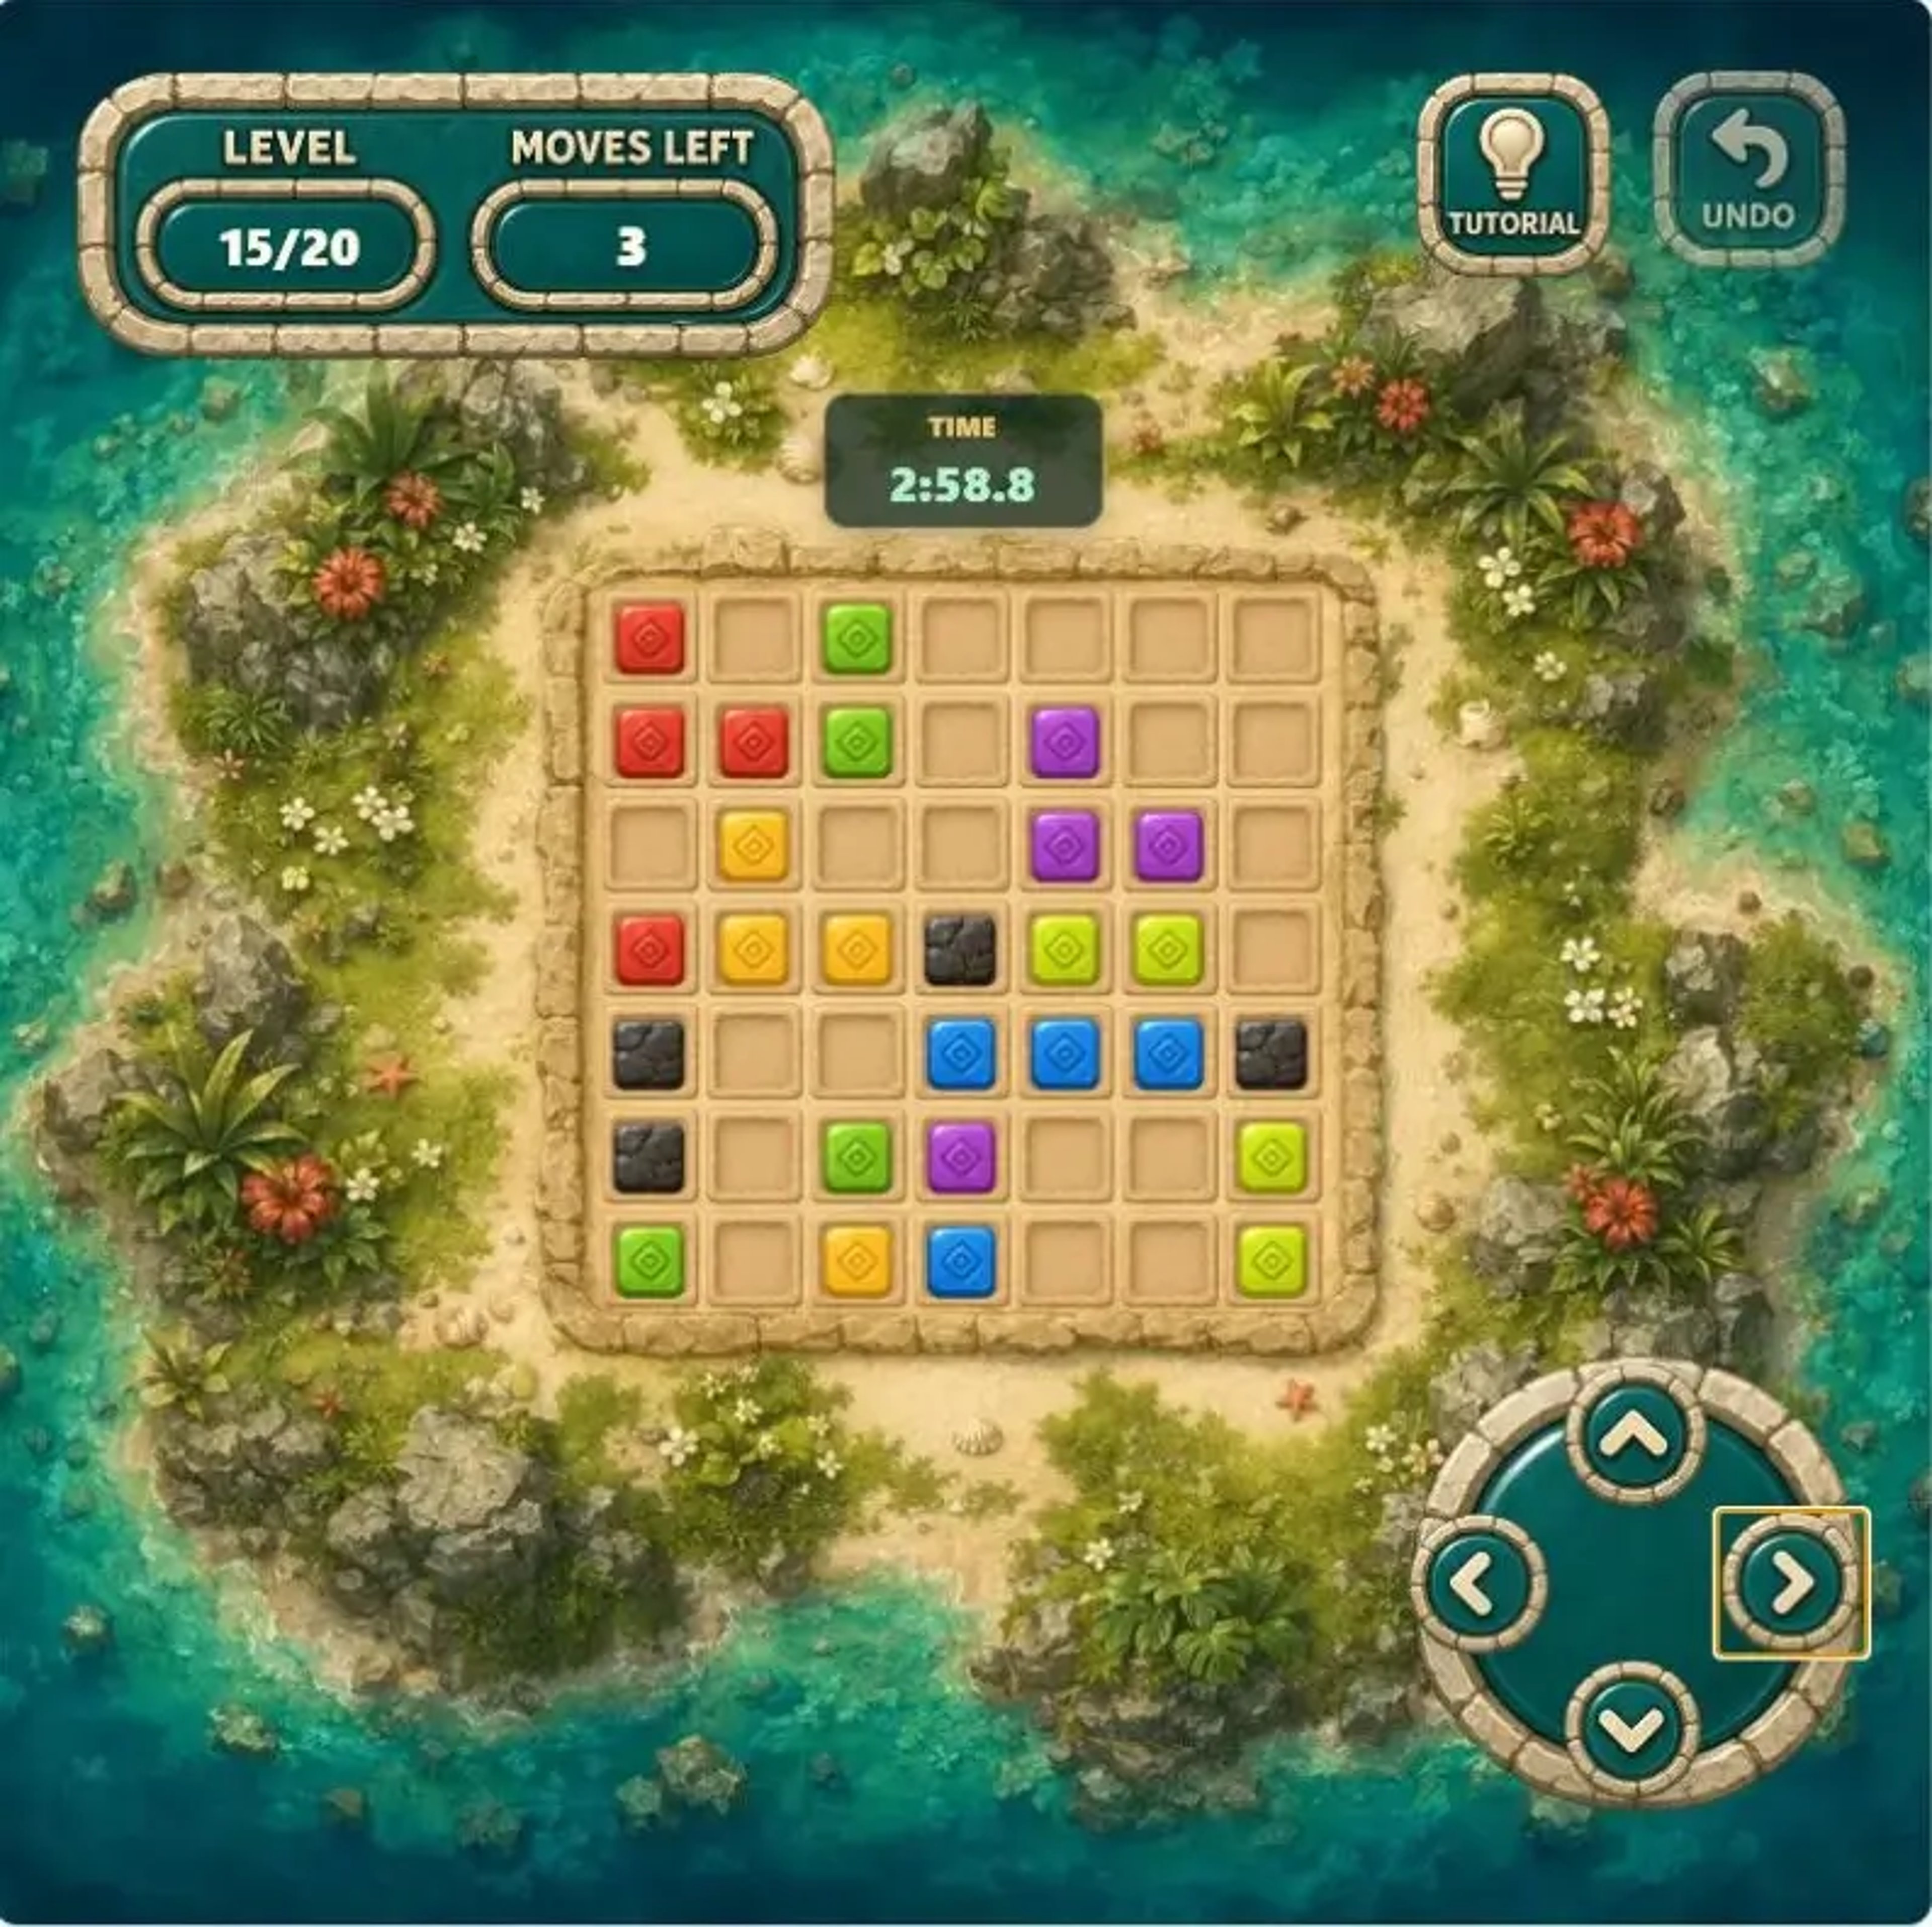
Example route↓ ↓ ← ↓ ↓ ↓
The final stage uses a 7×7 board, six colors, and four blockers. Scan all four edges and identify the one with the strongest concentration of matching tiles. Start there instead of chasing the most isolated color in the center. Central tiles usually become easier after other groups clear and release space.
Level 16: Keep Pushing While One Direction Helps
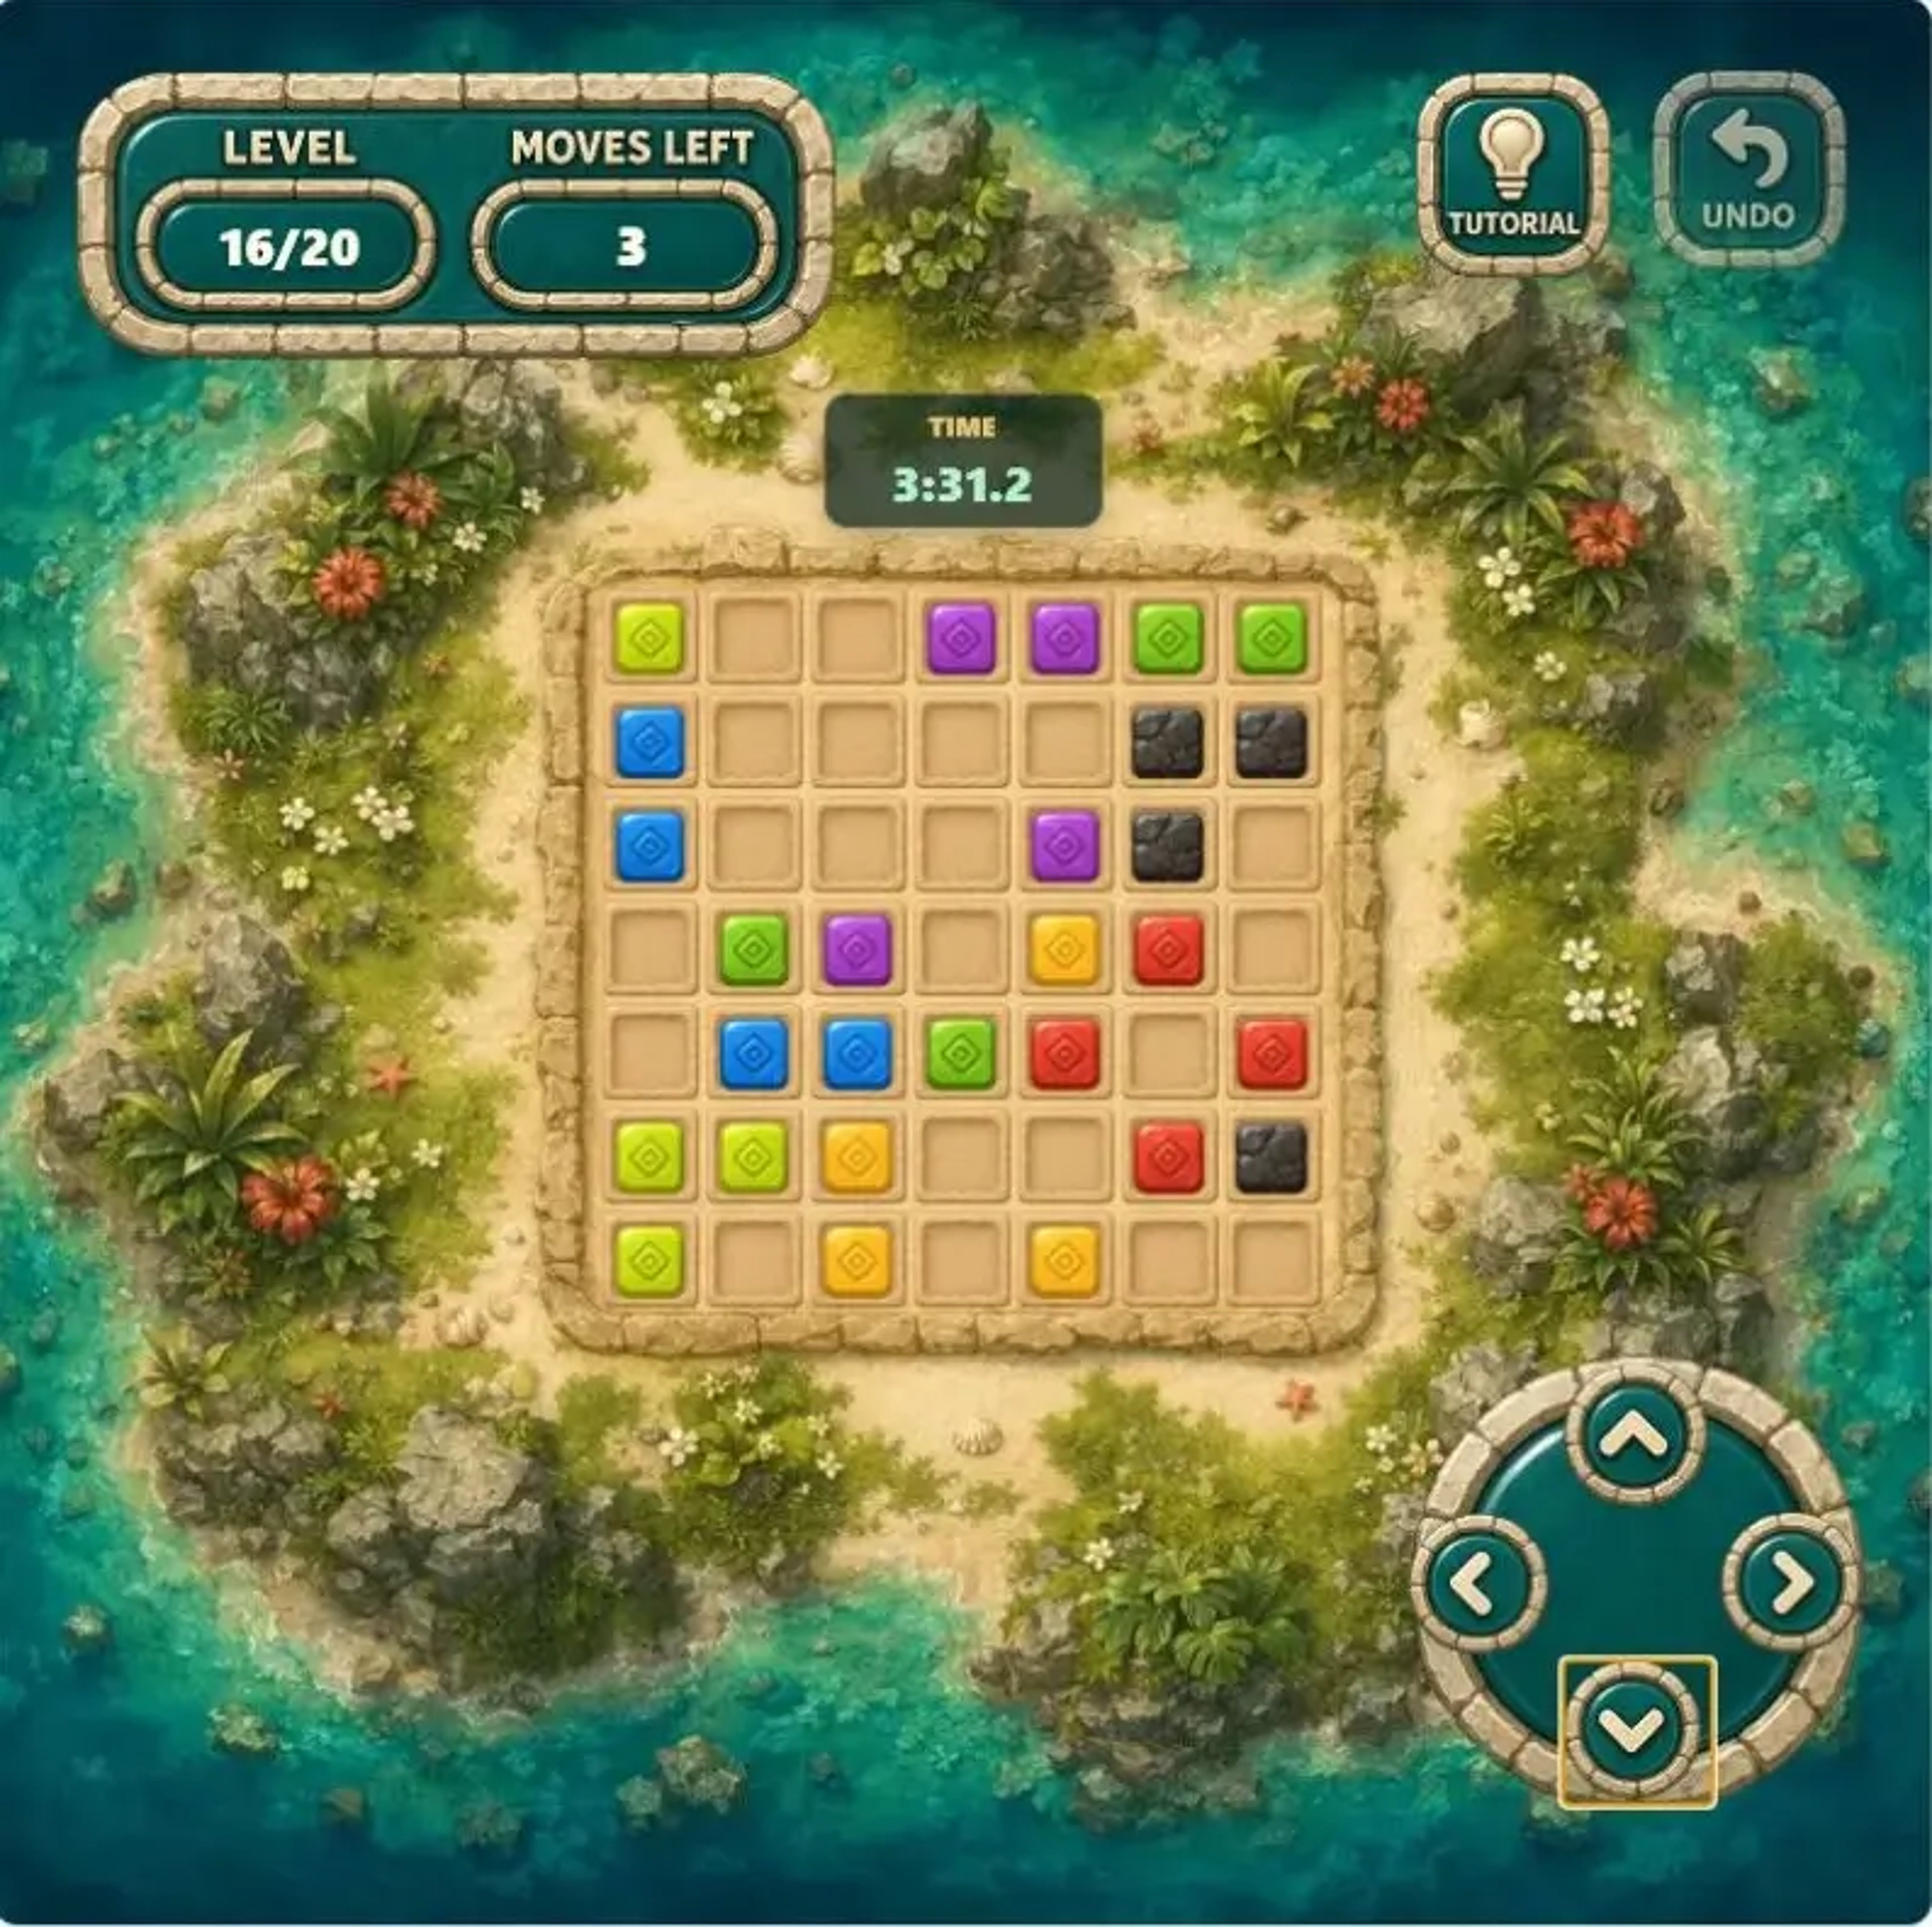
Example route↑ ↑ ↑ ↑ → →
A large board does not always require frequent turns. If one direction brings two or three colors closer together, repeated pushes are more reliable than constant adjustments. Because every cleared group restores a move, a productive long sequence can maintain the run's move count.
Level 17: Divide the Route Into Setup, Main Push, and Finish
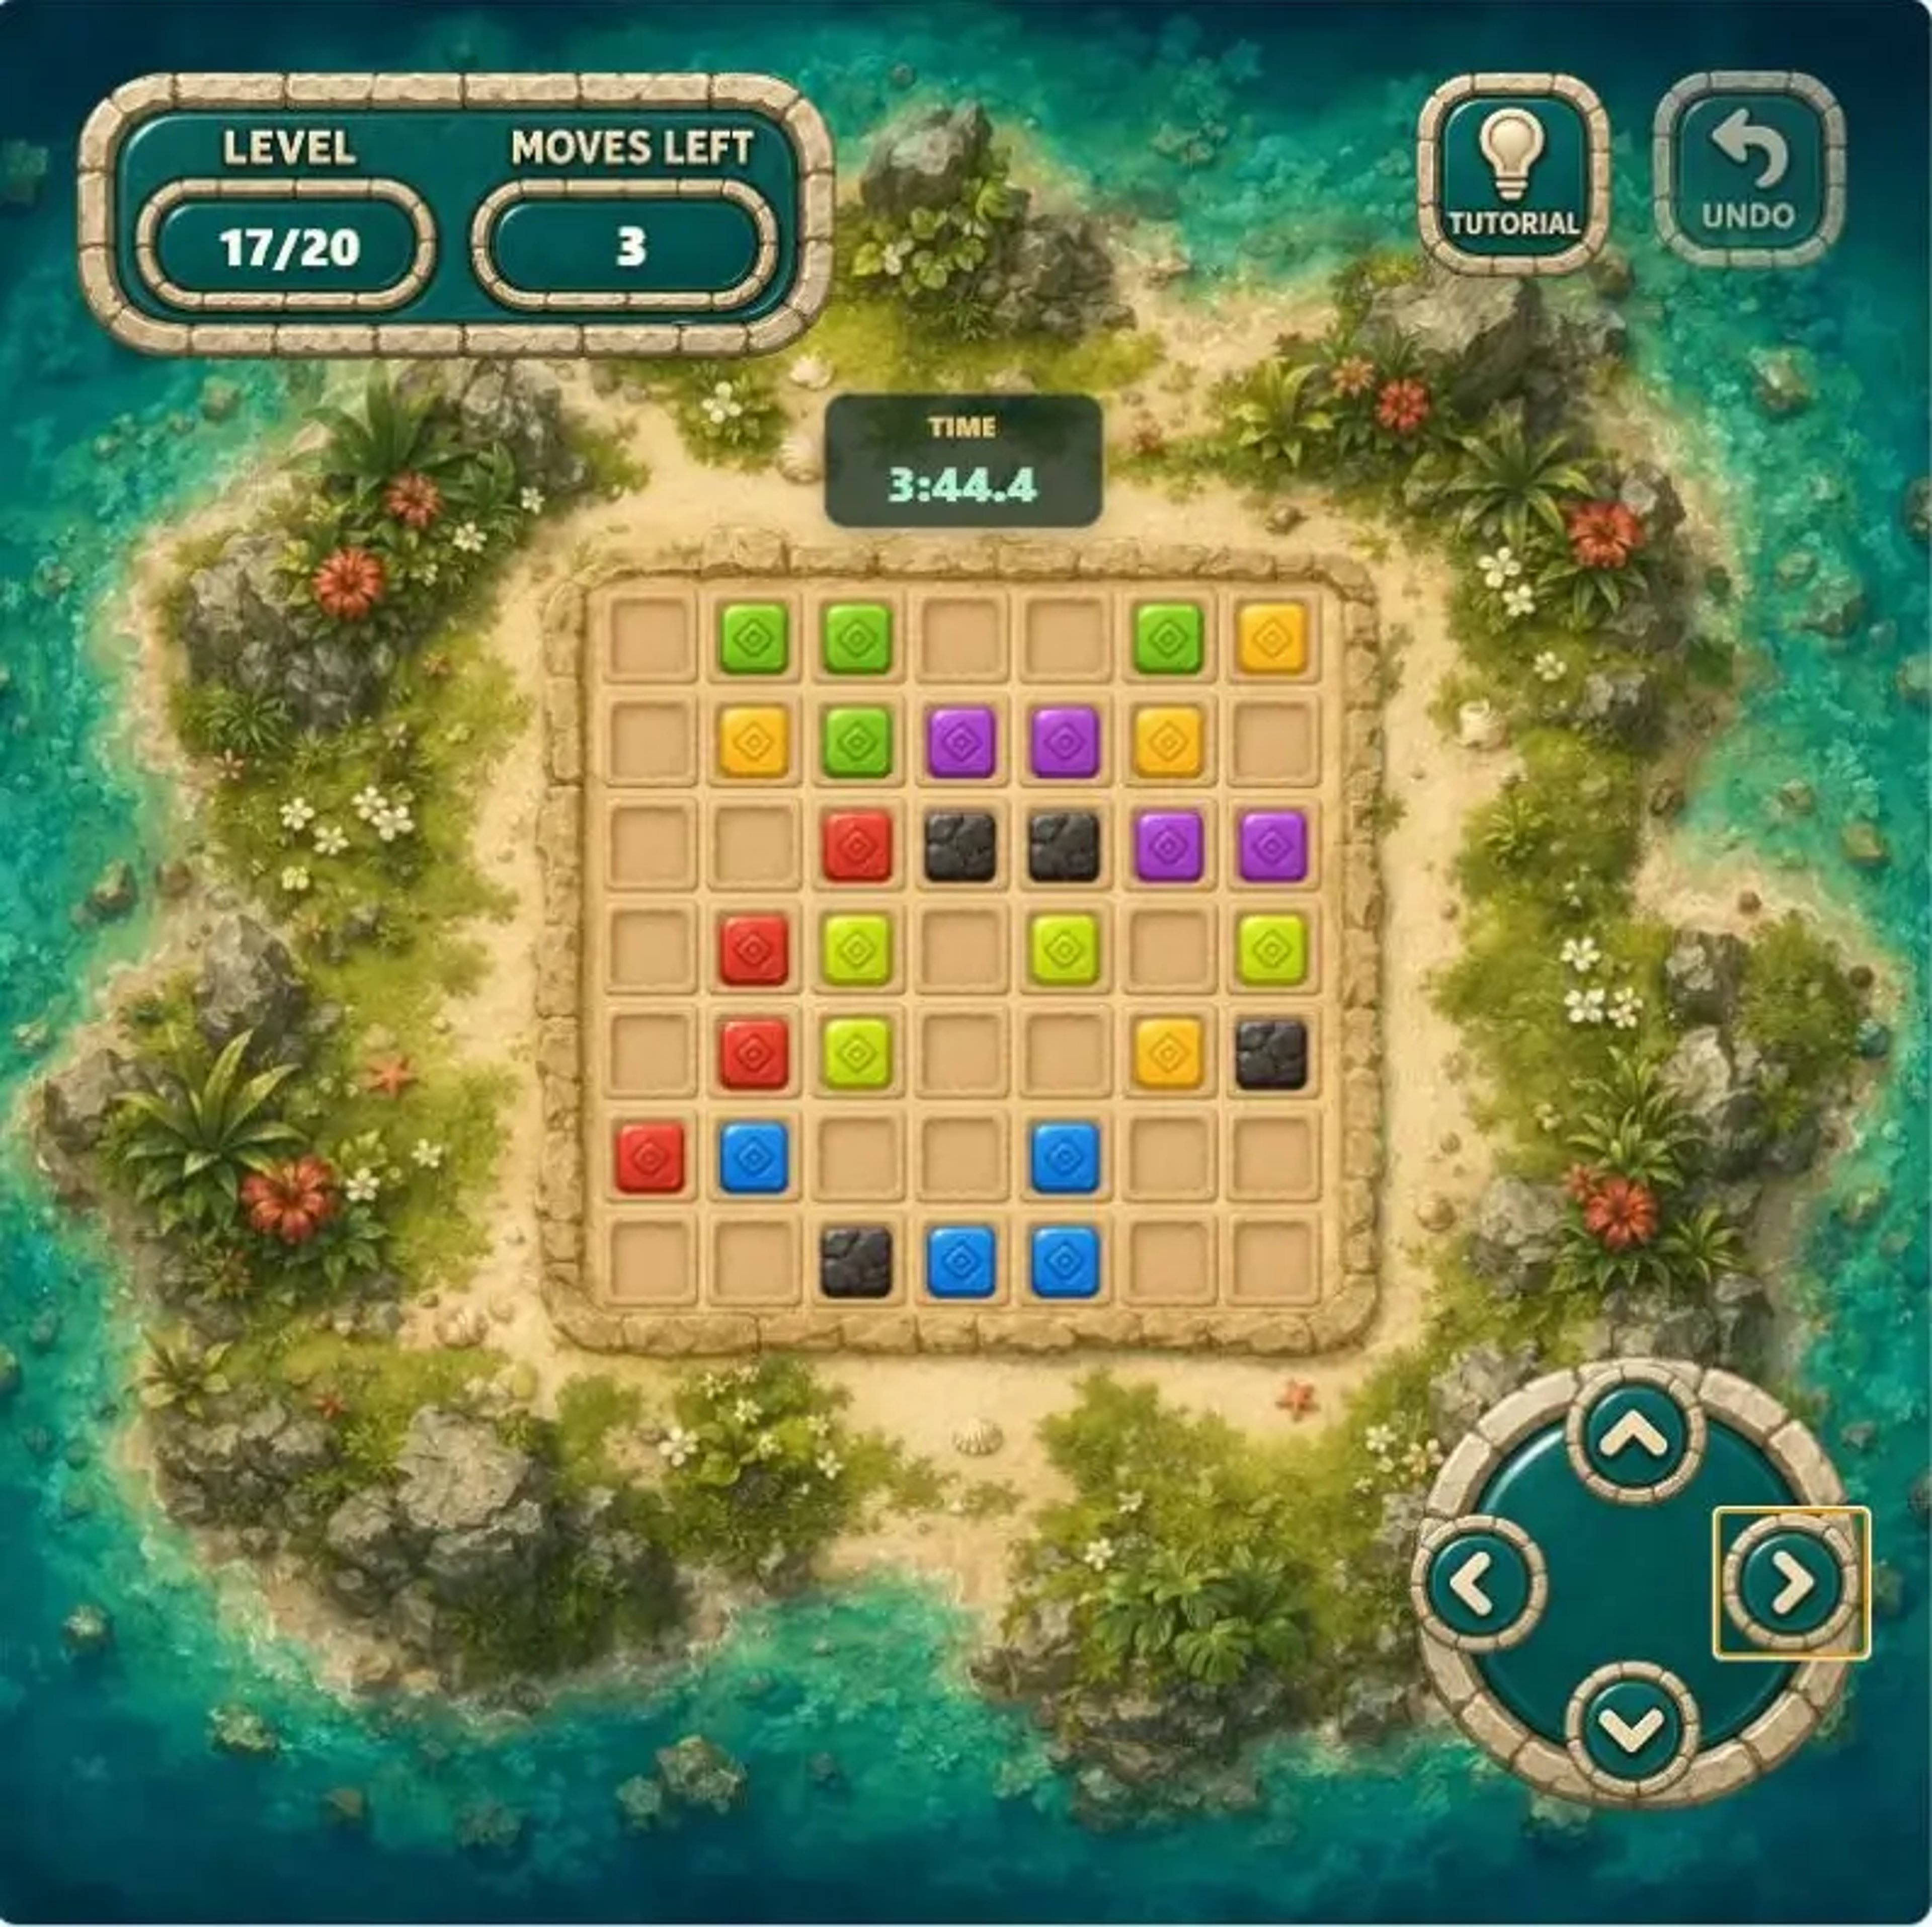
Example route→ ↑ → → → ↓
The first move opens horizontal space, the second corrects vertical alignment, the middle moves apply the main push, and the last vertical move finishes the remaining group. Use the same three-stage model on future complex boards. You do not need to see all six moves before making the first one.
Level 18: Turn Once, Then Return to the Main Route
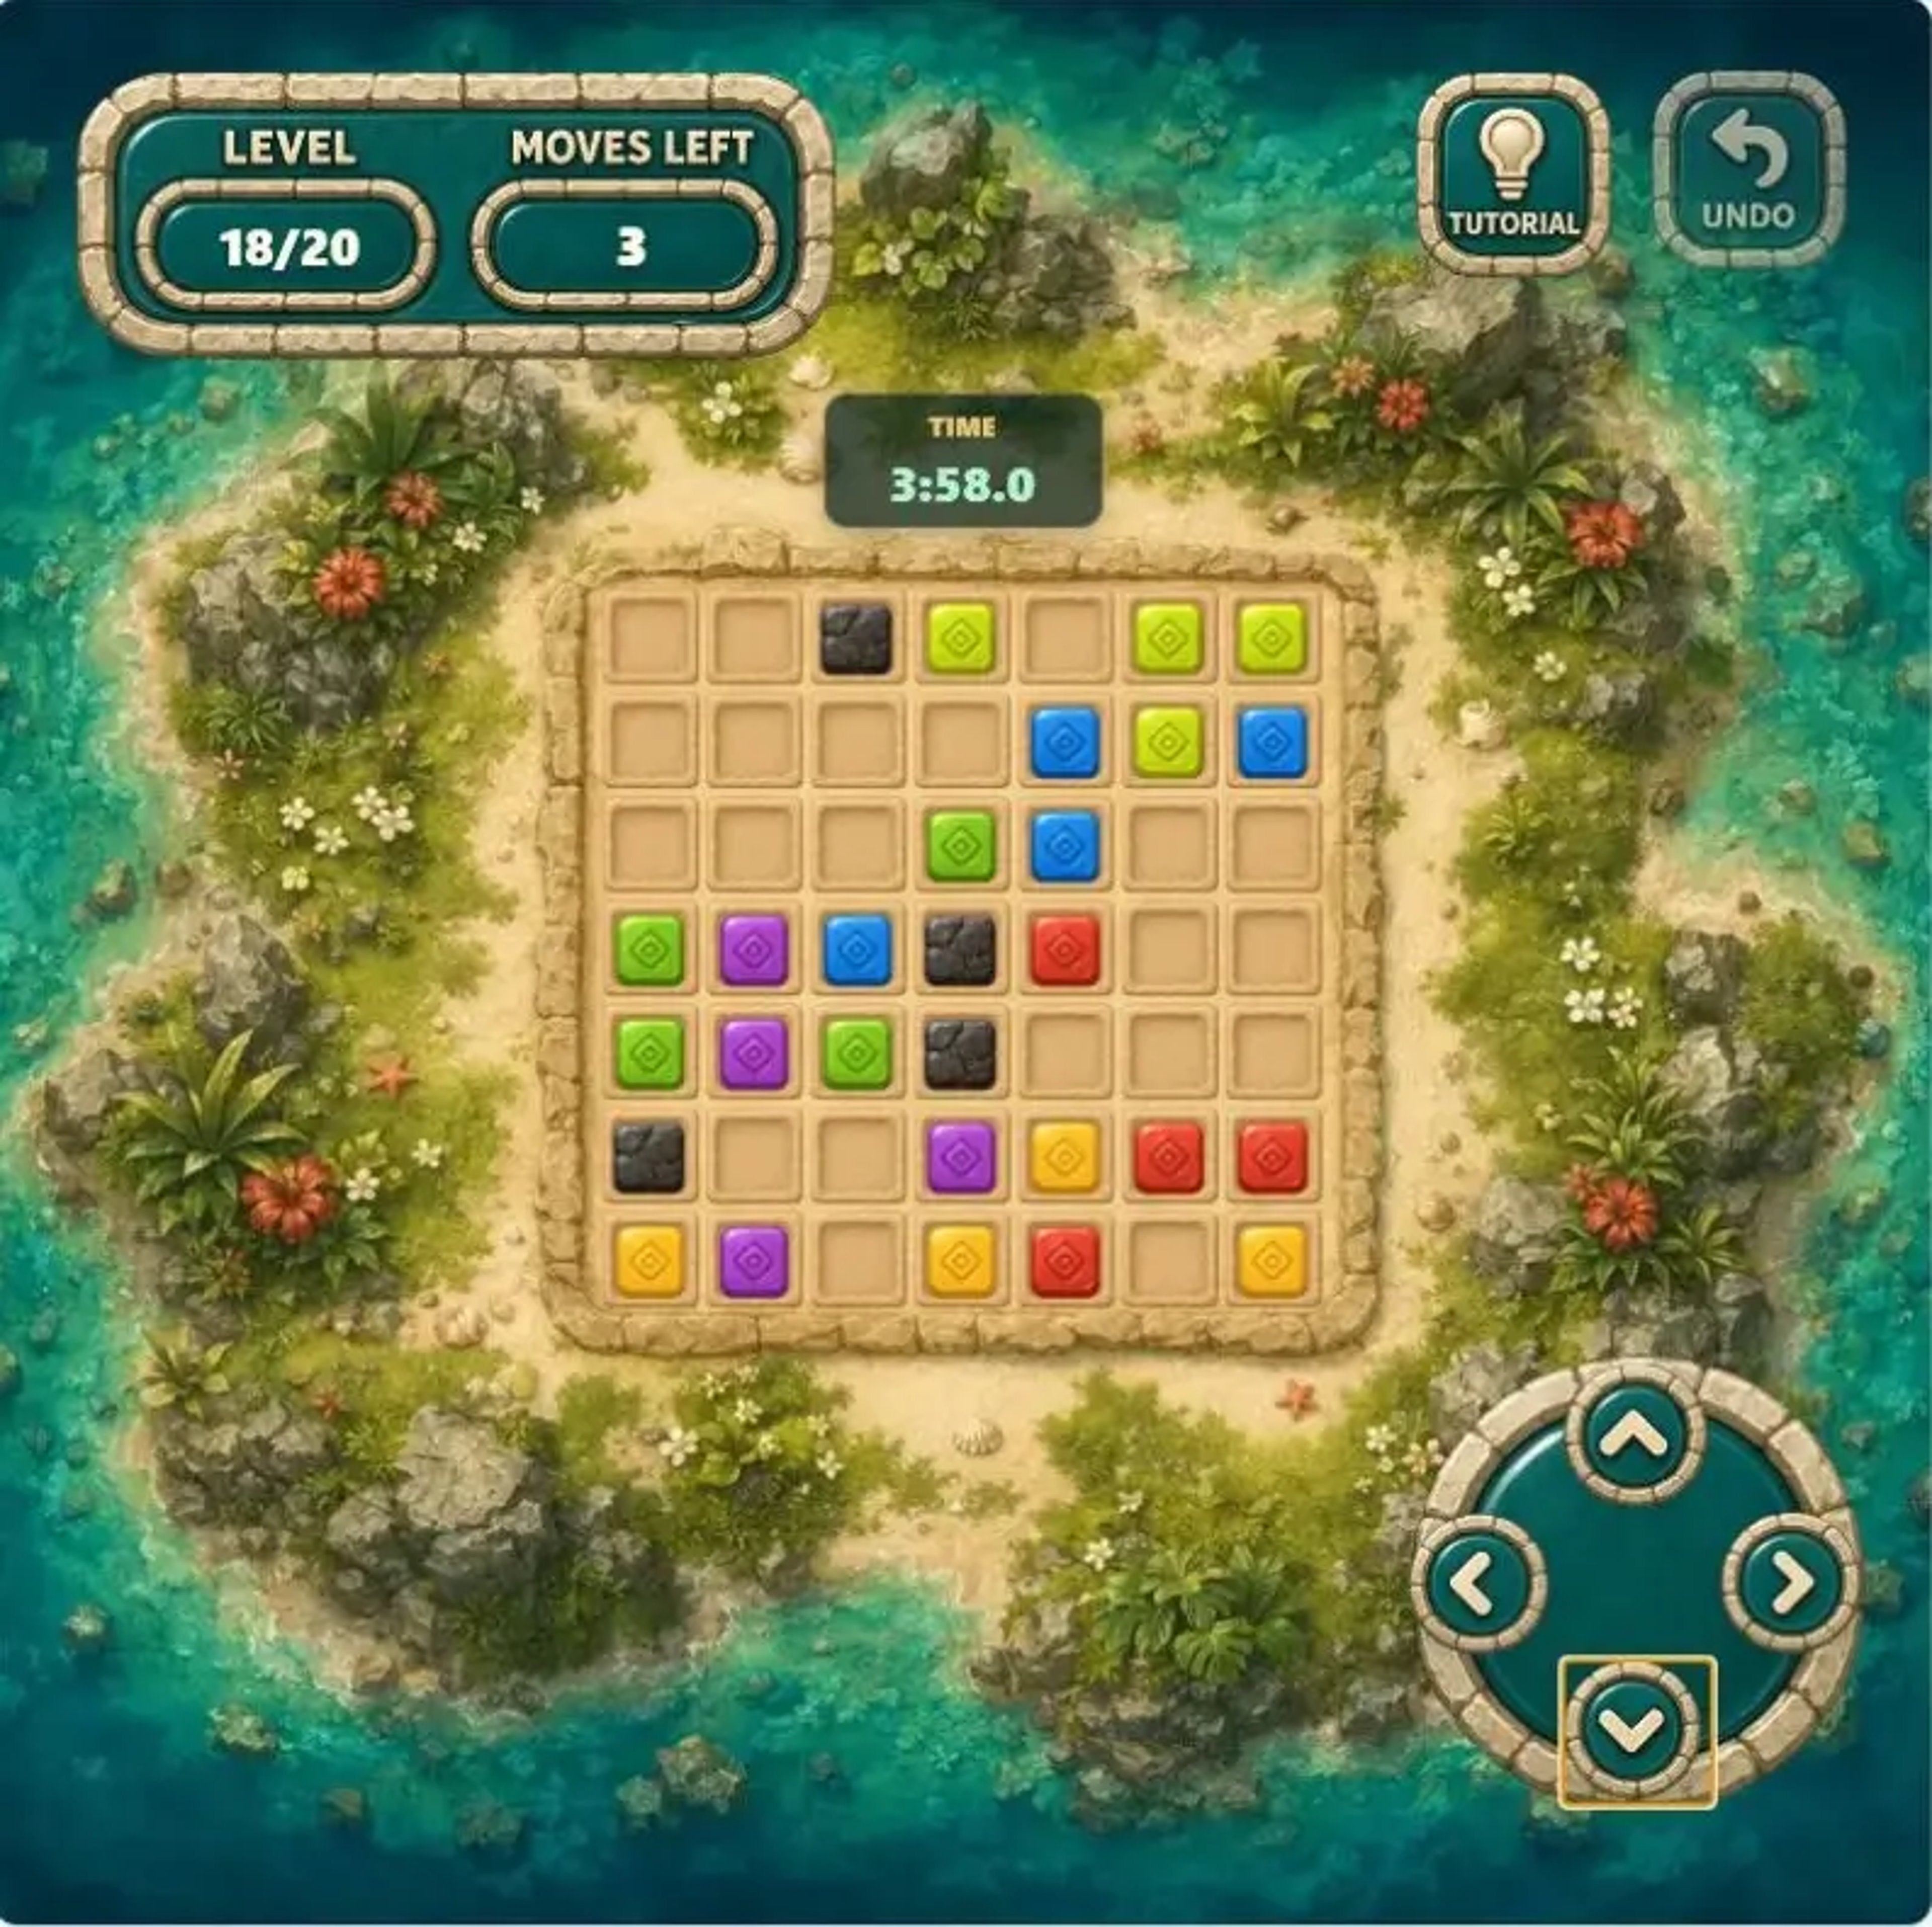
Example route← ← ↓ ← ← ←
A blocker can temporarily stop the main direction. One perpendicular push may move the tiles into a lane on the other side of that blocker, allowing the original route to continue. If the turn creates no new lane or better connection, use Undo instead of hoping another blind move will fix it.
Level 19: Clear Along Two Adjacent Edges
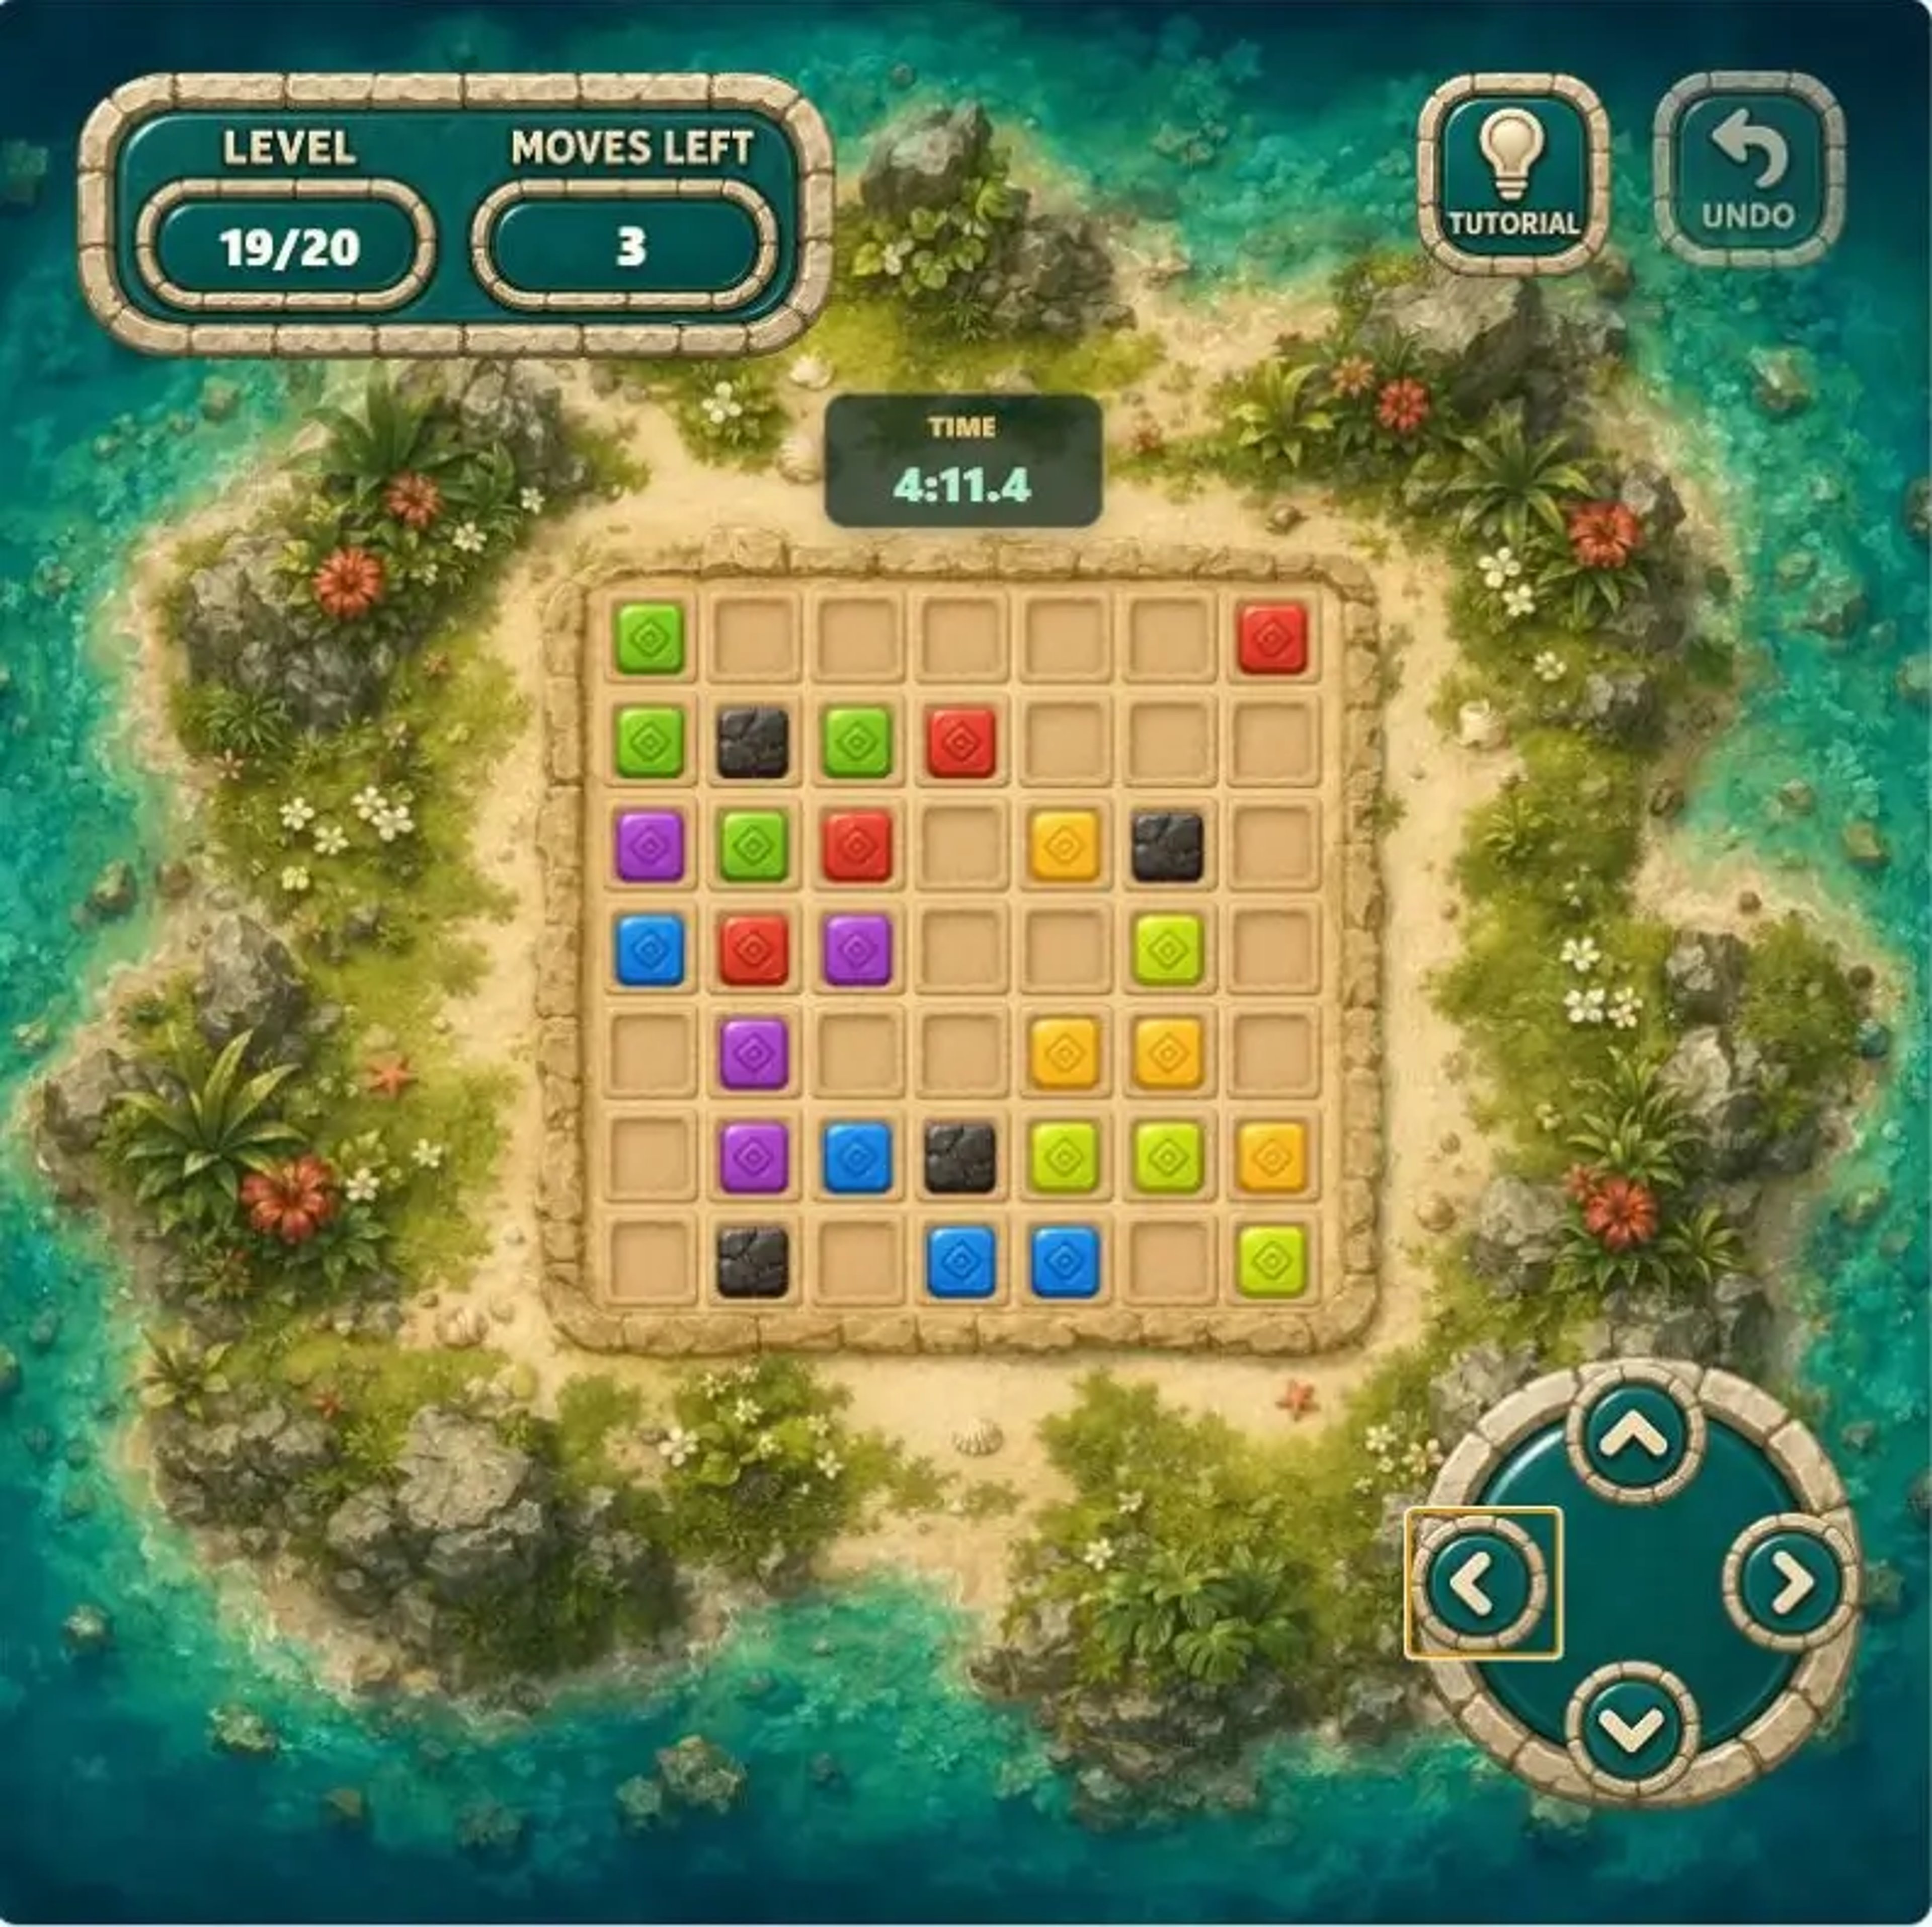
Example route↓ ↓ → → → →
Push toward one edge, then travel along the adjacent edge. This compresses a two-dimensional layout into one corner area. Choose a corner that is not sealed by blockers, and favor the side with more empty cells and longer available lanes.
Level 20: Finish With a Boundary Sweep
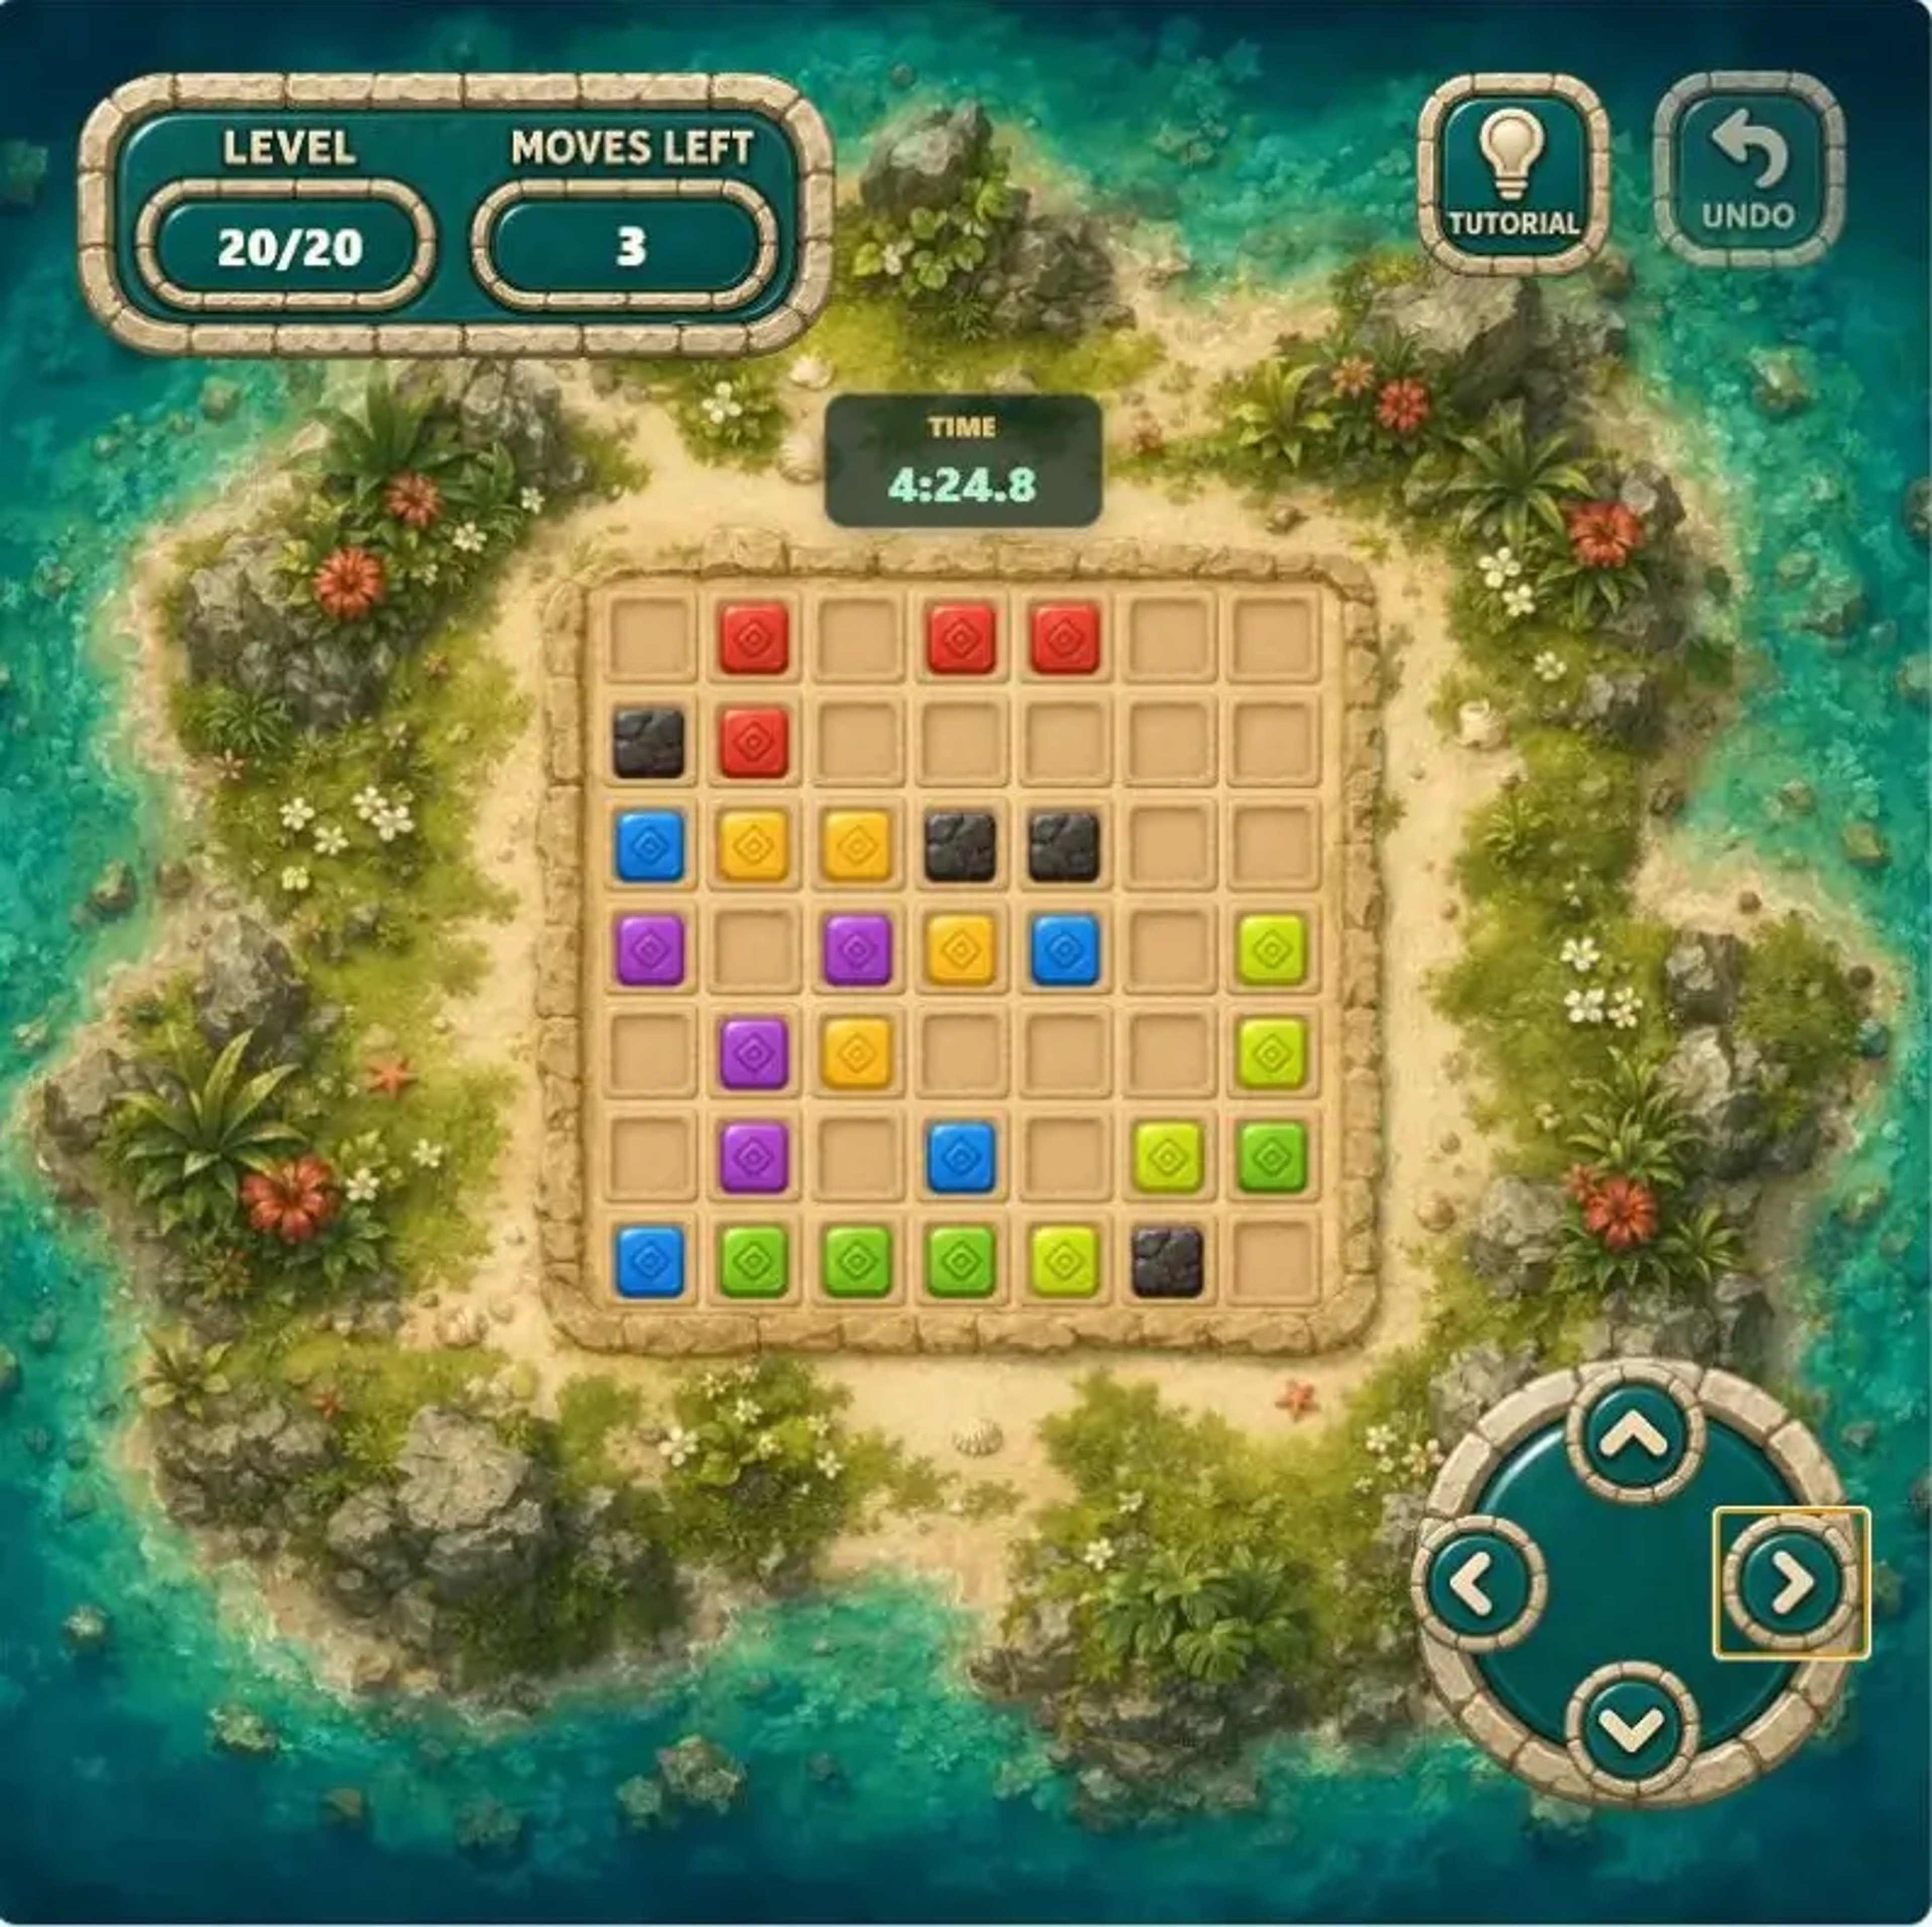
Example route← ← ← ↓ ↓ ↓
The final level introduces no new rule. Choose a horizontal boundary that benefits several colors, continue until the horizontal relationships are stable, then change to the vertical axis for the remaining groups. Wait for every clear animation to finish before pressing again; an extra input caused by rushing is the most avoidable final-level mistake.
Use this on any date
How to Solve Other Color Tiles Boards
The exact positions change, but the same decisions appear across daily boards and similar sliding color puzzles. Use this process instead of trying directions at random.
Start With the Easiest Group
Look for a color that already has two or three tiles connected or nearly aligned. Check whether one push can bring another matching tile into that group. Clearing the easiest color first creates empty cells and usually makes the rest of the board simpler.
Read Blockers as Lane Dividers
Stone blockers split a row or column into separate movement lanes. A tile stops when the next cell is occupied, while tiles elsewhere may still move. Use that difference to line up tiles that began in different rows or columns.
Compress Small Boards Toward an Edge
On 3×3 and 4×4 boards, an edge is often the easiest place to complete a group. Repeat a direction only while the target tiles are still getting closer; change axes when another push would leave the pattern unchanged or move the wrong color away.
Choose a Main Direction on Large Boards
On 6×6 and 7×7 boards, find the edge or long blocker lane that benefits several colors and use it as the main direction. A single perpendicular move can redistribute empty cells before you return to the main route.
Recalculate After Every Clear
A cleared group changes the movement options for every remaining tile. Wait for the animation, identify the new empty cells, and find the next color closest to a four-tile connection. Do not continue an old sequence automatically.
Protect the Move Count
Every real move costs one move, and every cleared color group restores one. When only one move remains, choose a direction likely to complete a group immediately. Keep the one-use Undo for a move that damages a promising setup.
Quick checklist
- Count blockers and identify the lanes they divide.
- Find the color closest to a four-tile group.
- Predict which tiles will move and which will stop.
- Favor a direction that helps more than one color.
- Recheck the board after every clear.
- Include the restored move in the plan.
- Use Undo when a real move breaks a useful structure.